With the global coronavirus pandemic raging on and the weather getting colder, I decided back at the end of September that it was time to build a home wall or a “woody” as they’re affectionately called.
My partner and I are both avid climbers but we unfortunately had to put our climbing gym membership on hold back in March when we went into lockdown. As the weather warmed up, we climbed outside all summer and didn’t think twice about the gym.
Now that it’s getting colder, I knew I would want to be able to train this winter but I also knew it was not likely I would be returning to the gym anytime soon. It was at this moment that I decided to follow in the path of many other climbers I had seen recently and assemble my home climbing wall.
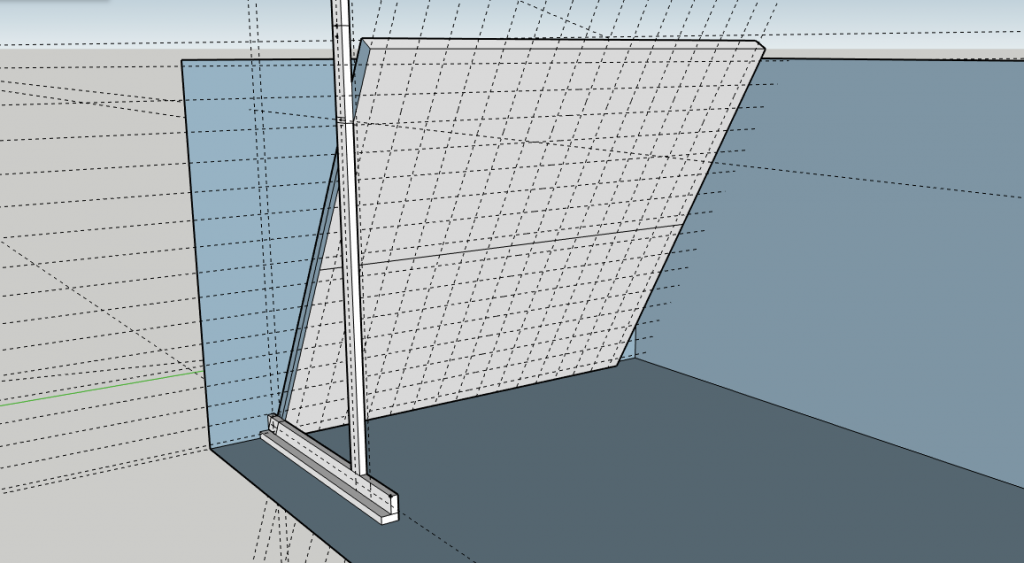
Just like with my bed for my Chevy Tahoe, this process started with once again whipping some preliminary designs up on SketchUp. You can see here my initial idea for the wall and the stands that would hold it. I only designed one just for sake of time.
Based on my research (and I did way too much of it) and the measurements of my garage space, I decided to build an 8 foot by 8 foot board. I also decided to tilt it at a 30 degree angle. I initially thought about doing 45 degrees but based on aforementioned research that seemed to be just a bit too aggressive.
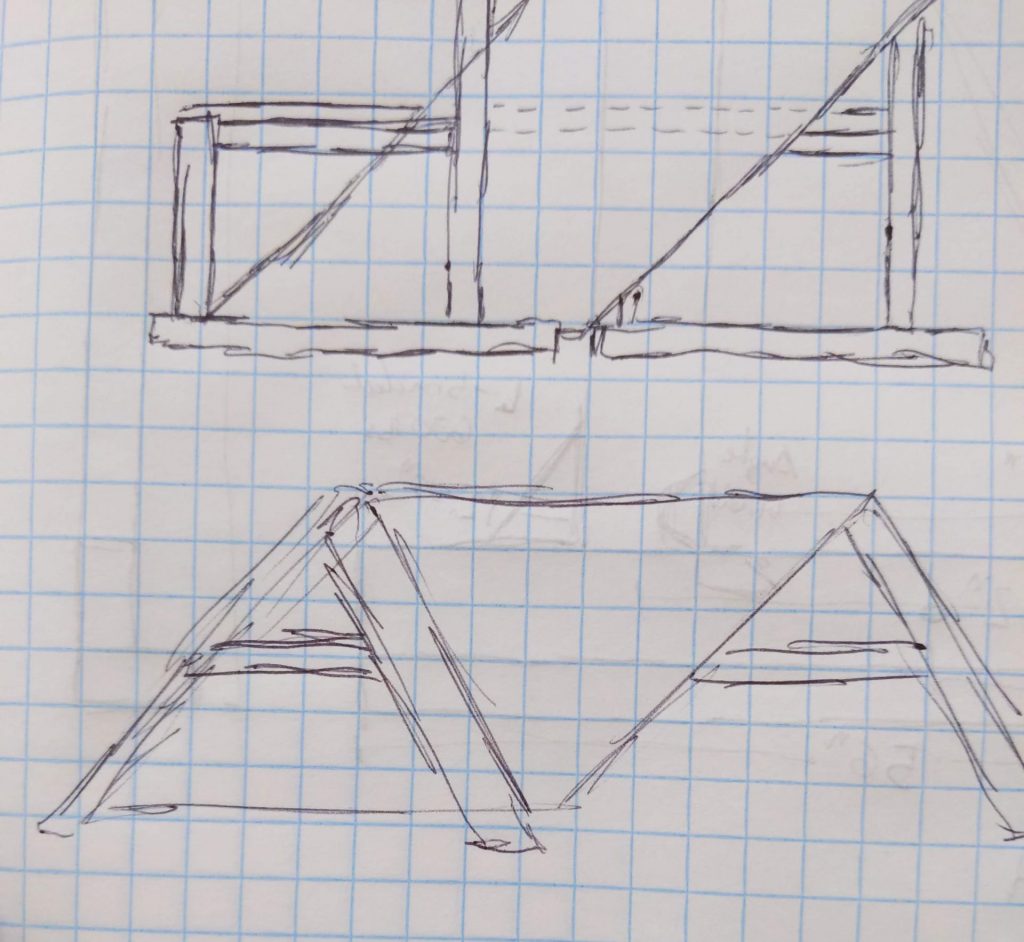
Considering how heavy this thing was sure to be, I was nervous about just building it and hoping for the best. I consulted with a good friend of mine who is a construction engineer and he suggested I build an A-frame instead of my original idea.
His reasoning was that an A-frame is one of the simplest but strongest structures you could make but it would also sit more level since there were just four points on the ground instead of three long sides.
I had to agree, he was definitely right so I quickly sketched a new design. An upside to this redesign is that I decided to make the wall adjustable too. In the photos above you can see I calculated the angles and lengths necessary to make the adjustments work.
With this, the wall would be able to sit at 15 degrees or 30 degrees depending on where I place just two bolts on each side.
Let The Construction Begin
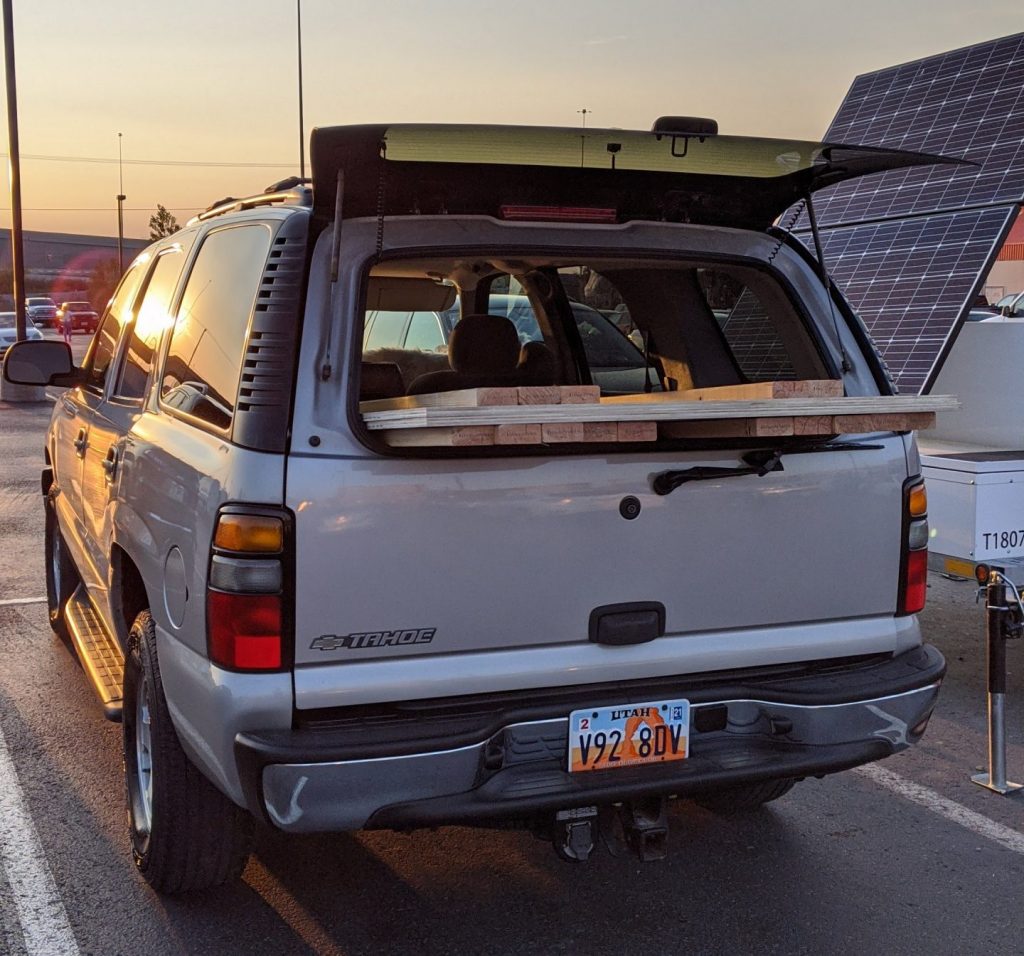
With the designs finalized and all of my materials and hardware calculated out, I hopped in my Tahoe and headed to my nearest Home Depot. I will list out everything I ended up needing for this project including the costs at the end of this article but it worked out to about $250.
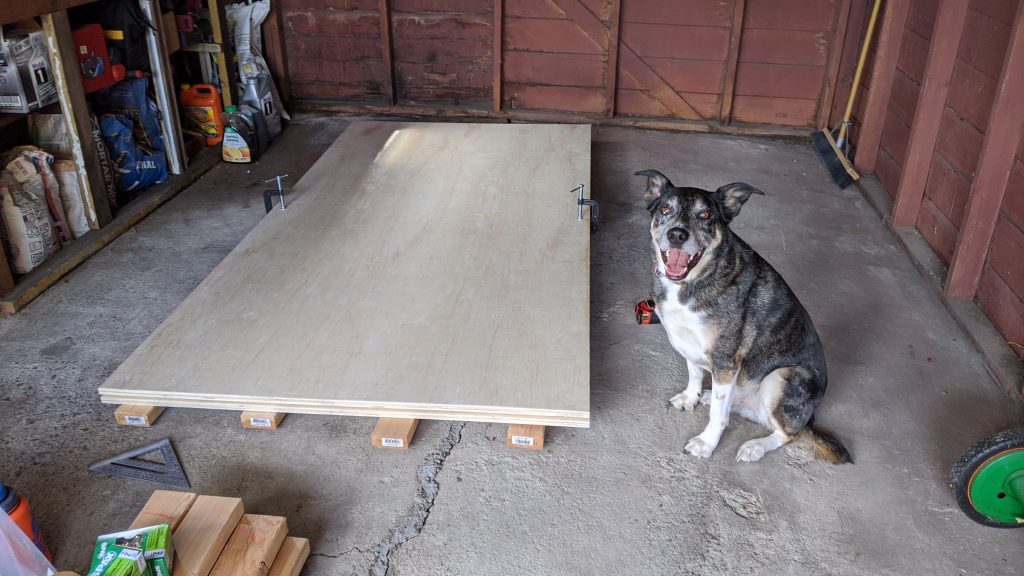
Really the most expensive part of building a climbing wall is the actual wall itself and by that I mean the plywood. I had read that some people were able to get away with cheaper and thinner 1/2 inch plywood but I opted to spend the extra dough on this really strong, 3/4 inch sheeting that was about $50 per sheet after tax.
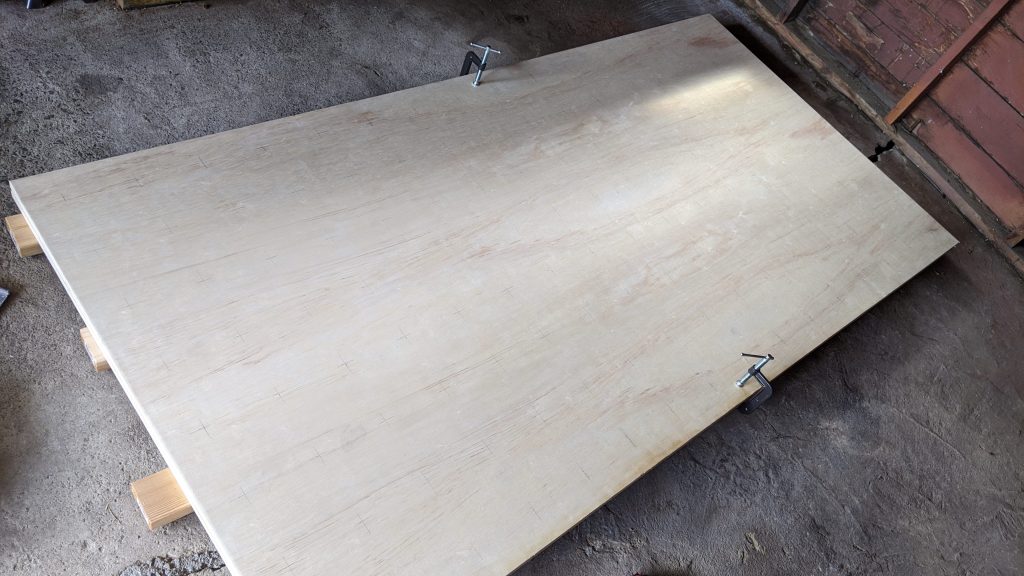
Once I had all of the sheets I was planning to use, I clamped them together and measured out a grid for my t-nuts. Using a combination of a speed square and a yard stick, I measured out a 16×16 grid with each line being 6 inches apart except for the edges which were 3 inches in from the edge of the wood. This will work out to 256 total holes where I can mount climbing holds.
I should also mention, these measurements were derived from the Moon board and modified a tiny bit so I could maximize how many holds I would be able to fit in the space. It’s a bit hard to make out in the picture above but all of the lines are drawn on and I’m ready to start drilling holes at the intersections.

Drilling holes! The process is better with a friend. T-nuts all installed!
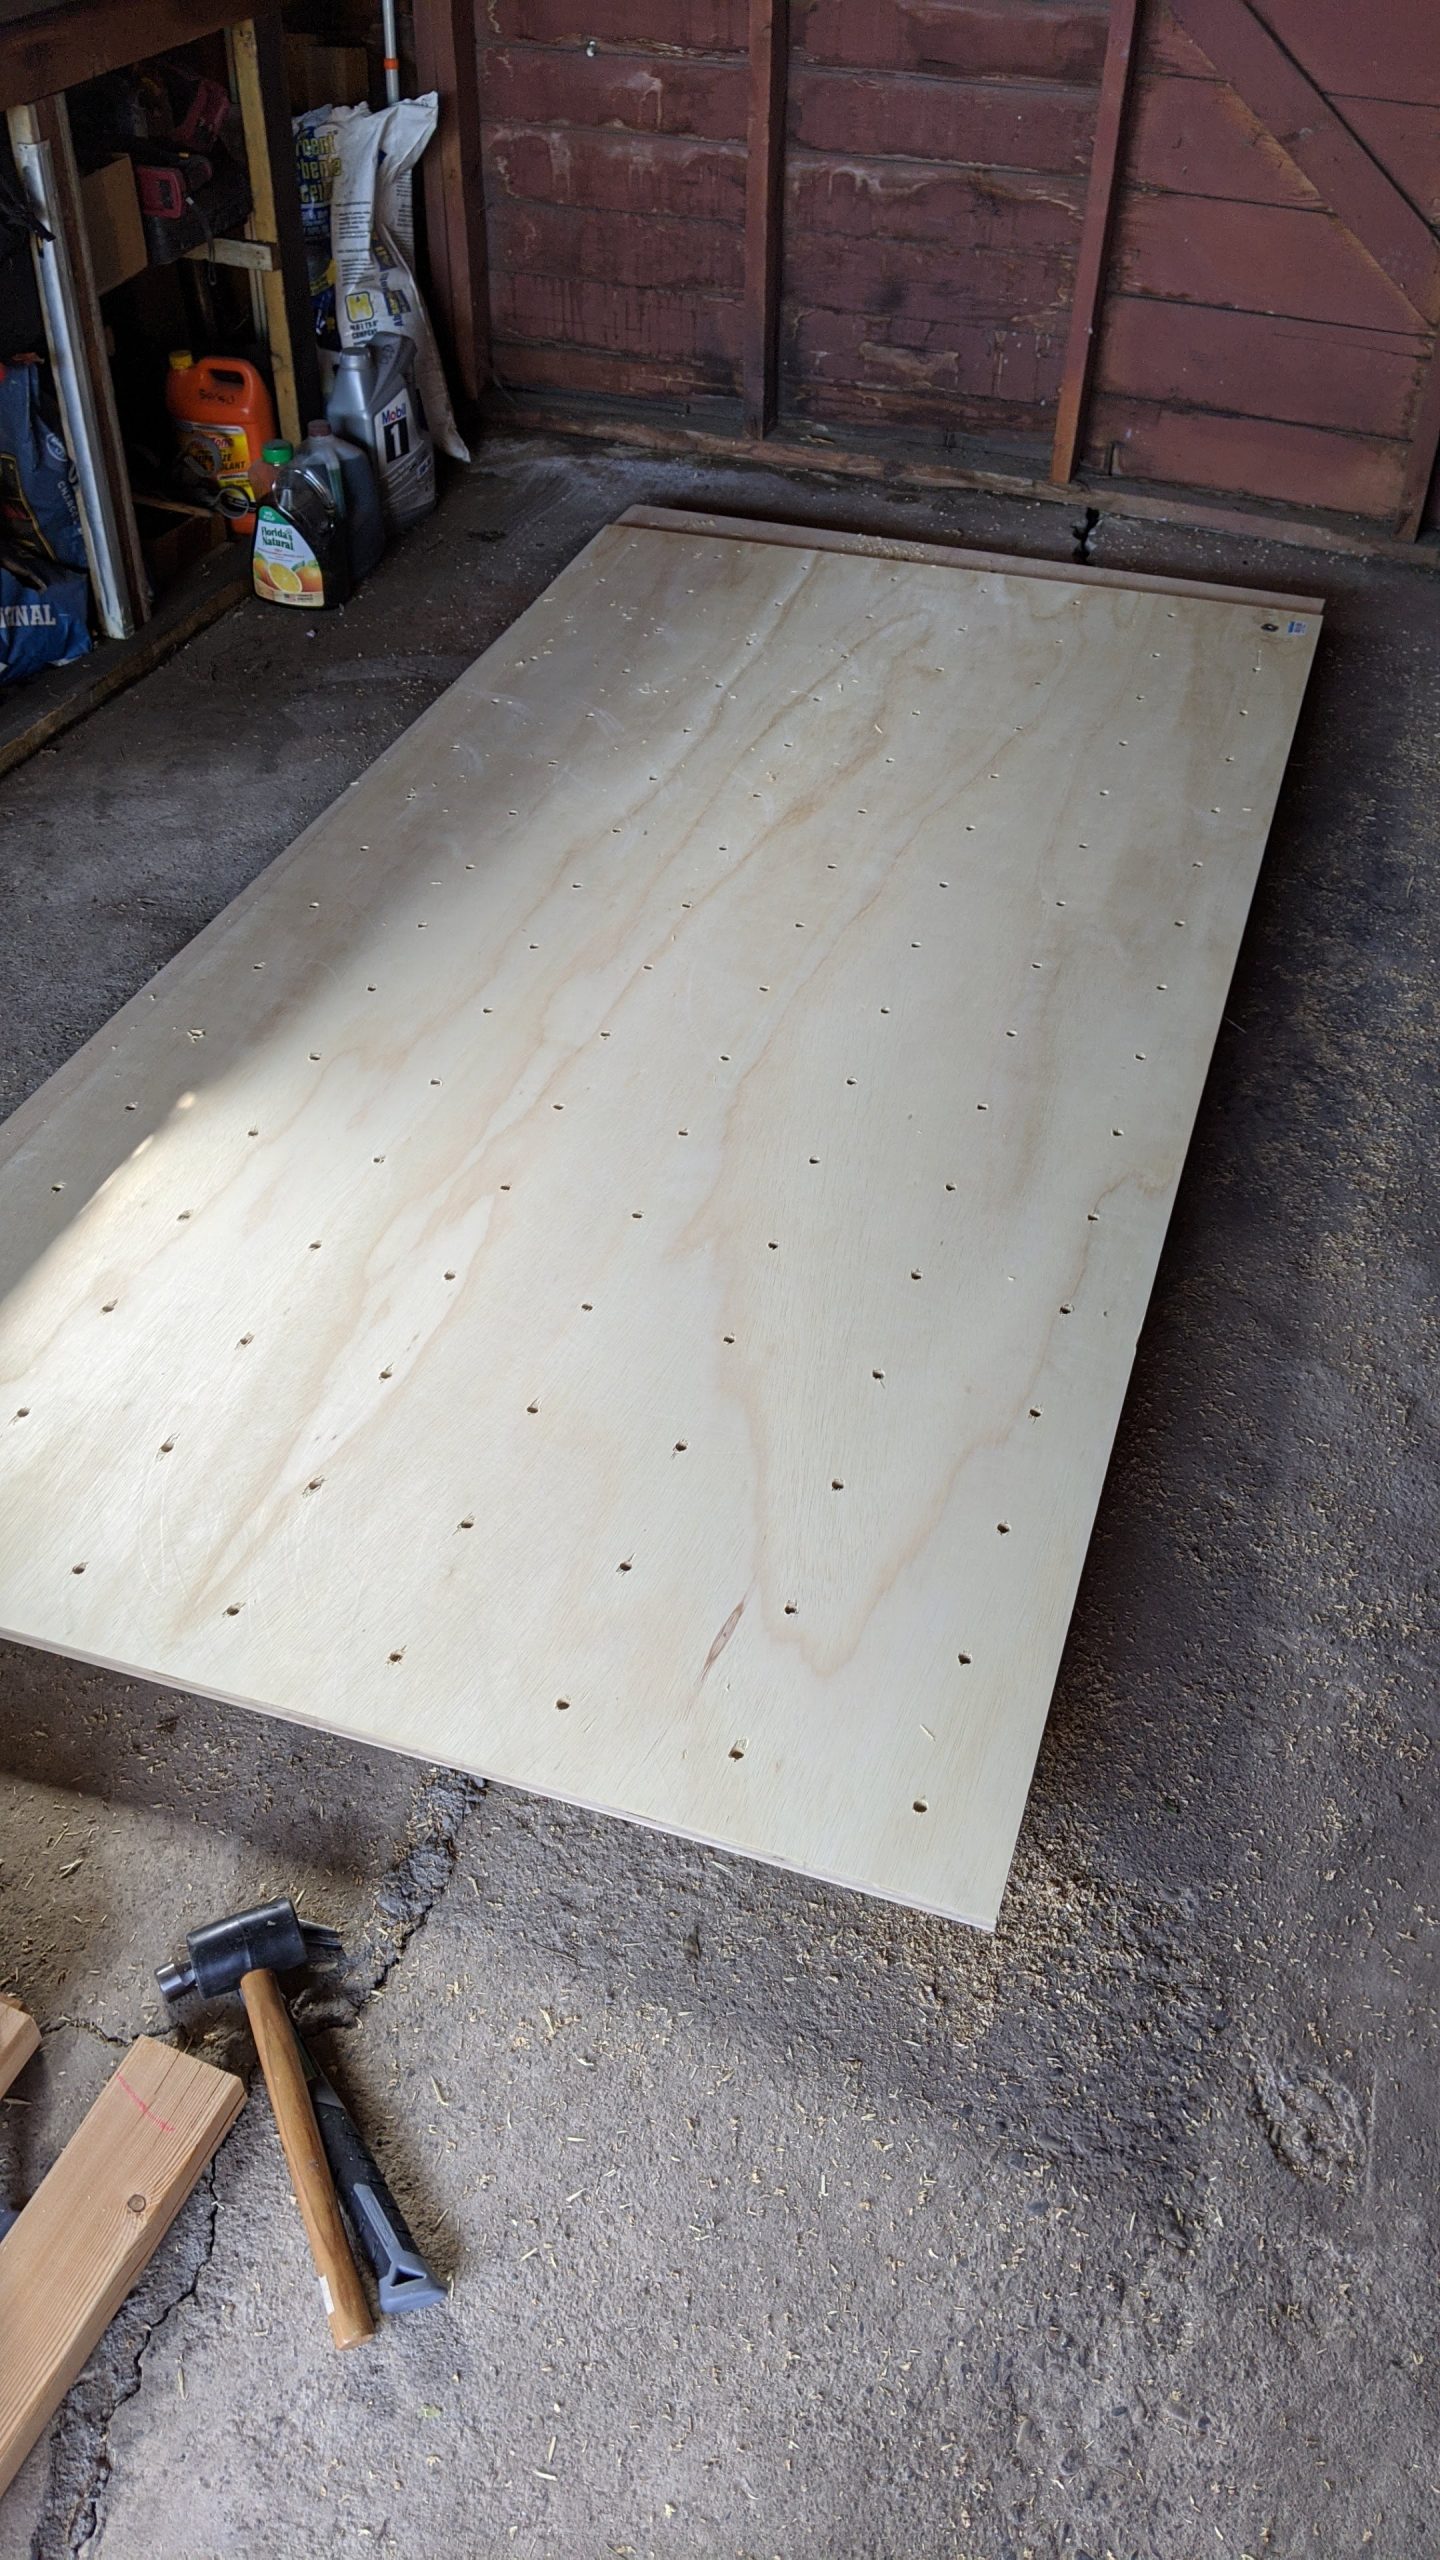
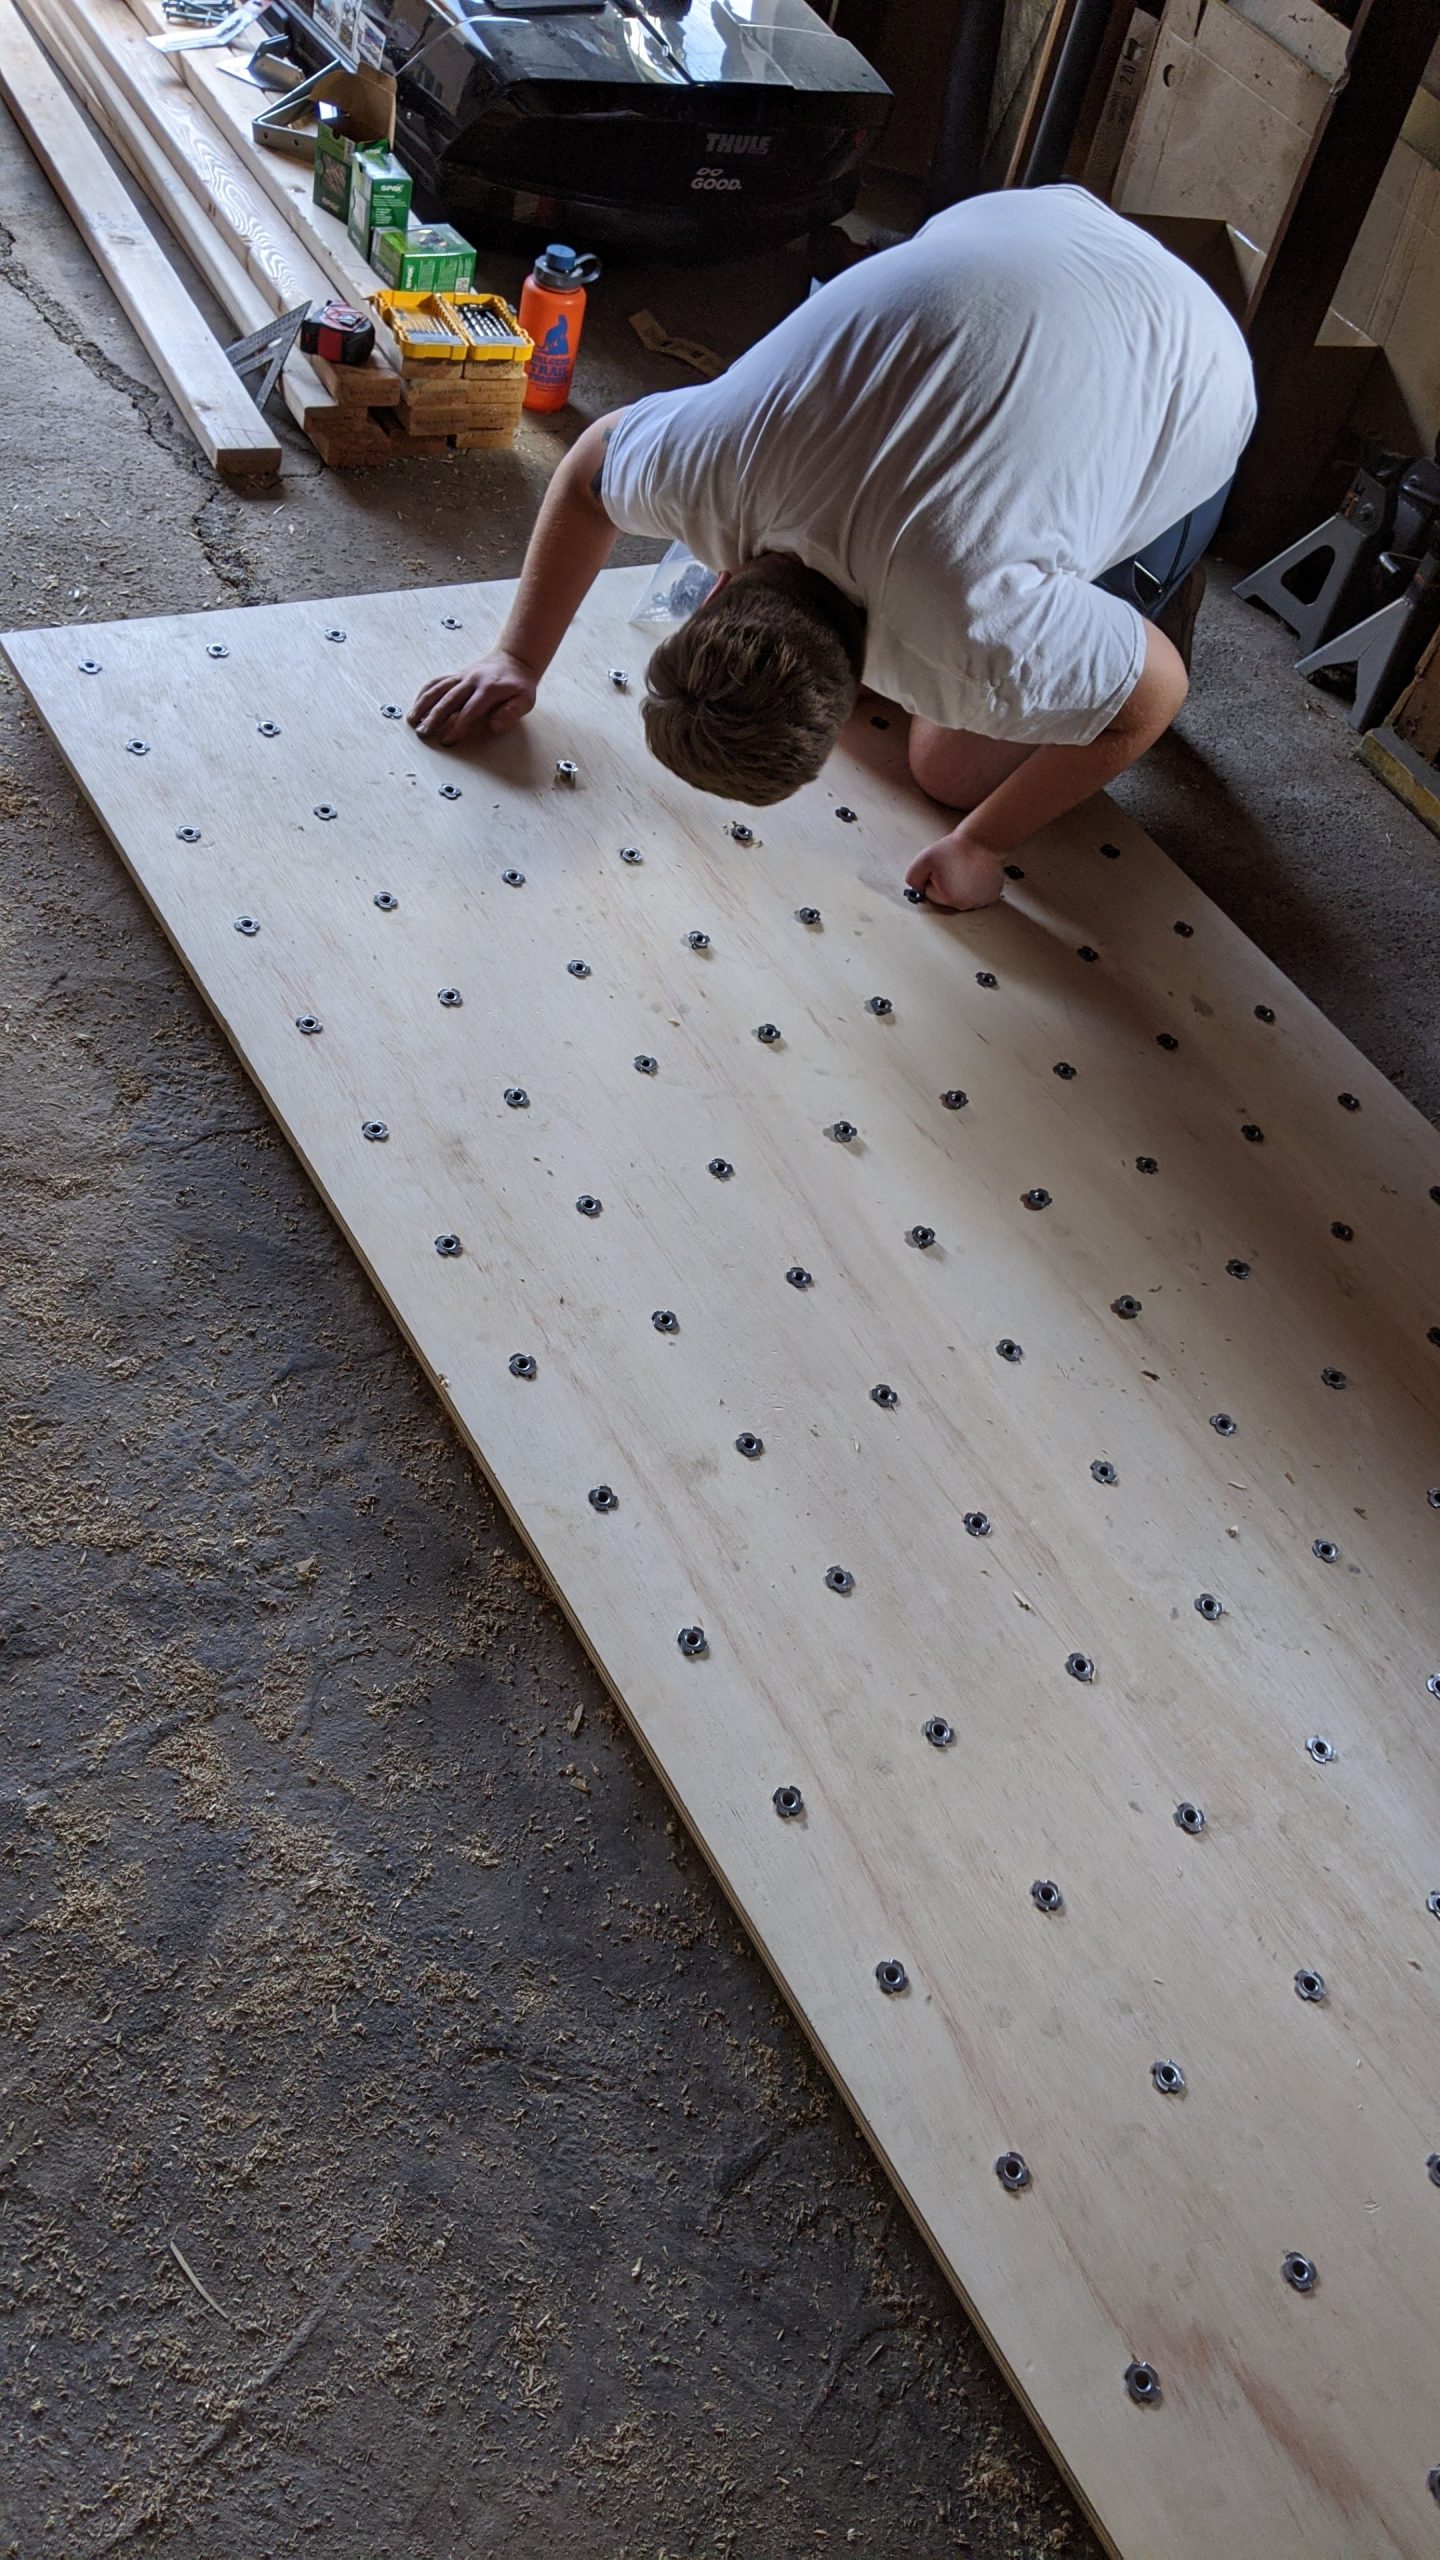
I had no idea that this step is what would end up taking the longest and being the most work. Having the boards clamped together while drilling the holes definitely helps to speed things along and keep things accurate. For the holes I used a 7/16 inch spade bit and regular cordless drill.
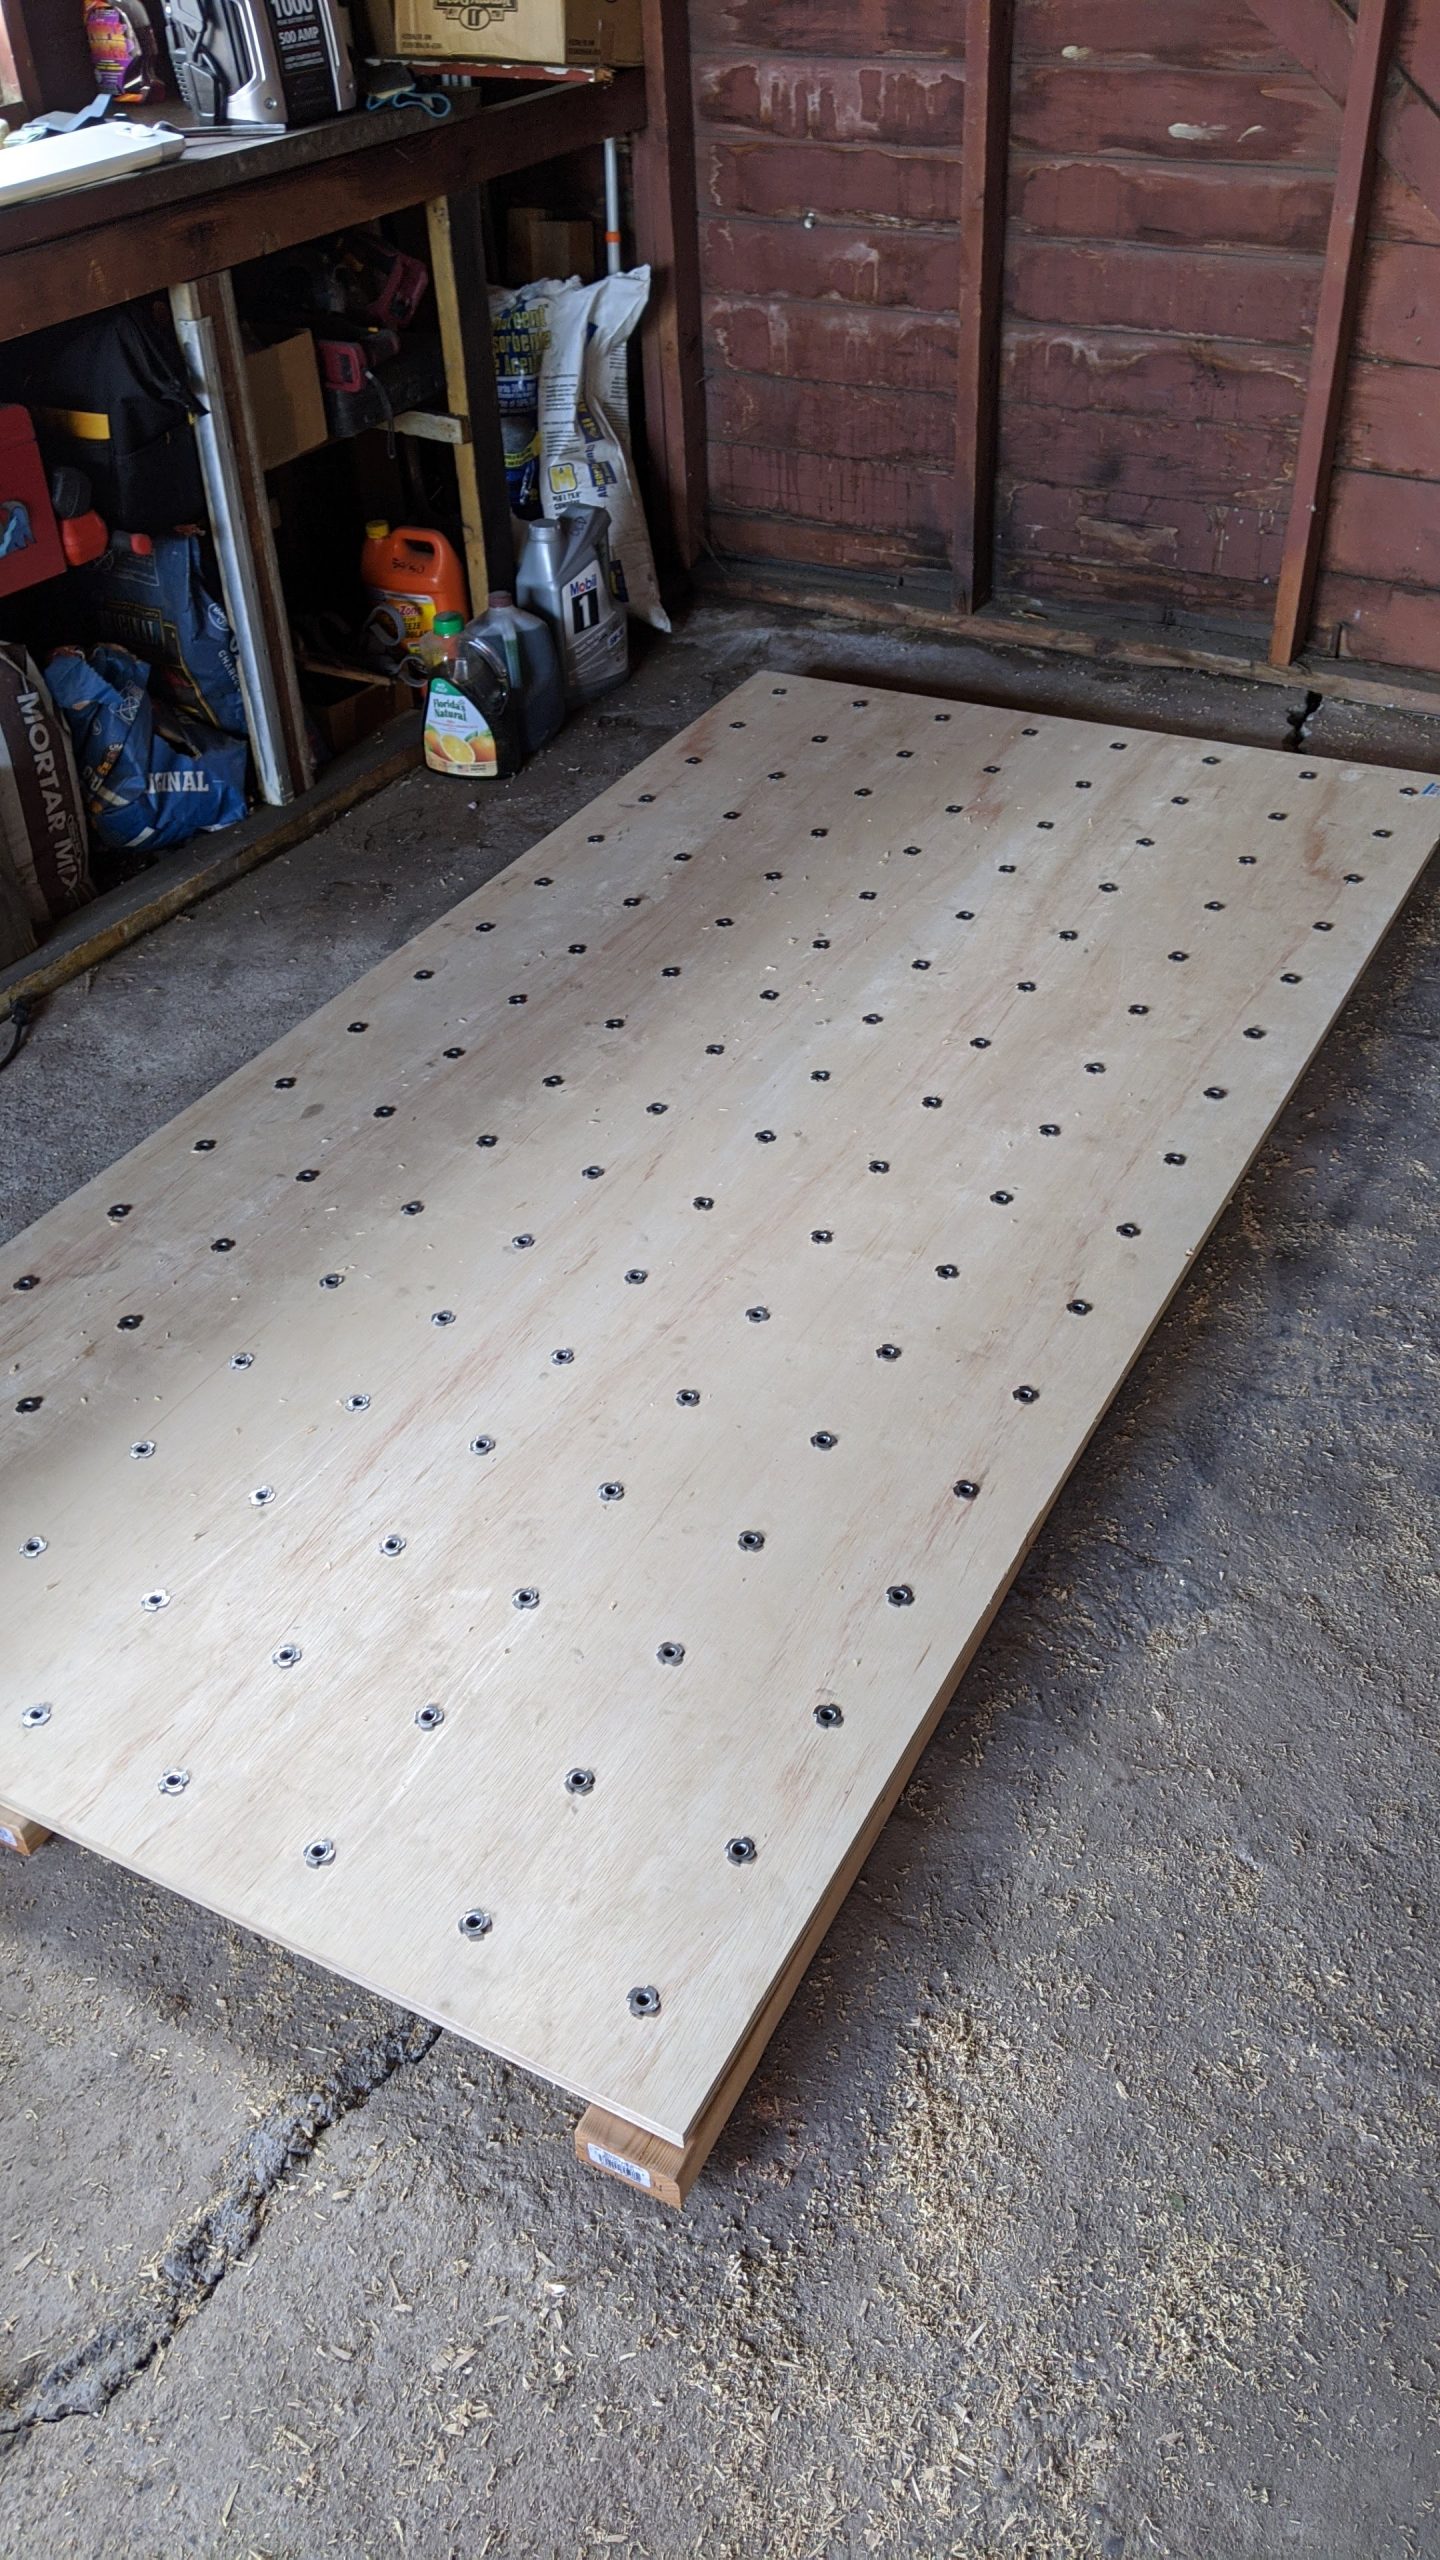
Once the holes were drilled, I separated the boards and began hammering in the t-nuts. The t-nuts are stainless steel 3/4 inch nuts that I got from a local place called Habit Climbing. They were super helpful during this process so if you’re in the Salt Lake area, I would encourage you to hit them up!
As I mentioned, this step took forever! My friend Adam and I hammered t-nuts for hours. I wasn’t sure if I was going to be able to climb this thing when it was finished because I was so sore from hammering these damn t-nuts!
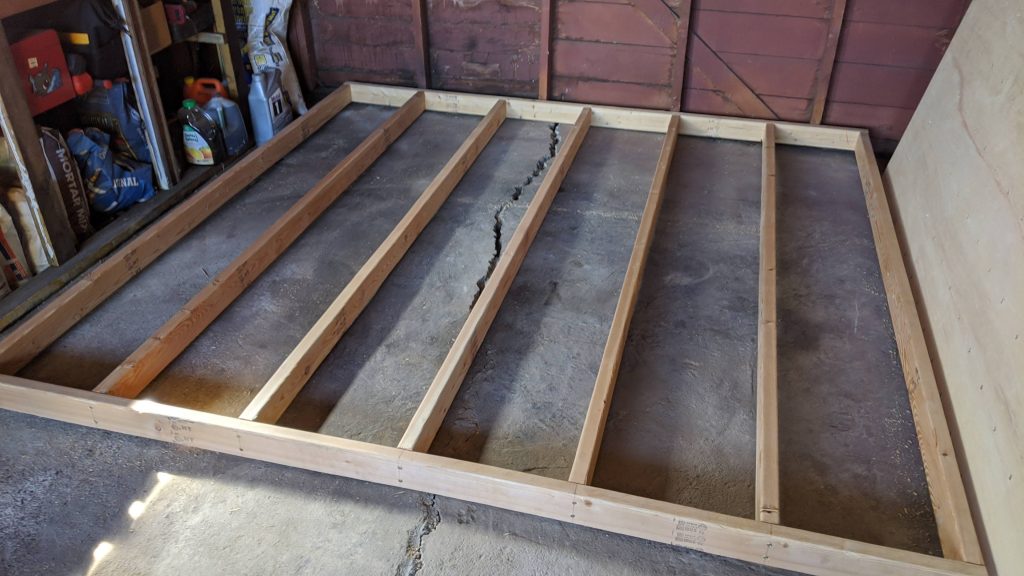
Here we have the skeleton of the wall. For this, I just built a standard 16 inch on center wall out of 2×4 studs like you would find in most modern homes. To connect everything together, I used 3 inch self drilling decking screws and predrilled the holes to ensure a snug fit.
I read a lot of information that recommended 2×6 studs or even 2×8 depending on the size and overhang of the wall but I felt that would be unnecessarily heavy for my purposes. Of course, you should adjust the construction of your own wall accordingly. I would much rather over engineer something than under-engineer it in this instance!
At this step, I also drilled 2 holes in the outer 2×4’s using my 7/16 inch spade bit that will be where my bolts go to attach the beams that make up the rest of the A-frame. Unfortunately, I didn’t take any in-progress pictures for those but they’re pretty straightforward.
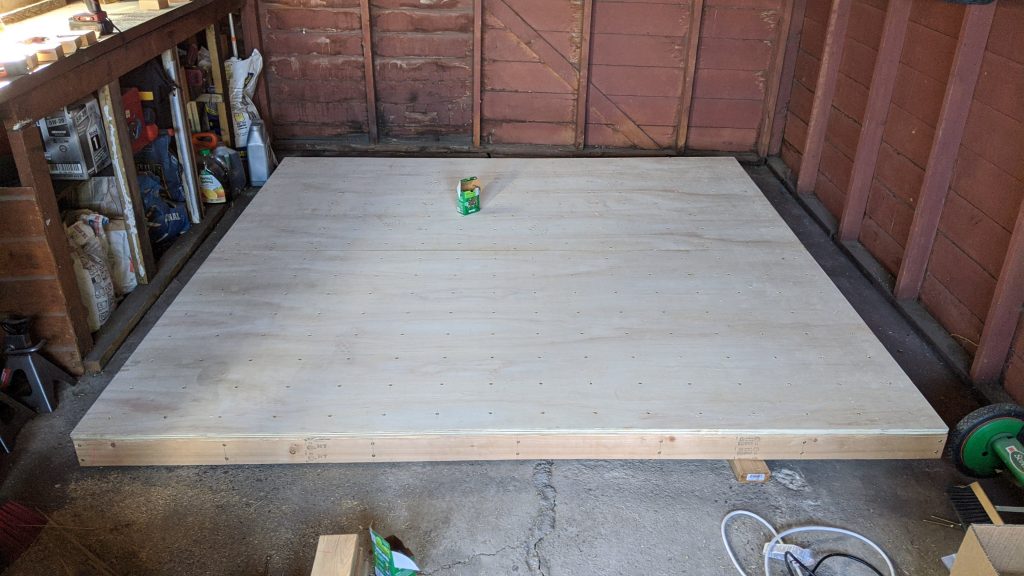
The wall is on the skeleton! It took awhile to drill in all of the 2 inch self drilling decking screws that secure my plywood wall to the wall frame but I would still take doing this over hammering all of those T-nuts again!
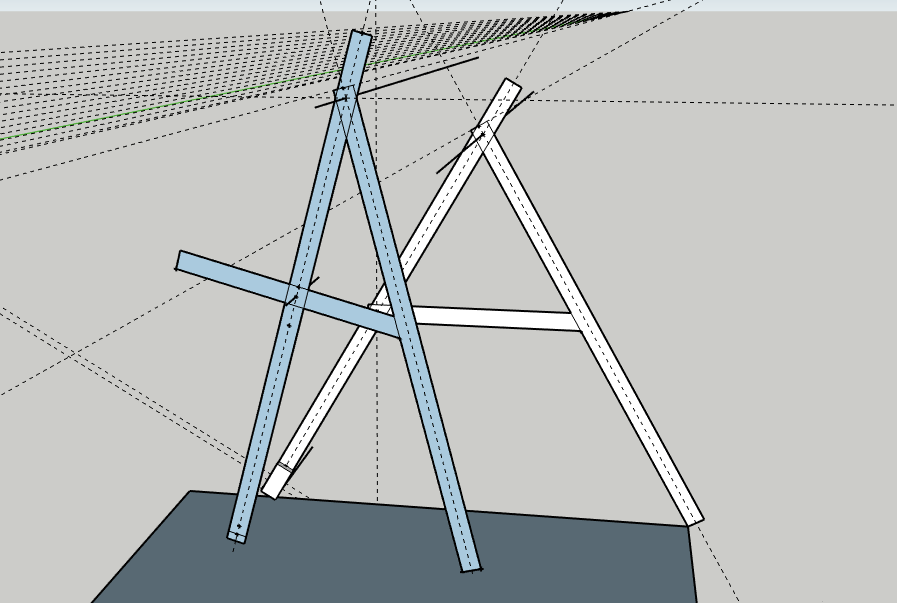
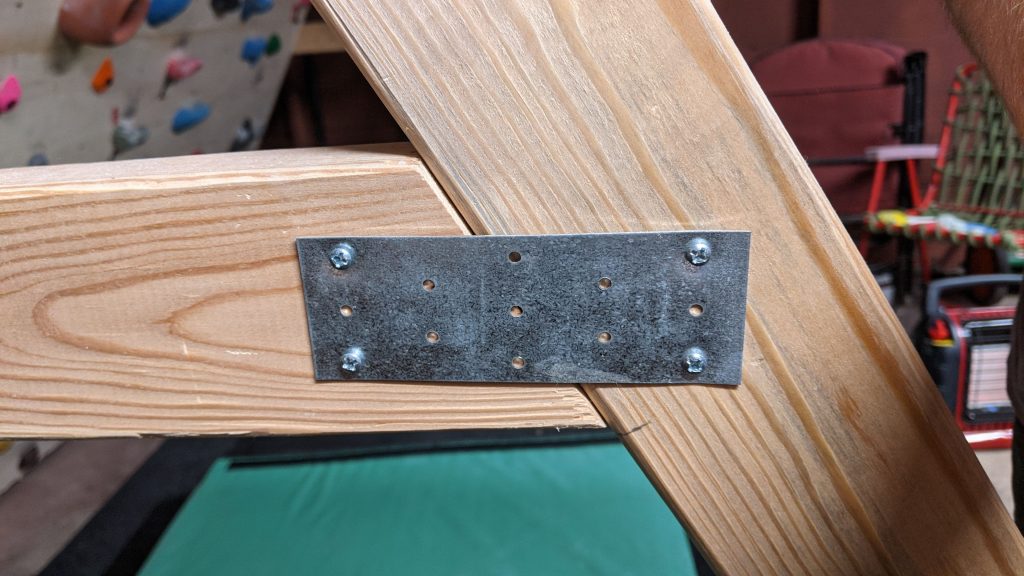
As I mentioned before, I built the support beams at this point but I don’t have very good pictures of that process. Basically, I cut a 2×4 in half on a 30 degree angle to make the middle beams for each side and connected it to the main support using wood glue, an angled decking screw on the long edge, and a steel plate with 4 smaller screws on each side. This can all be seen in the pictures below.
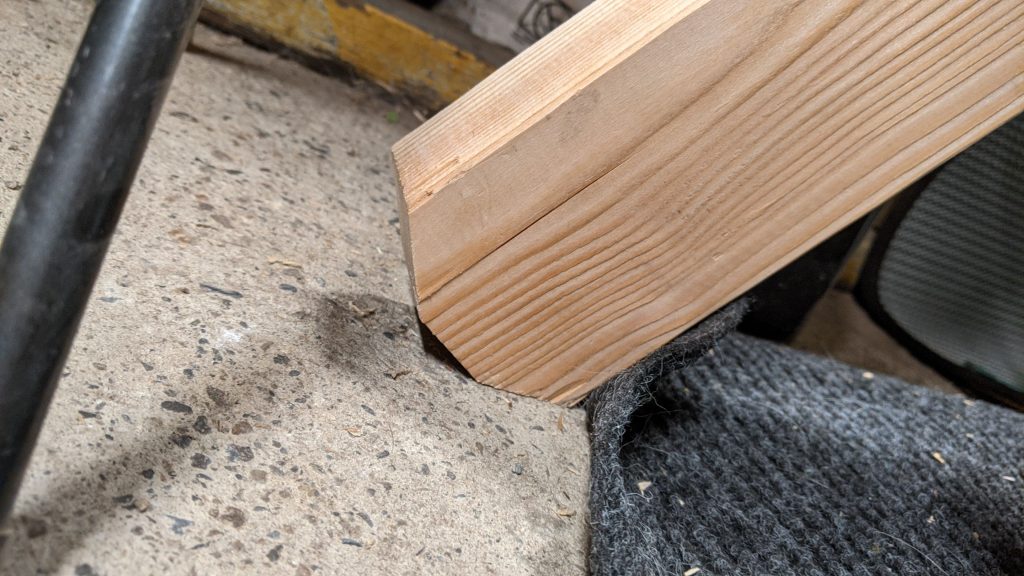
The angled connection I cut the bottom of the legs to have 30 degree angles so it sits nicely on the floor
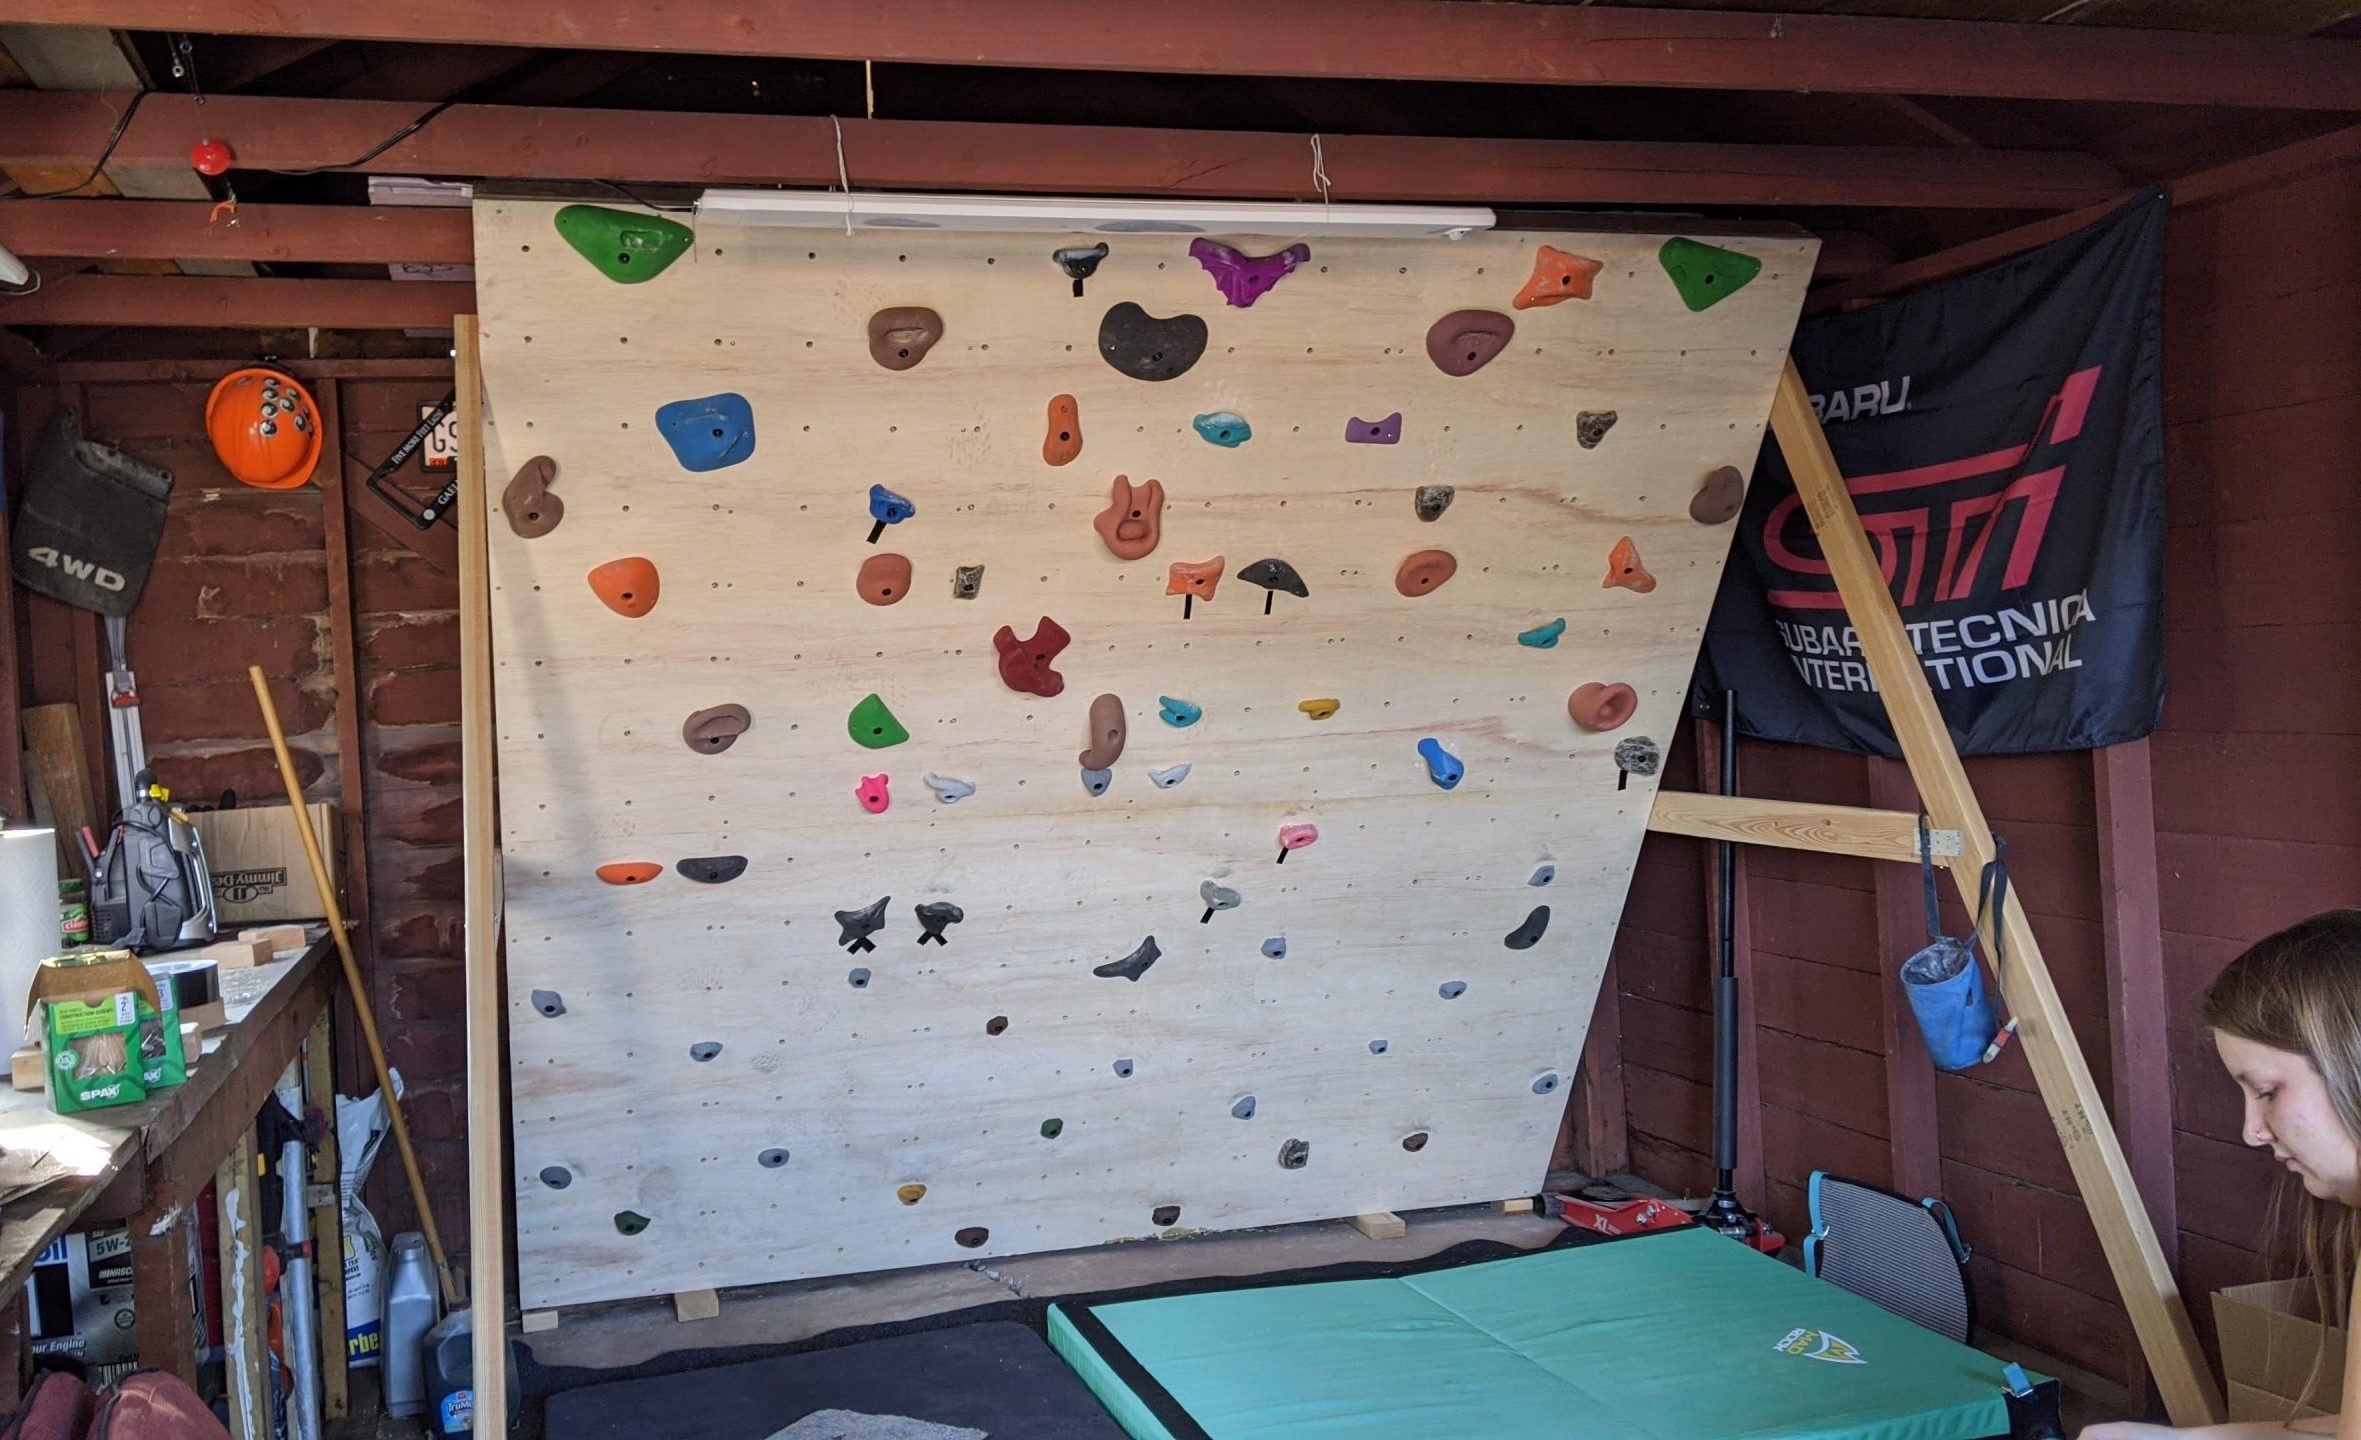
The final step was to have someone help me flip the whole thing over then tilt it up and connect the legs to for an A-frame with 4 bolts.
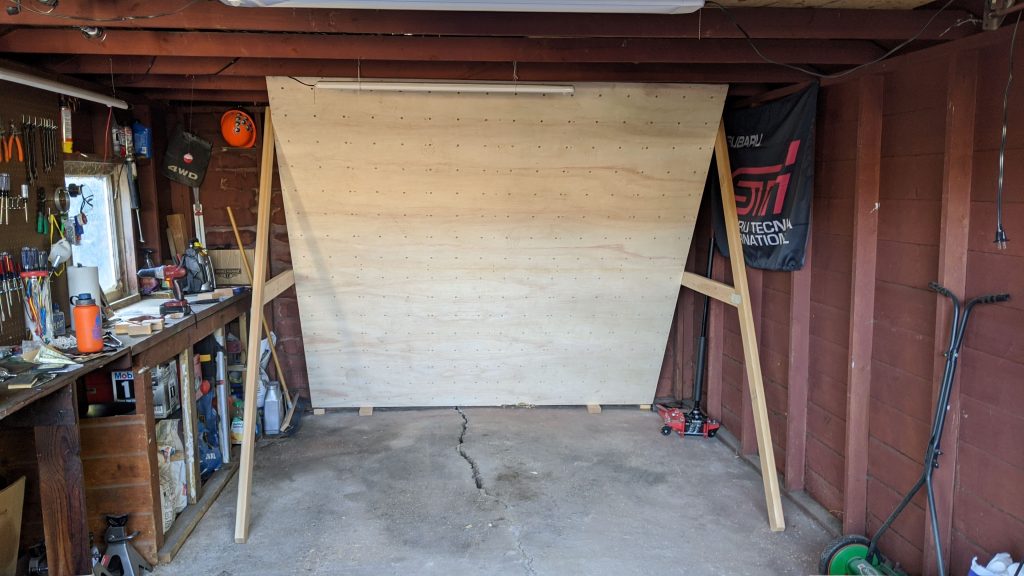
With the legs fully extended, the wall sits at 30 degrees or I can tilt it up a bit and set it to 15 degrees. It turned out beautifully and I couldn’t ask for anything more. Now that the wall is built, I had to learn some route-setting!
Holds galore! These are 70% recycled materials. Crash pads or pup beds?
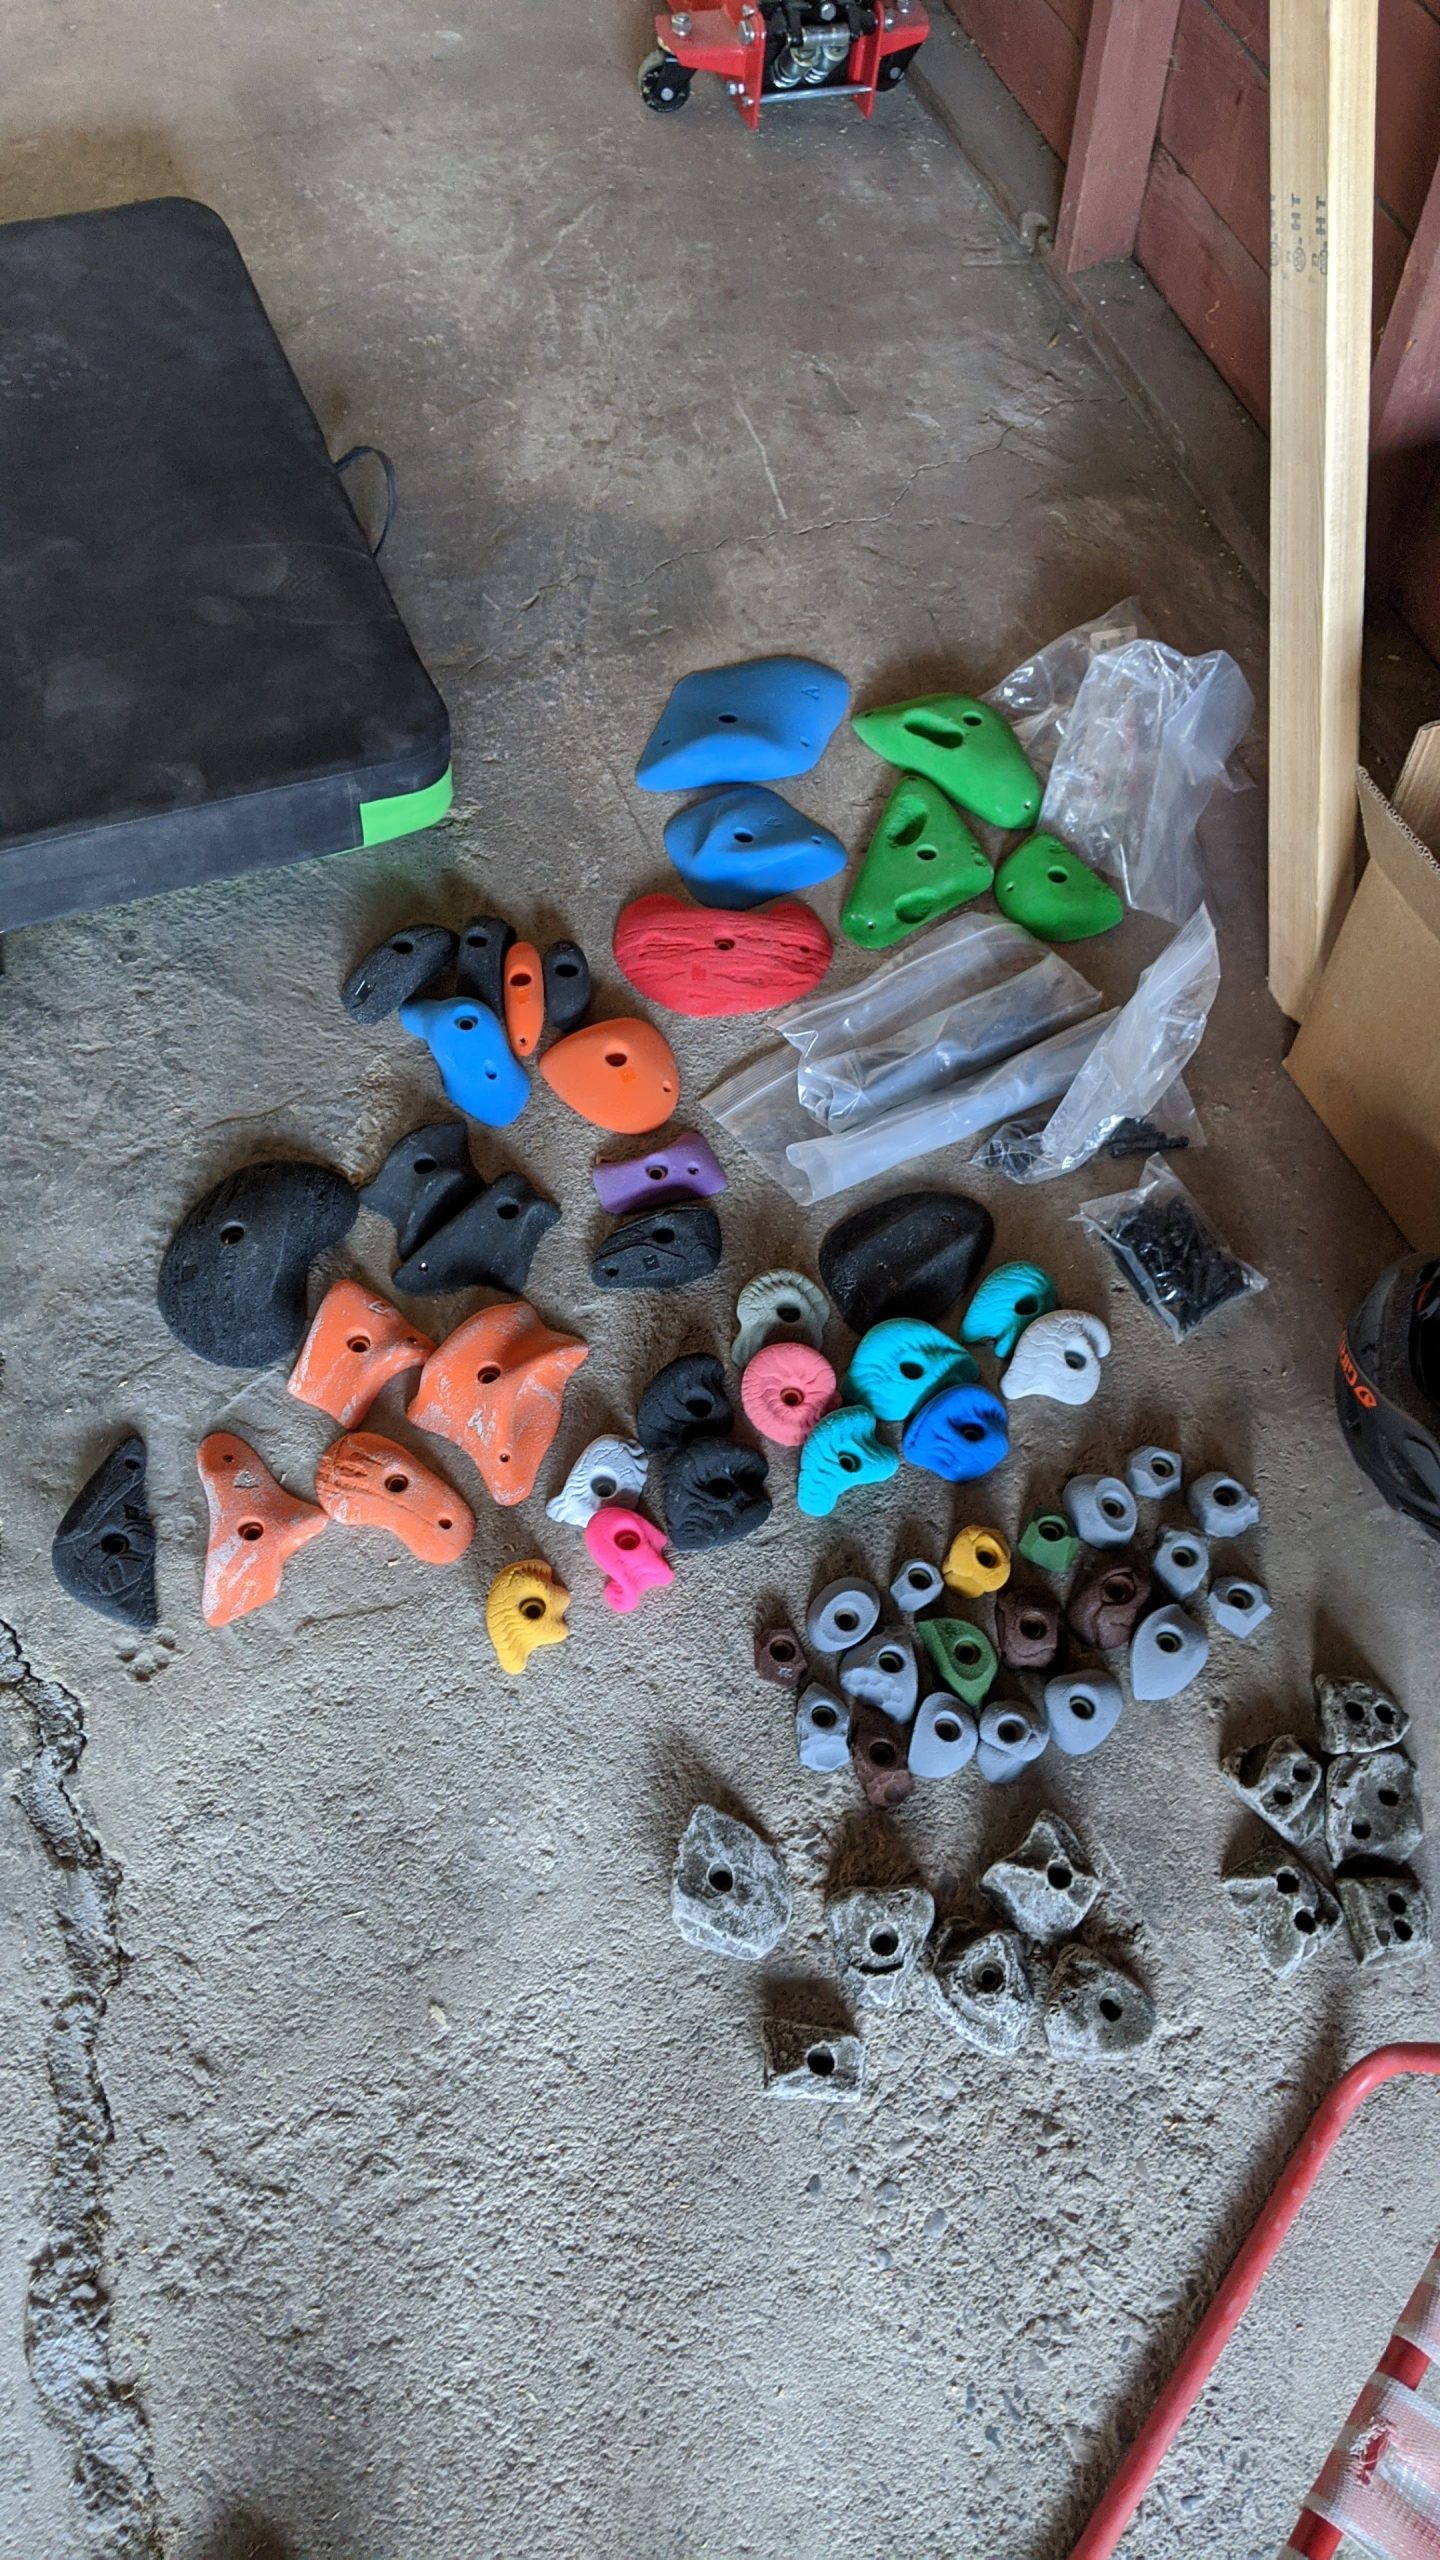

In these pictures you can see some of the holds I had to start with. It’s mix of hold types from Habit Climbing (that I mentioned earlier), Atomik Climbing, and this smaller company nearby called Rocky Mountain Climbing Gear.
I plan to order more holds in the near future so I can eventually make kind of a splash wall and fill in as many holes as I can. But for now, these will do just fine!
Materials Cost
Here is what the project ended up needing:
- 2 pieces of 2×4, 96 inches long
- 7 pieces of 2×4, cut to 93 inches long
- 2 pieces of 2×4, cut to 89 inches long
- 2 pieces of 2×4, cut to 42 inches on the longest edge (about 40 inches on the short edge), these are cut to 30 degrees on one end for the A-frame
- 2 sheets of 3/4 inch plywood, sold in sheets of 48×96 inches
- 2 boxes of #8 2 inch decking screws
- 1 box of #10 3 inch decking screws
- 4 bolts, 4 inches by 3/8 inch, with washers and nuts
- 256 t-nuts, 3/8 inch zinc plated
- 4 steel plates,
- Powered drill
- 7/16 inch spade bit
- Miter saw (can be rented from Home Depot)
- Hammer (for the t-nuts)
- Titebond Wood Glue
To minimize costs, you should be able to cut all the 2×4 parts from 12 pieces of 96 inch long 2×4 which comes out to about $60. The plywood sheets are about $50 per sheet so there’s another $100 there. With all the hardware, I ended up spending about $250 total but I had a couple things on hand already. Regardless, this project should be under $300 if you build yours identical to mine.
Inspiration and Helpful Links
One of the biggest things that was a huge help and a source of inspiration from the beginning of this project was the classic Metolius home wall guide. I essentially used that to brainstorm all of my designs and figure out how to construct them.
I also gathered a lot of information from Climbing.com’s Home Wall Primer (all 3 parts, especially part 2 and 3!) regarding layout, what holds to invest in, and how to utilize the wall to the fullest. I highly recommend reading through all of their Home Wall Primer articles thoroughly before you decide to embark on this project.
When I began to design and develop the wall, I decided to make it adjustable after watching this fantastic video from Send Story. Obviously, I didn’t have the space or the budget for something as grand as theirs but I loved their adjustable system. I essentially mashed that idea up with the design of the wall created by Jen Sends in this video. Jen gave me the confidence to take on a project like this.
And finally, this video from Jackson Climbs and this video from Climber Dad provided just a bit more insight into creating a freestanding board since I wasn’t going to be able to attach mine to my garage space.
Final Thoughts

I contemplated the idea of building a home wall basically all summer while I was spending a majority of my time climbing outside. After finally making the leap, I think it was a good decision for myself and my climbing goals. Having the ability to train on this wall right here at home at a moments notice while this pandemic (and this funky year) rage on has given me a huge boost to my psyche and fitness.
After having the wall for about 3 weeks, and climbing on it almost everyday, I went to Little Cottonwood Canyon and crushed a couple of projects I had only dreamed of sending. I can definitely feel my fingers and body tension getting better, especially on the 30 degree overhang.
Let me know if you decide to build your own wall and how it goes! Thanks for reading, enjoy this gif of the new wall!
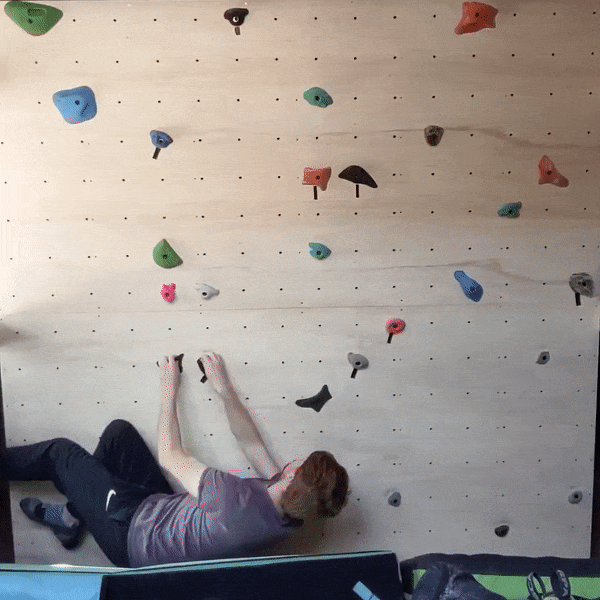
I’m going to get really good at sit starts and traversing!

Pingback: Solo Red Rock Trip in my Chevy Tahoe Camper – Skighlife
Pingback: Low Budget Camper Conversion in a Nissan Rogue - Skighlife