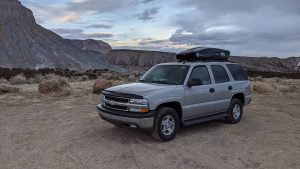
When I originally built my Tahoe for camping, I did so on a tight budget. I wasn’t sure how often I would use it or for how long. In the past year, I’ve spent a heck of a lot of time living out of my Chevy Tahoe camper. It’s been awesome but I’ve definitely seen some opportunities for improvement. And so, I’ve decided to start making incremental improvements and documenting them here!
From the moment I bought my Chevy Tahoe, the goal was to keep the car in its original form. I don’t want to modify anything on the inside or outside that would be irreversible. I see myself eventually upgrading to a van or an RV in the future which I can build out using the experience I’m gaining now. That means I may resell this Tahoe one day and I don’t want it to have a Fantastic Fan embedded in the roof.
When I bought the car, I removed the third row seats but I decided to leave the second row. Removing the second row is harder than removing the third and it doesn’t add a ton more space. Then, in my original build, I bought a cheap outdoor rug from Costco and cut it to cover the back. This was to protect the original carpet since I intended to go off the grid quite often which could create a mess of my interior. It’s worth mentioning, the front seat came with those nice all season rubber mats.
Upgrades People, Upgrades
Well, after a year of camping, my cheap outdoor rug is pretty worn. It also catches on anything I move in and out of the vehicle. It did its job but I think there is a better way. A majority of the van builds I see have hard floors which seems more rugged and even easier to clean. With that in mind, I stopped by my local Habitat for Humanity and picked up a discount case of vinyl flooring.
If you’re building out your own camping vehicle, be it car, van, SUV, or whatever, you might think this is totally unnecessary. And you might be right. I just happen to find a real cheap box of surplus COREtec Plus XL vinyl plank flooring one weekend and decided to give it a go. This stuff is waterproof, scratch resistant, and has a layer of cork at the bottom! Also, the XL planks are 6 feet long which fits my space perfectly.
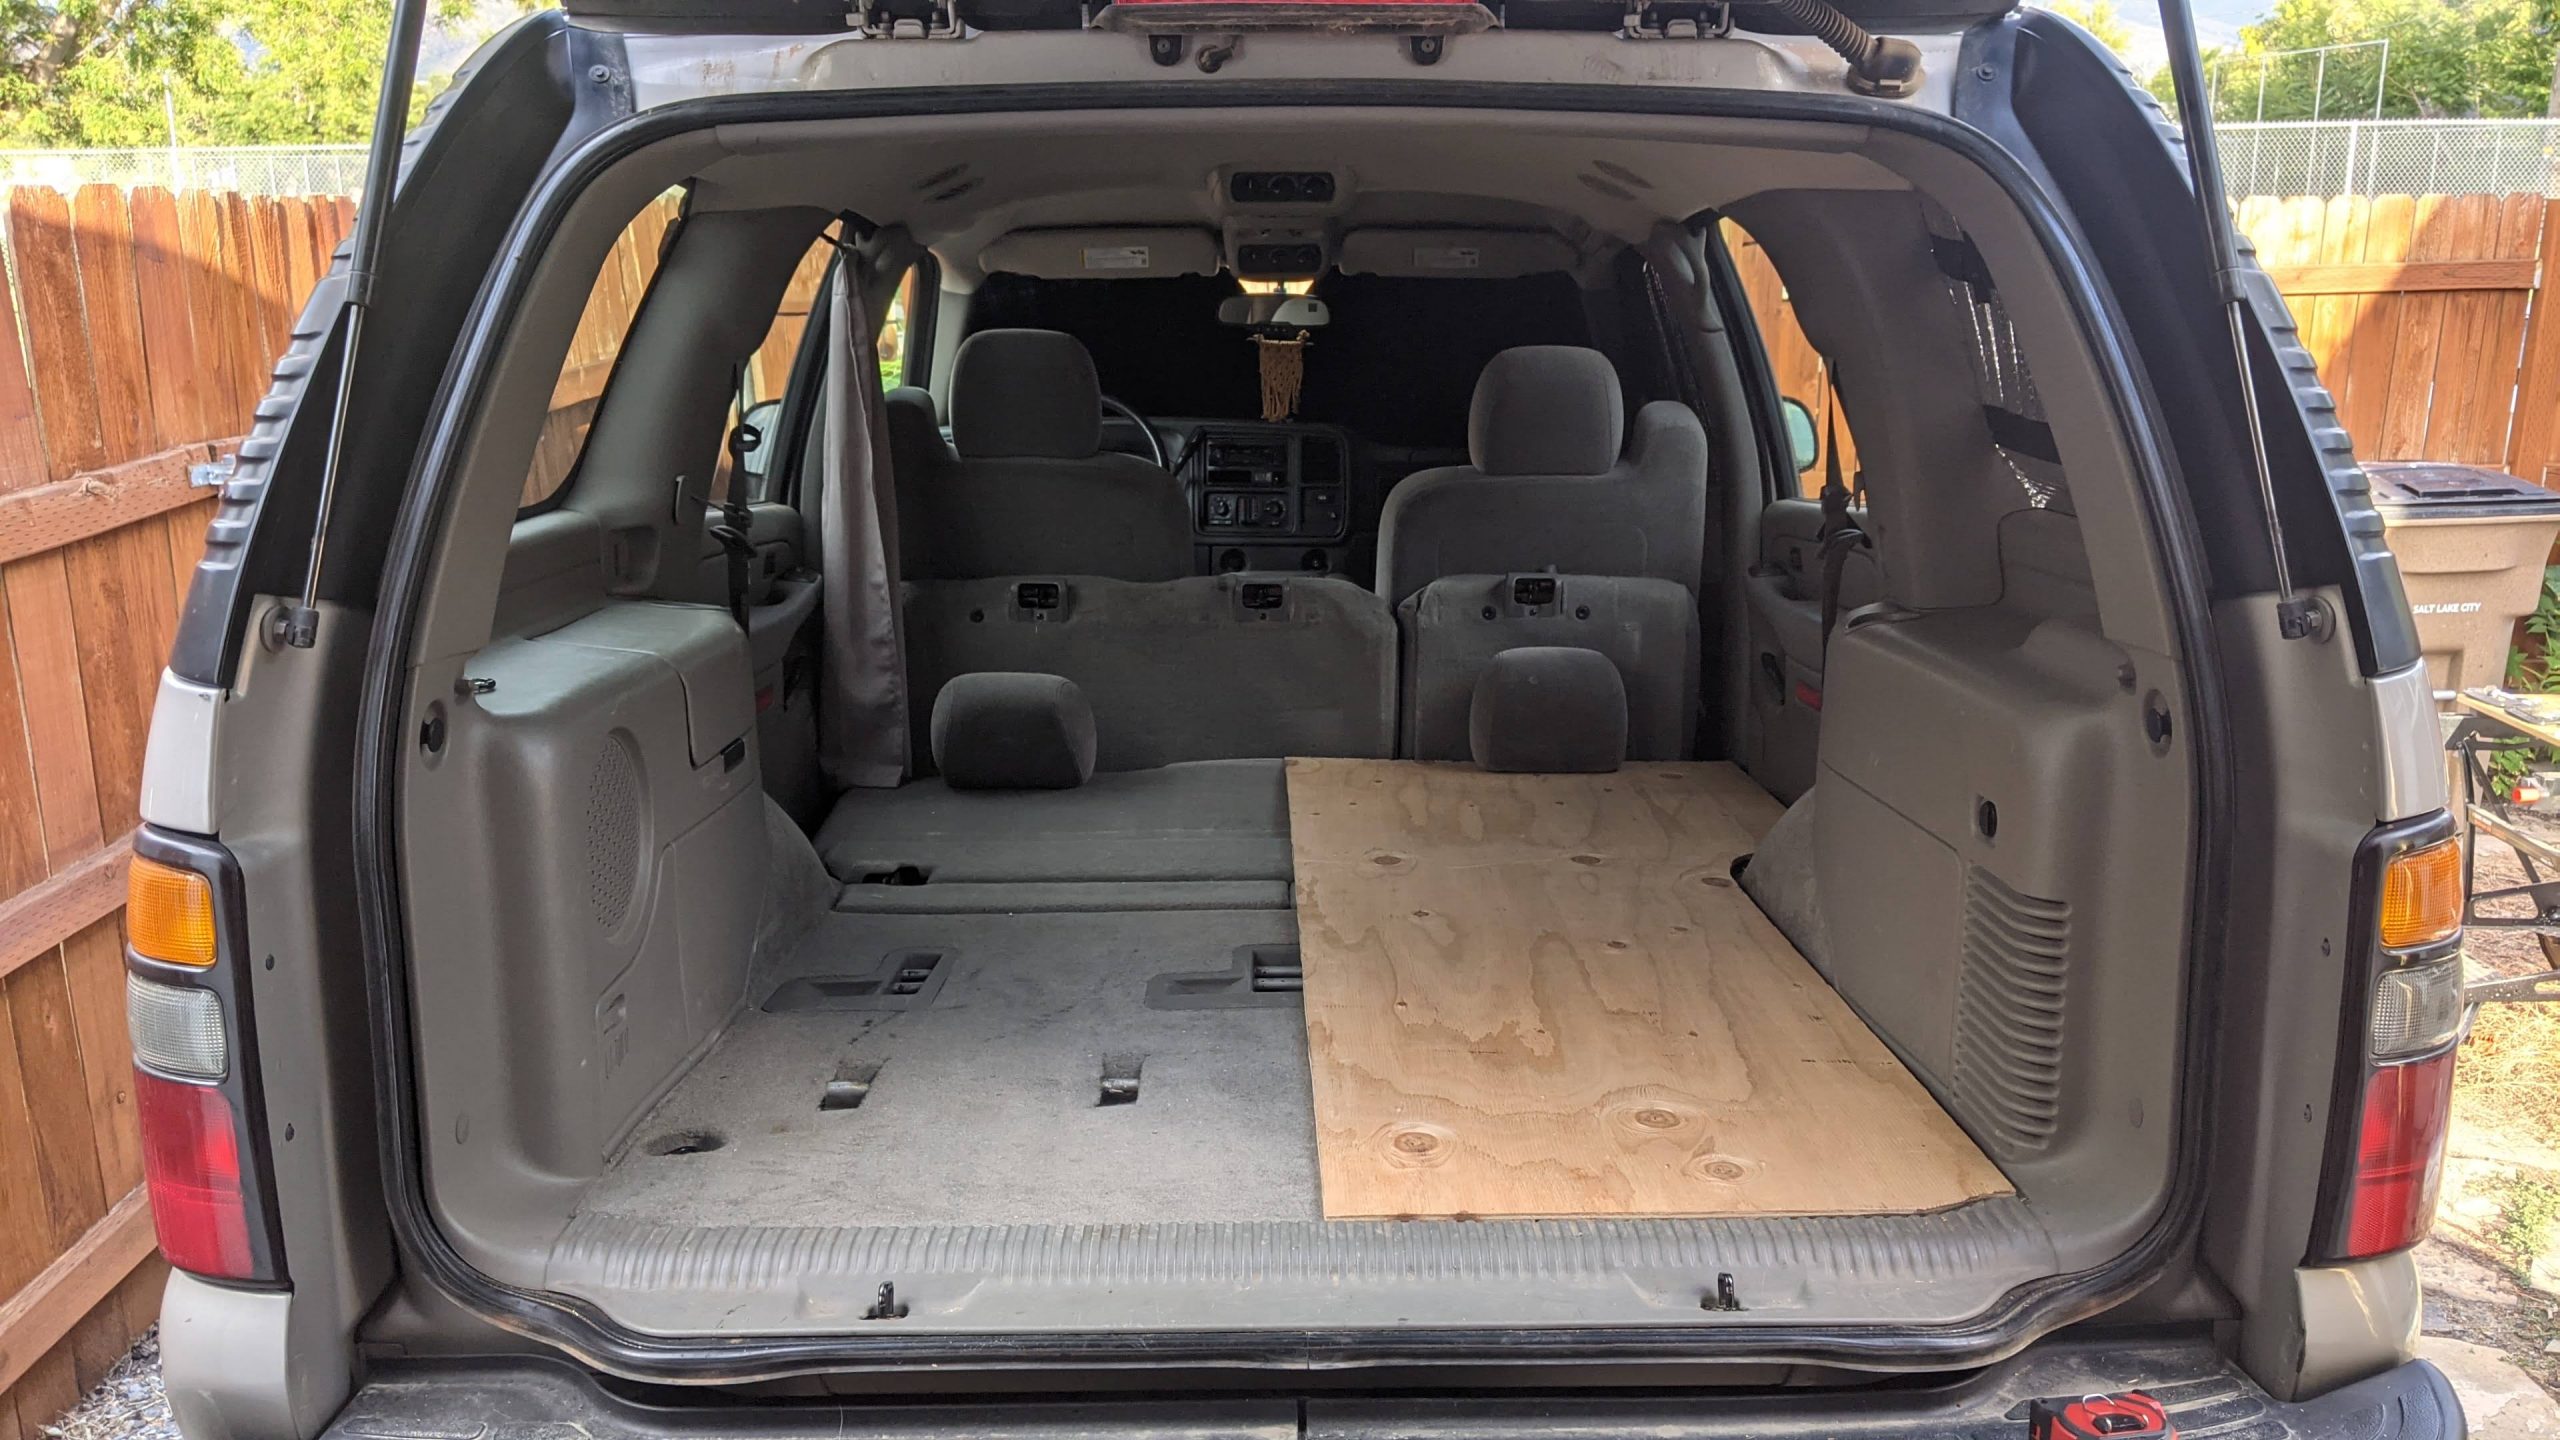
As always, measure twice and cut once! After removing everything from the car, I mapped out the floor and created the cardboard stencil you can see here:
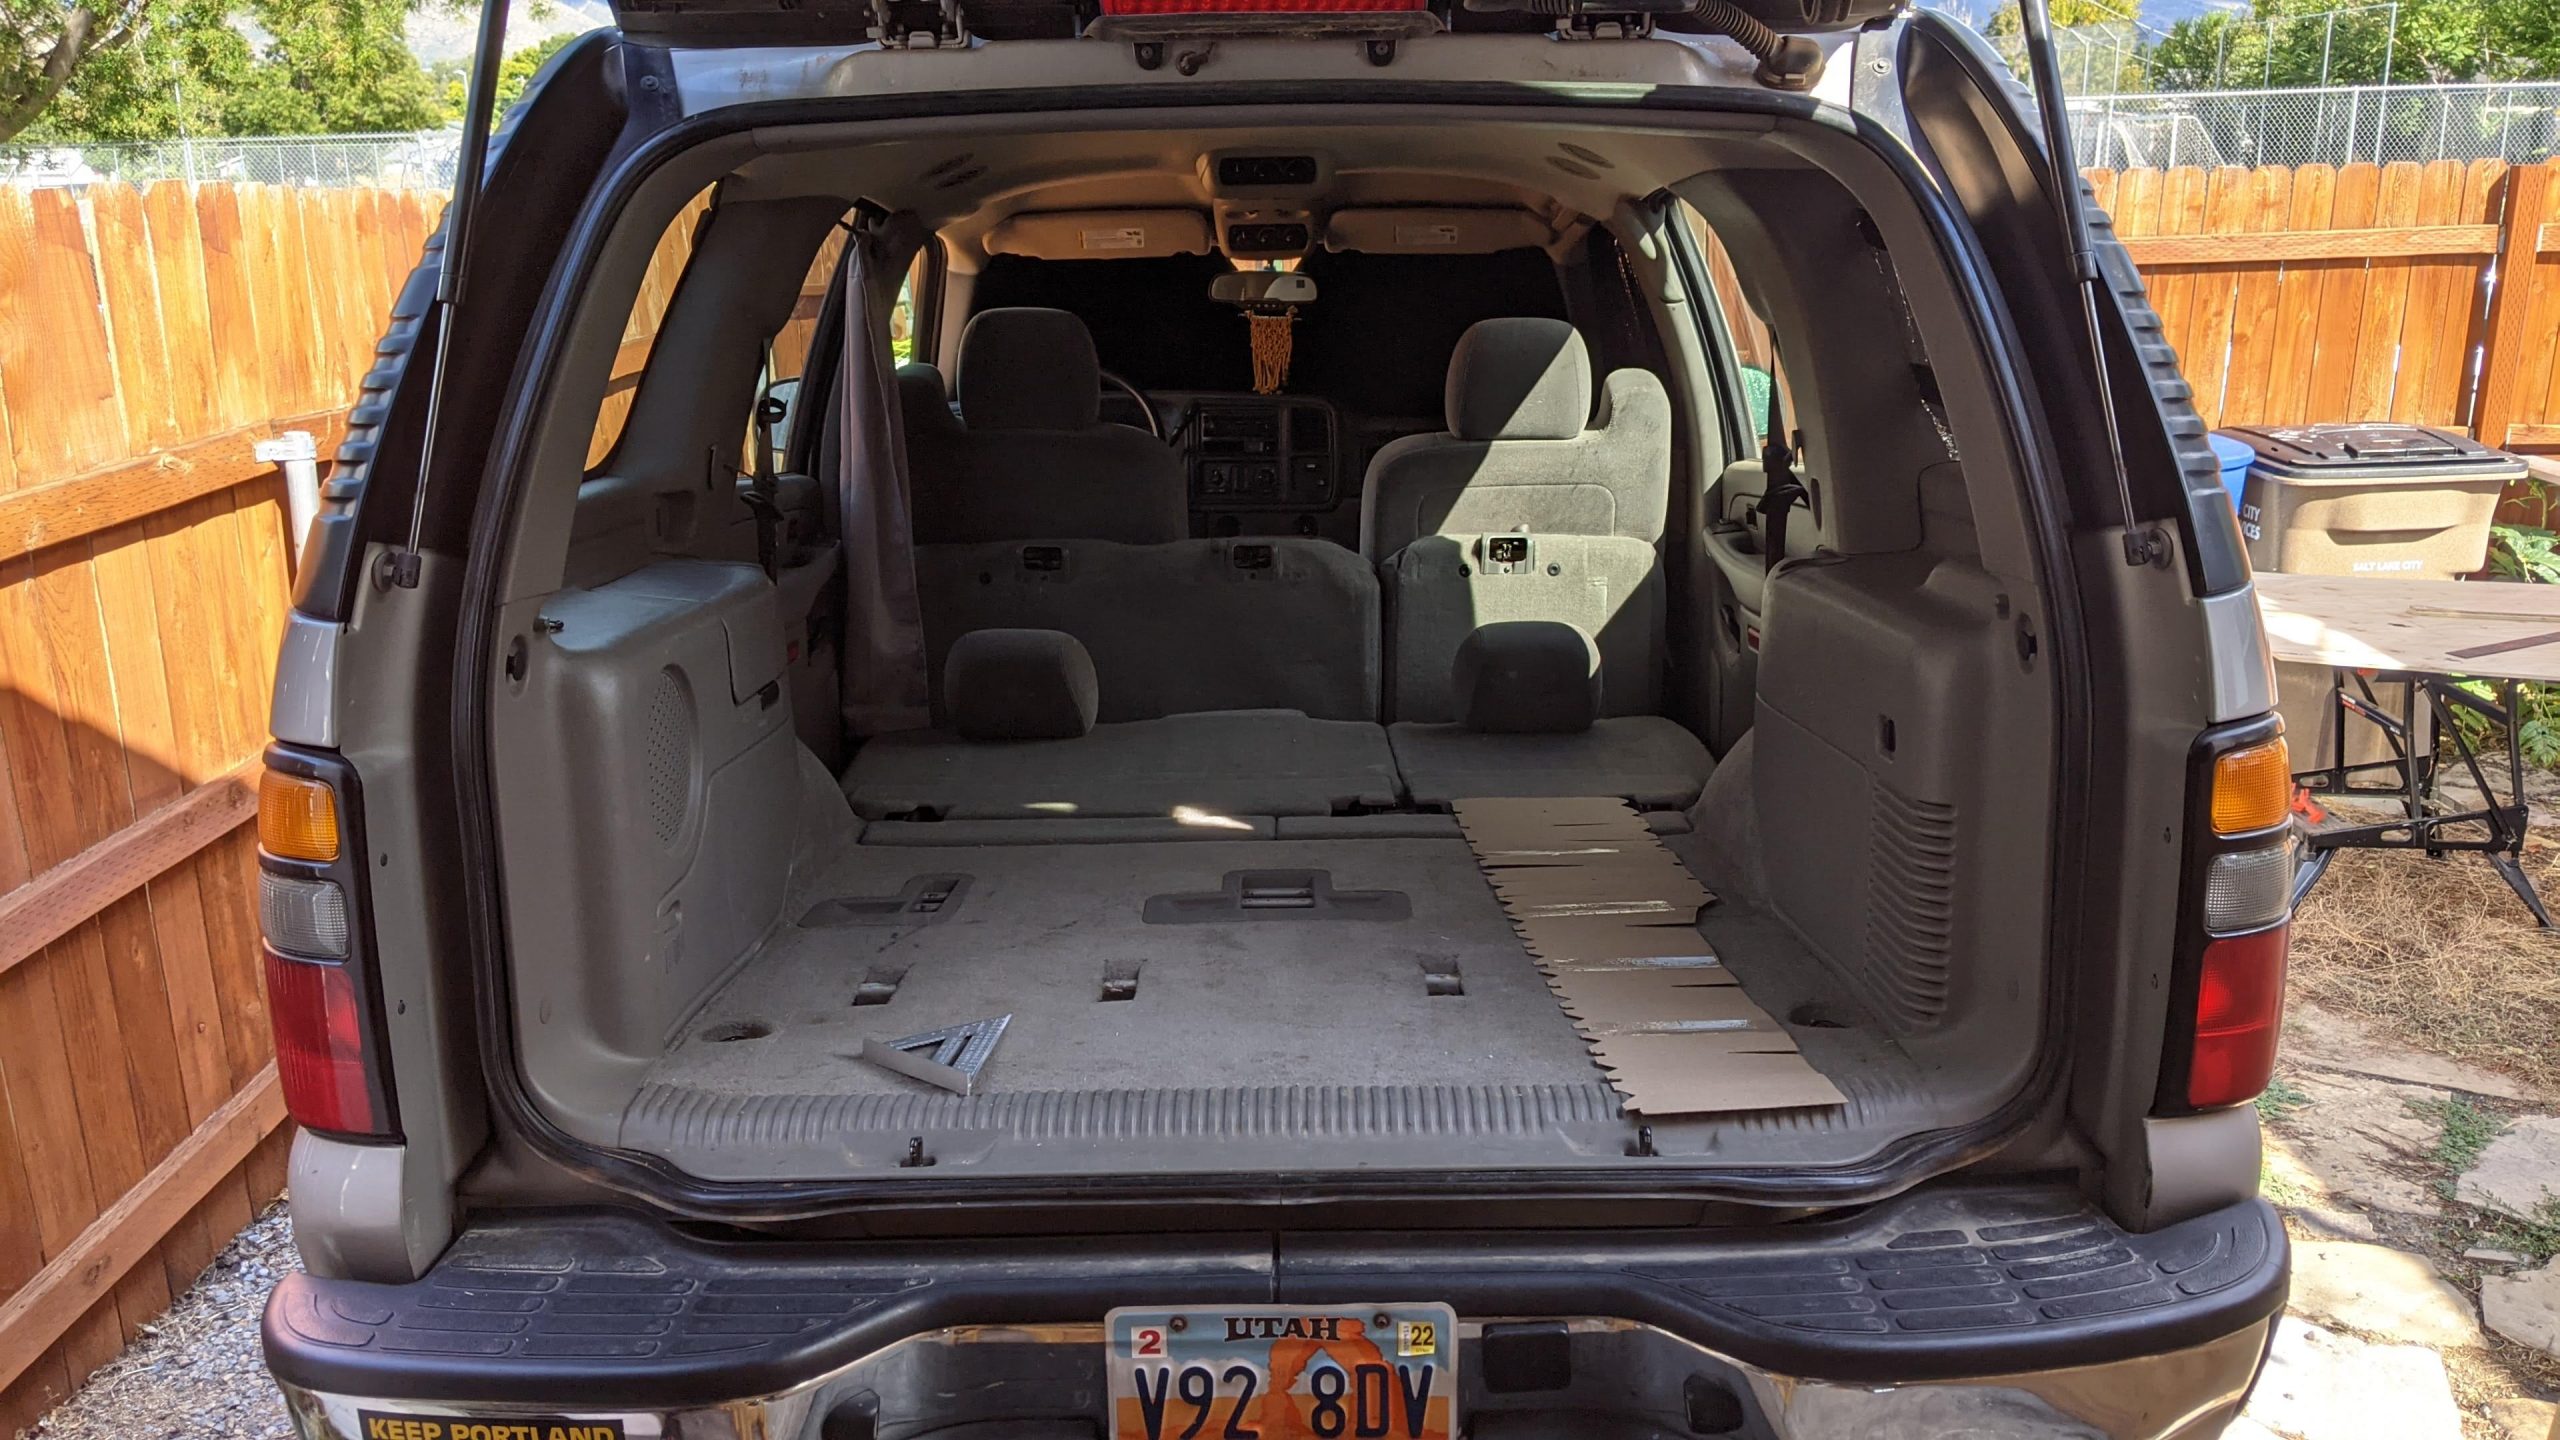
Scribing To Create Irregular Cuts
Fun fact, I actually bought a handheld jigsaw specifically for this project. I knew I would have to make some pretty strange cuts to fit everything to the shape of my Tahoe. Before I started cutting the wood though, I made a few stencils. For this, I used a process called scribing. It might take a few tries to get it right but with this method you can ensure everything fits nicely.
Once I’m happy with my stencils, I trace the stencil onto my 1/4 inch plywood. Then, I use the aforementioned jigsaw to cut along my line. In the next series of photos you can see how my cuts turned out. I used scribing to cut out a space for the rear wheel well and the trim pieces at the back of the trunk. The rest of the car is pretty straight.
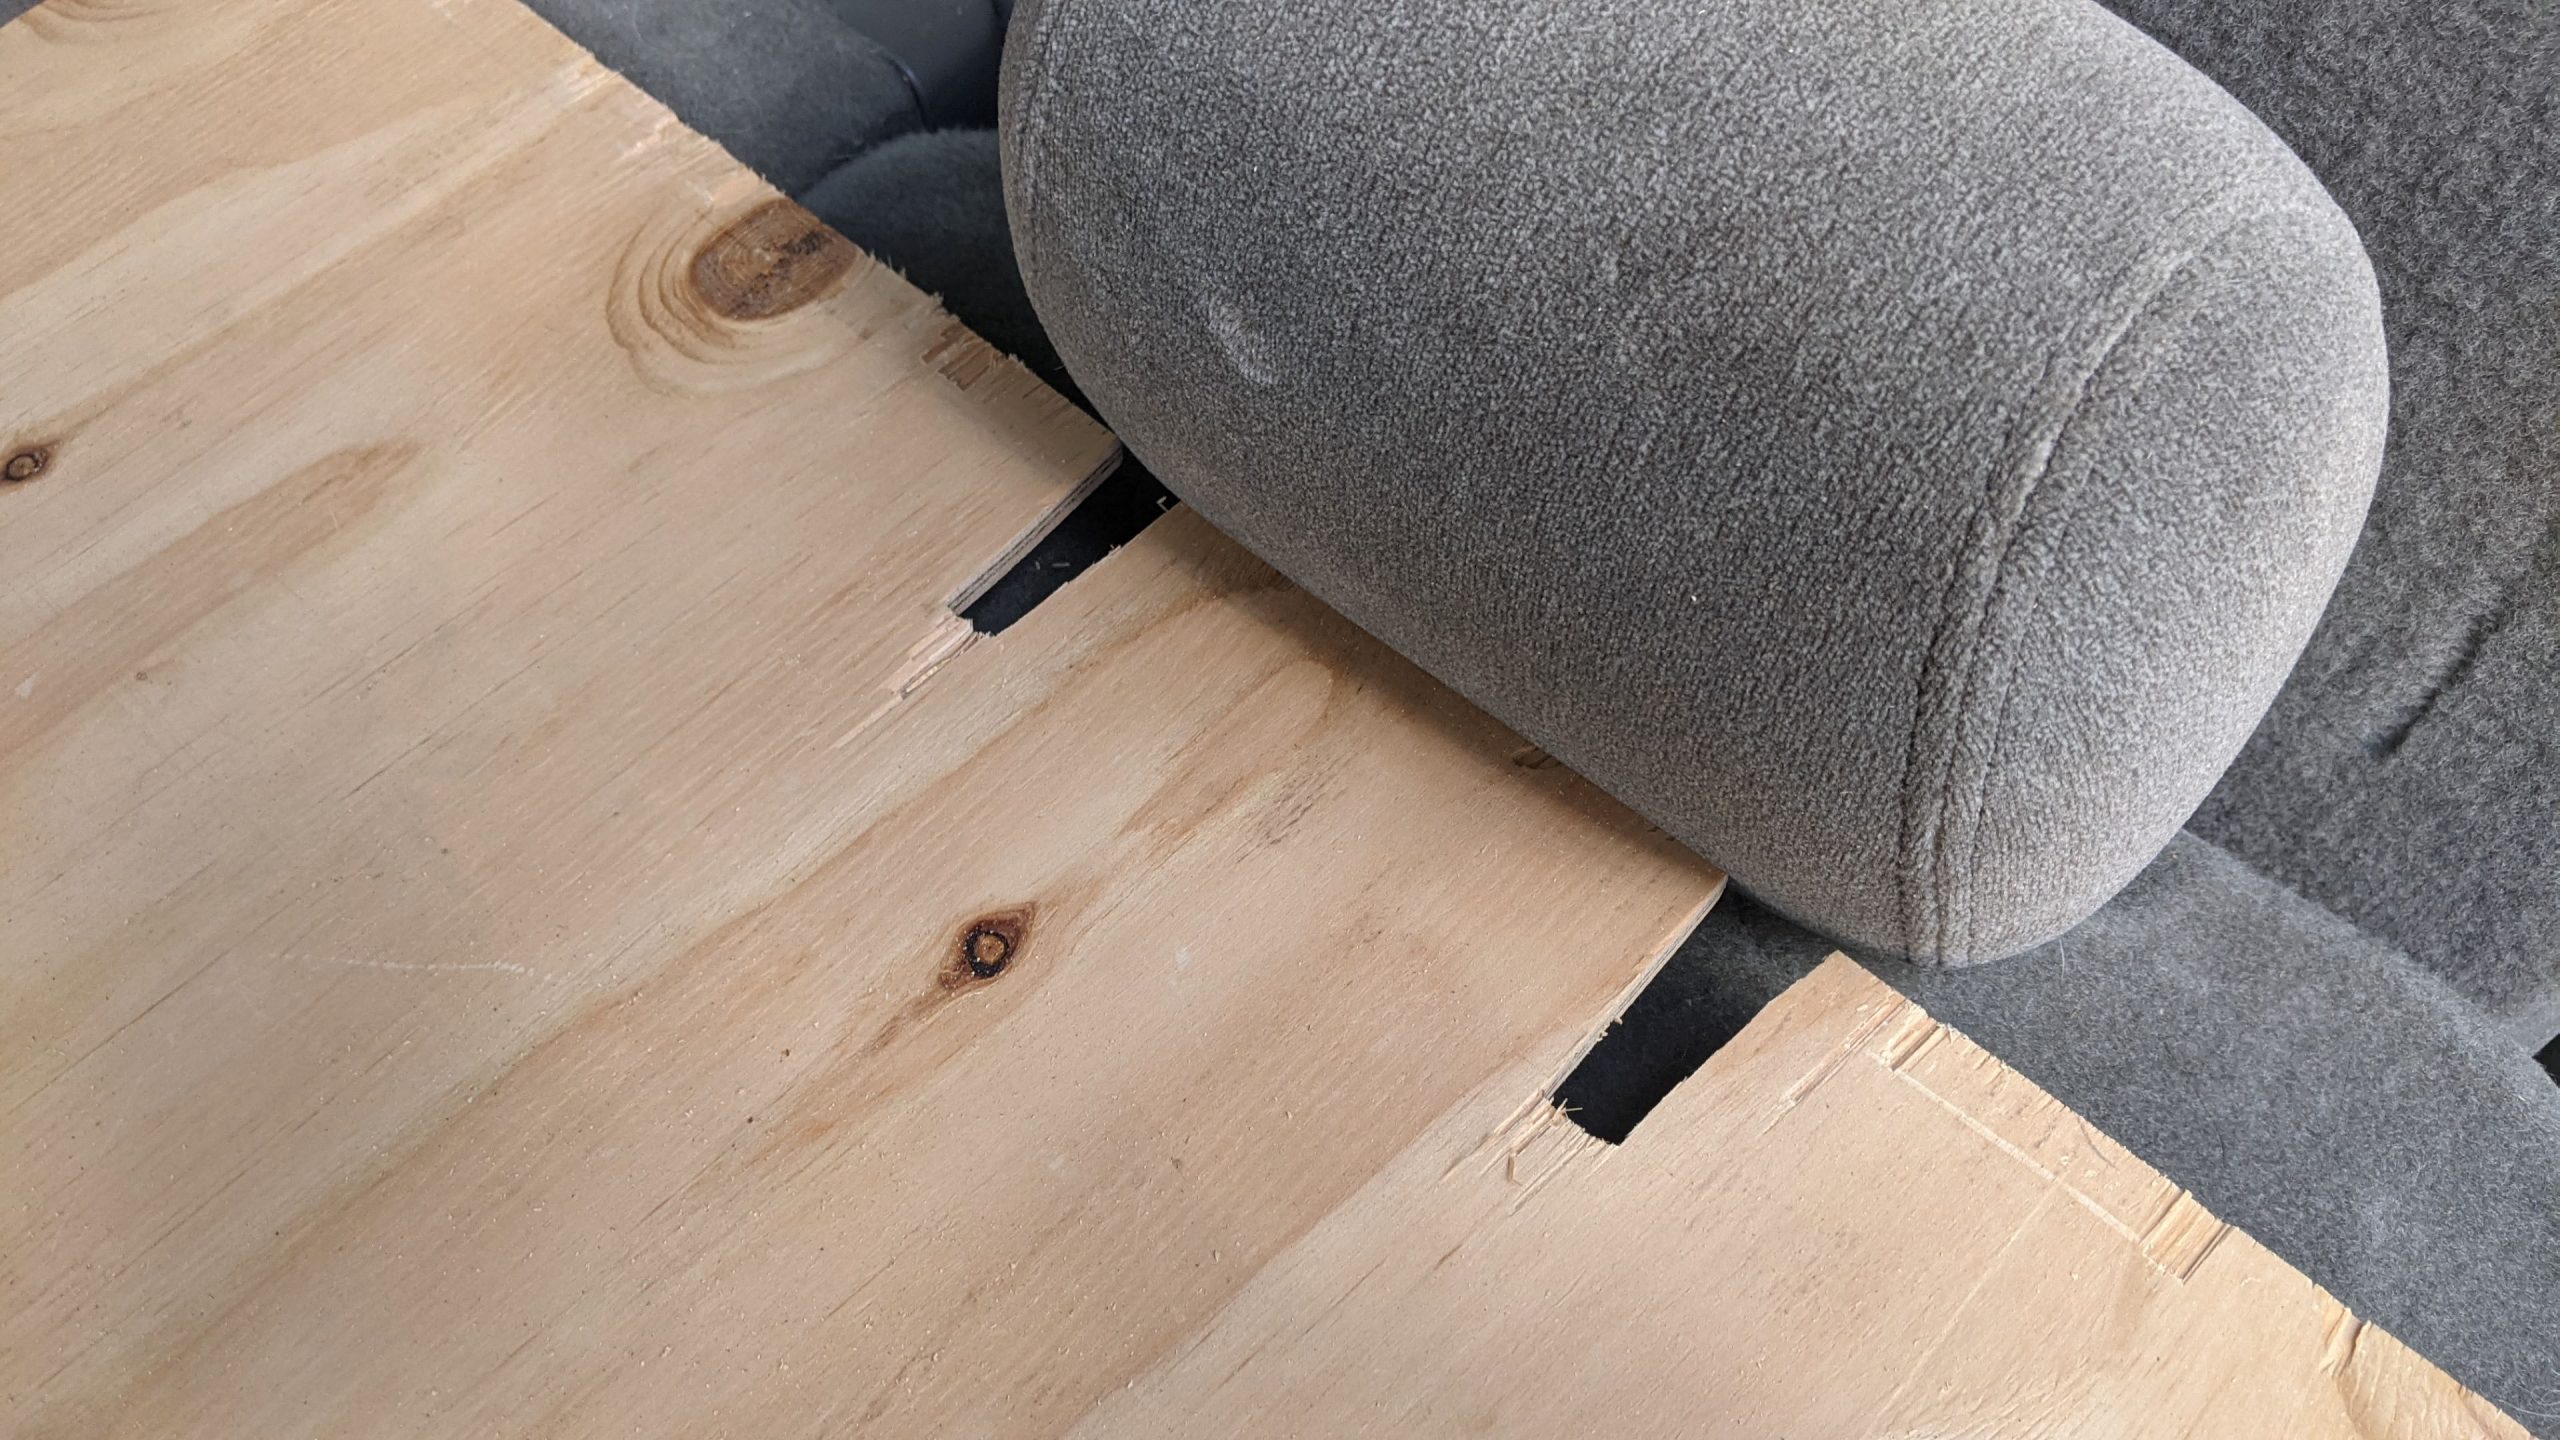
I also used a bit of trial and error to make a cutout for the metal posts on the rear headrest. I think it’s different for the Suburban but in my Tahoe, the rear headrests are not removable.
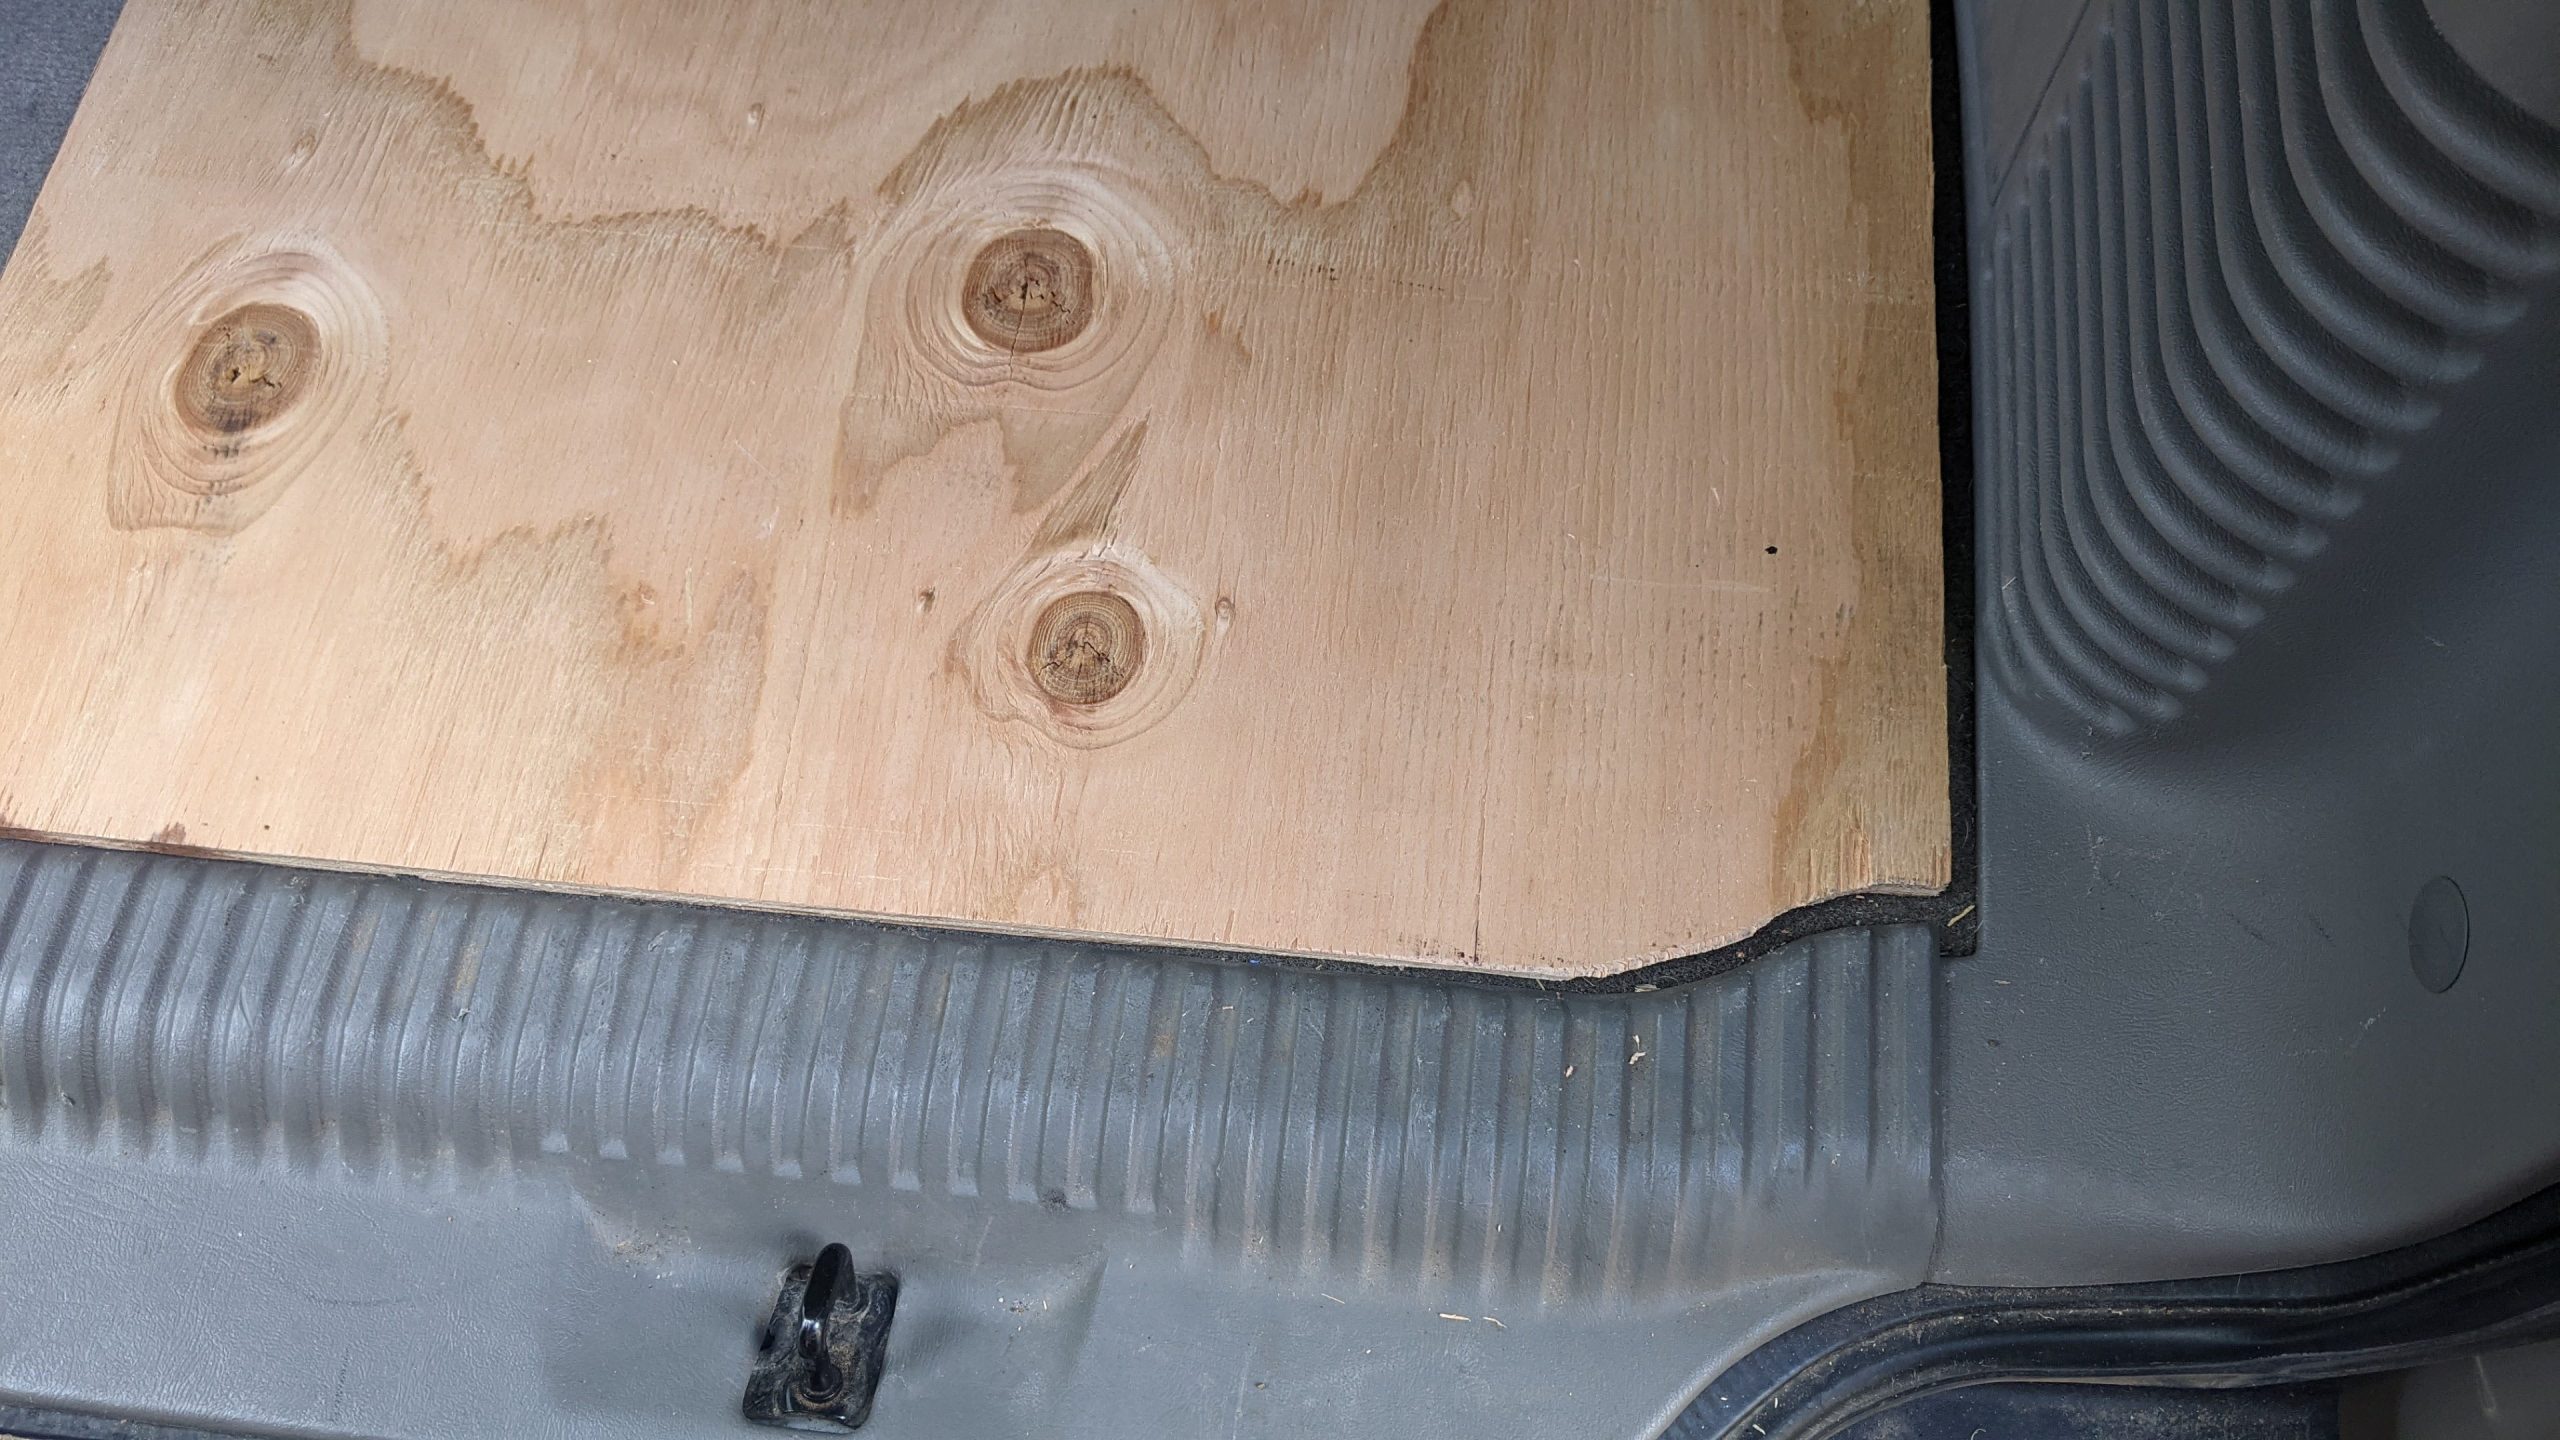

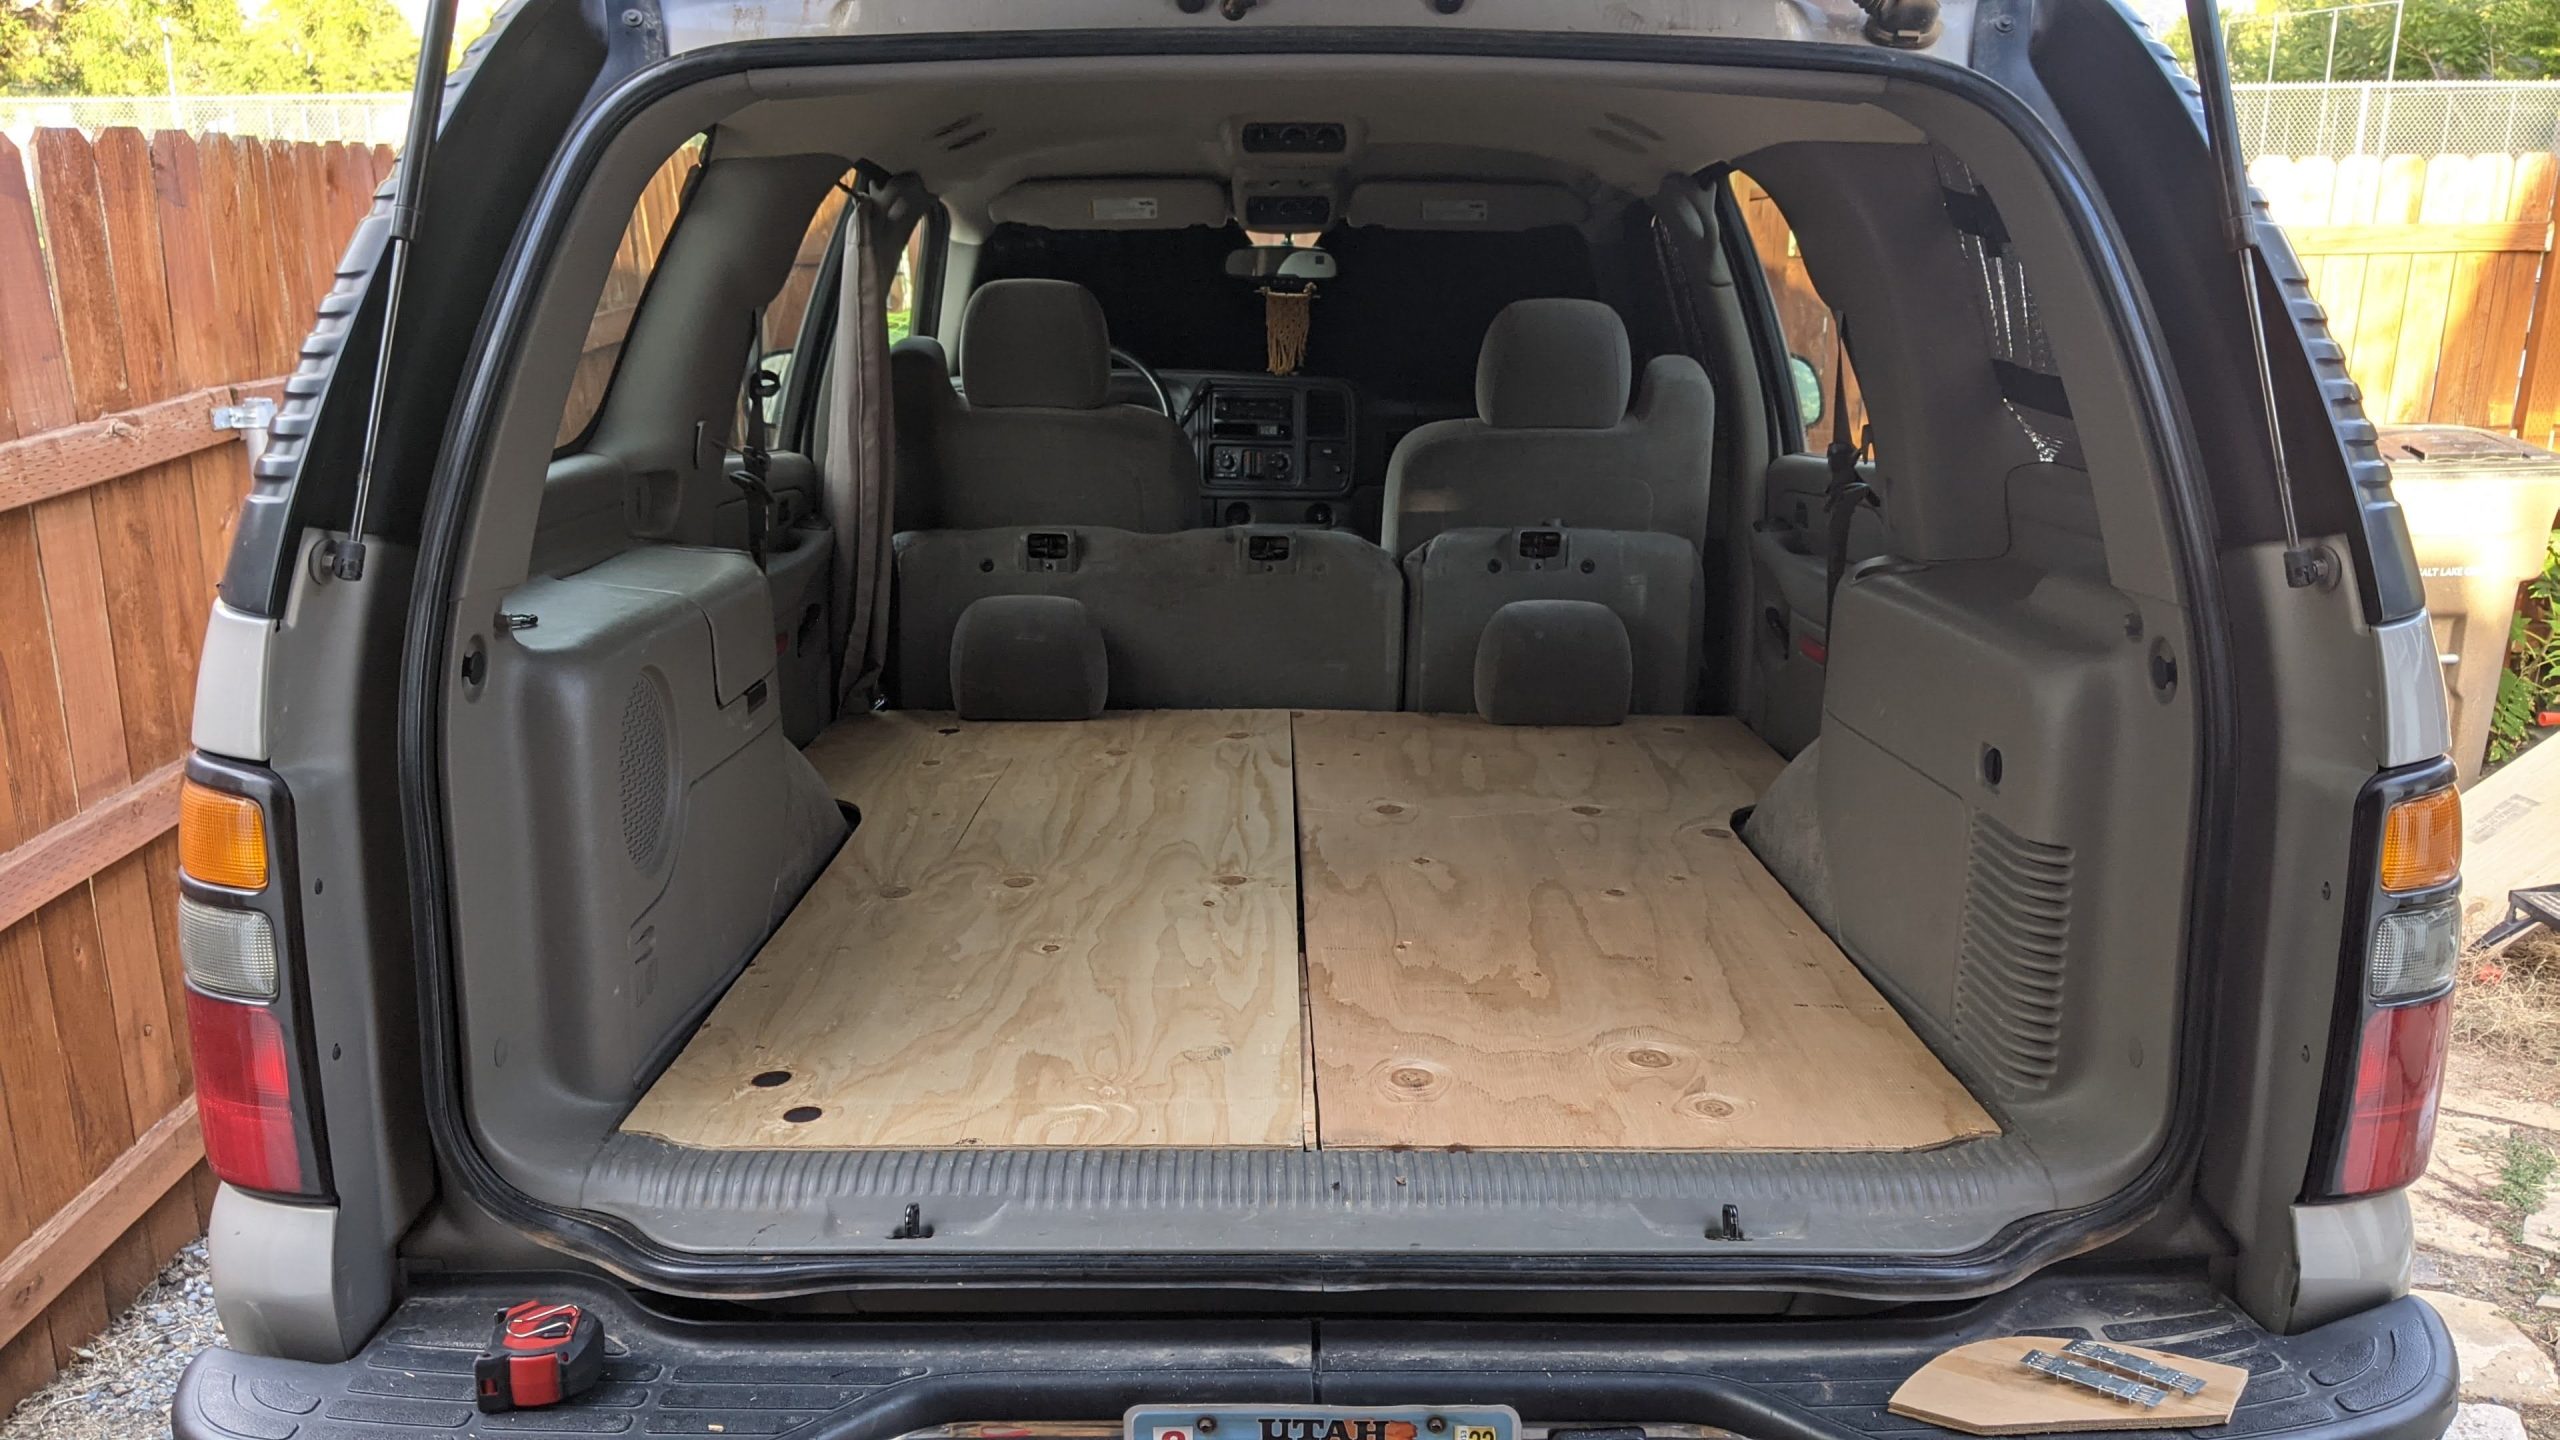
Covering the whole trunk requires more than one sheet of plywood unfortunately. Instead of having a big piece and one little extra piece, I opted to divide the trunk in half. I now have one plywood sheet and one half of the trunk scribed and fitted. At this point in the project, things start moving a lot faster so stay with me.
Finishing the Subfloor
I always look for ways to “work smarter, not harder” and this project is no different. To make the second half of the subfloor for the trunk, I just traced the first half onto my second piece of plywood. I cut that baby out with my handheld jigsaw and now the subfloor is complete!
At this point, I was quite proud of my work but you may notice there is a gap down the center. Apparently, I didn’t measure as well as I thought which left a slight gap in the middle of the trunk. Since this is going under my vinyl plank flooring, there shouldn’t be an issue. However, I aligned both pieces to the outside edge and tucked a piece of scrap wood in the center just to fill the gap a little.
Overall, I’m happy with how the subfloor turned out. Everything aligns nicely with the interior and the furthest outside pieces sit flush against the back doors. I’m ready to start installing the vinyl planks!
Installing the Vinyl Flooring
As I mentioned further up the page, I have a box of COREtec Plus XL vinyl plank flooring on hand. This stuff is waterproof and the XL means the planks are each 6 feet long. I wanted to minimize my cuts needed for the flooring so I decided to install it from the headrest posts to the trunk. This was completely a happy accident.
Starting from the driver side, I cut out a piece to fit around the wheel well and line up to the back door. Then, I just started clicking whole pieces together. I realized quickly that this stuff is kind of frustrating to work with. It really doesn’t want to fit smoothly together. I used my rubber mallet to coax them the rest of the way but I broke off the cork tabs a few times.
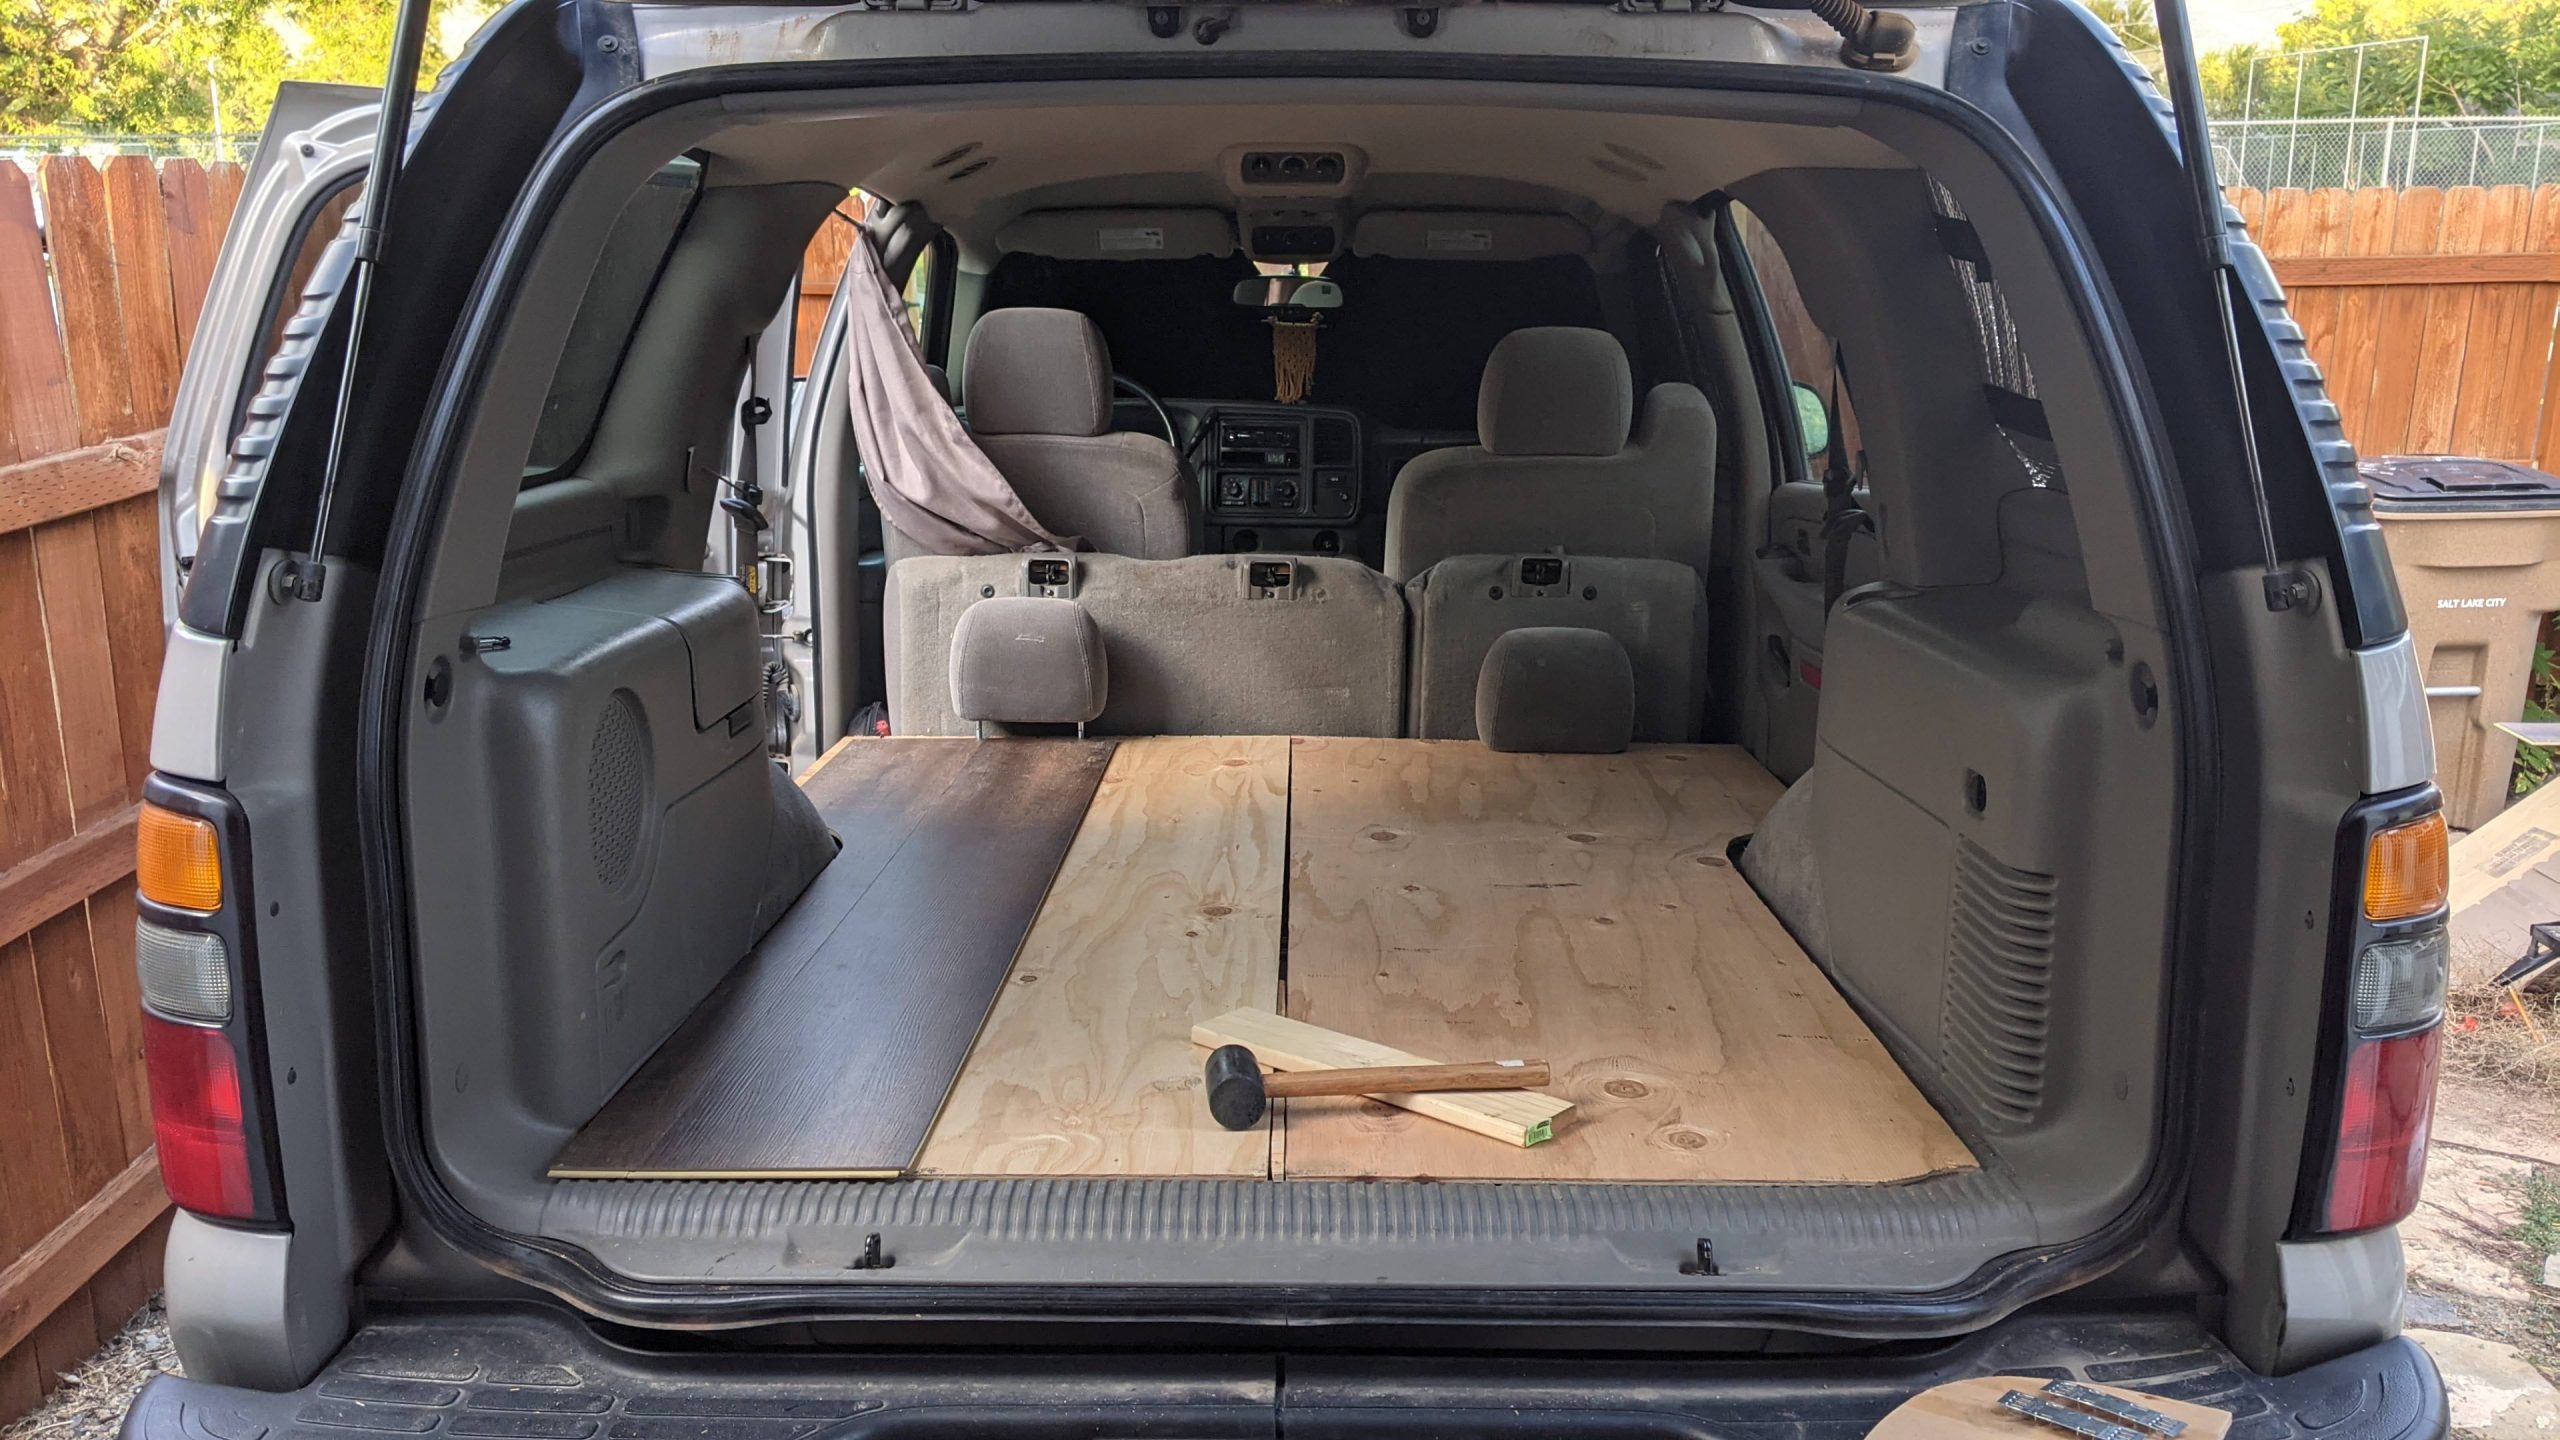
The easiest way seems to be wiggling the new piece up and down until it click in as closely as possible. Then use a piece of scrap wood with the mallet to give it a few taps the rest of the way. I also kept reminding myself that the manufacture probably didn’t intend their vinyl plank flooring to be installed in the back of a 2006 Chevy Tahoe SUV.
Several sweaty hours later and the floor is complete! Unfortunately, because of the aforementioned gap in my subfloor, the plywood pieces move around a bit. I also had a hard time getting the vinyl flooring to line up perfectly with the car. But as far as my first time working with vinyl plank flooring, I think it came out pretty well.
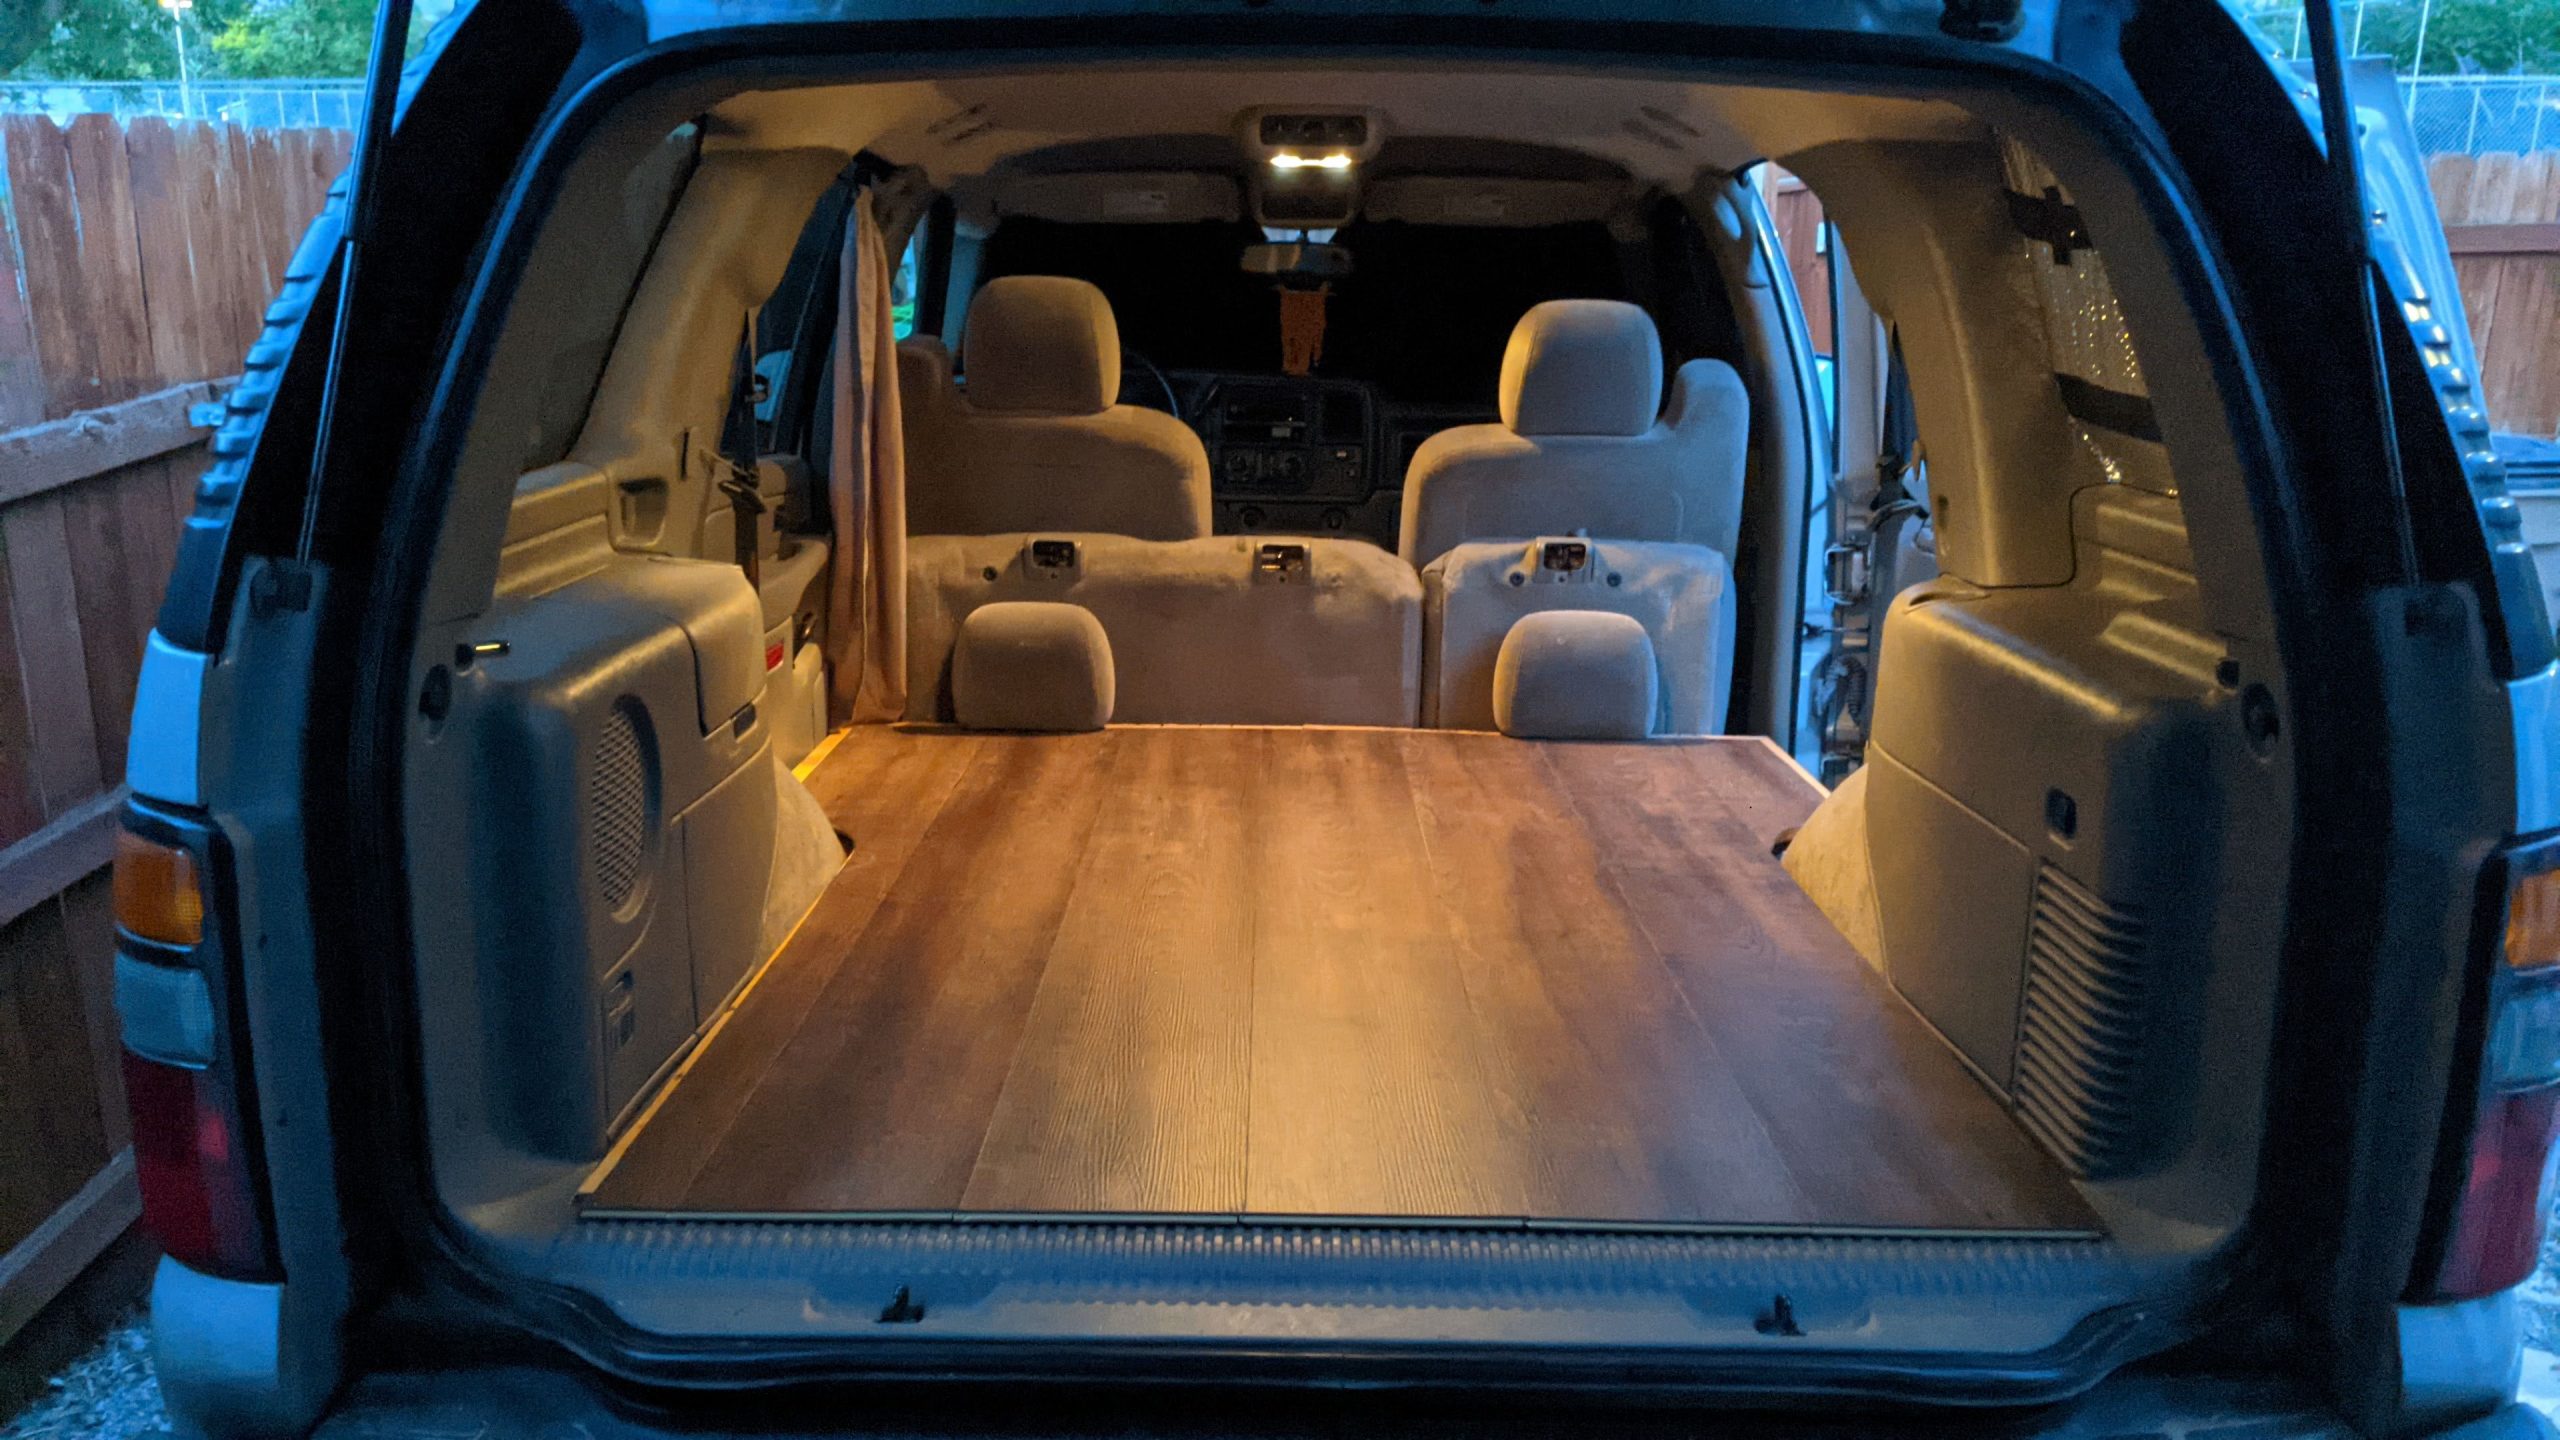
The Finished Product
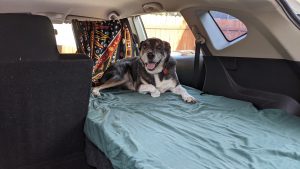
Here you can see the new (faux) wood floor with the trunk closed. I’m really happy with how it turned out! It adds a bit of insulation, a bit of sound deadening, and now I can just sweep any adventure debris right out of the trunk. I think I will keep a small brush in my Tahoe for just this purpose.
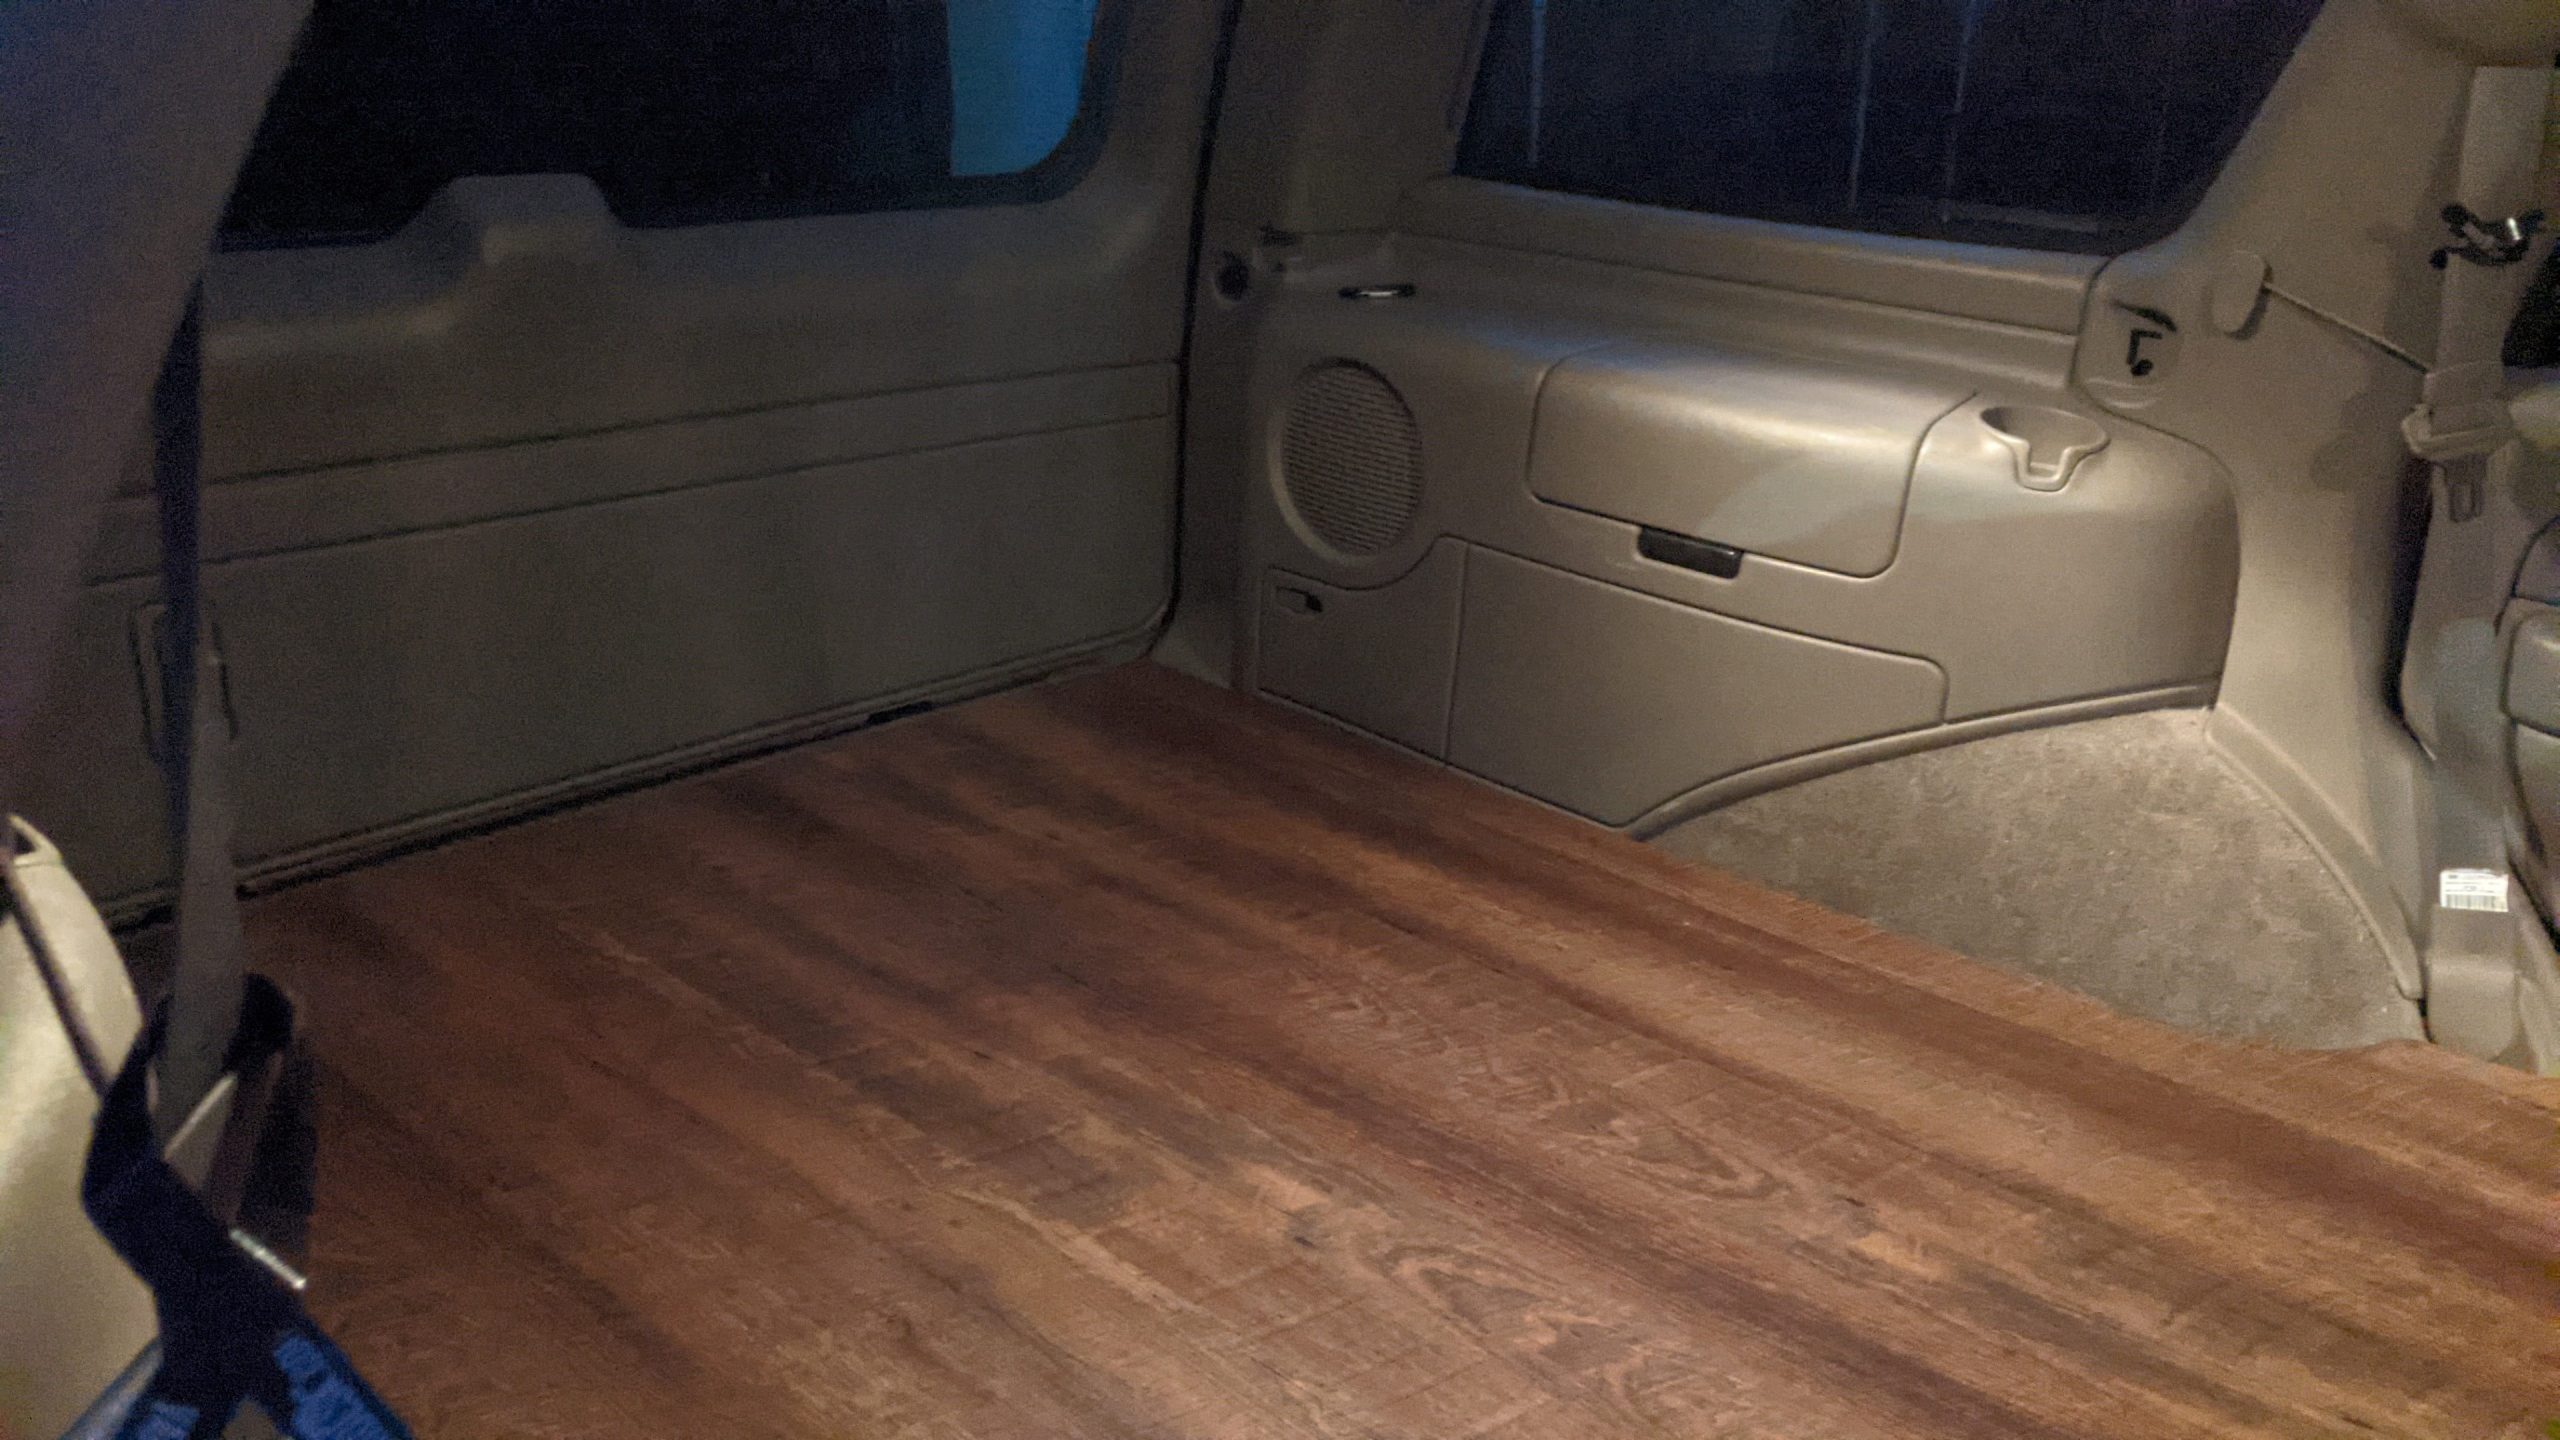
It’s also great for loading gear in and out of the vehicle. No more fussing with things getting caught and bunching up the cheap outdoor rug. Then climbing under the bed to fish something out. For the cost and time invested, I think this was a great upgrade to my existing setup.
What do you think about my Chevy Tahoe with wood flooring? Would you do something similar in your camping vehicle of choice? Feel free to drop me a comment with your thoughts or questions! Also, stay tuned for more Chevy Tahoe camper upgrades in the coming months. I’ve got some big ideas I’ve been noodling on.
And, as always, thanks for reading!

Awesome! I have a plastic office chair sheet which works ok.
I may try your conversion bed kit.
I took out the larger second row seat.
Thanks for posting. Jay
Oh that’s a good idea! I originally just had some indoor/outdoor carpet I cut to size to protect the original interior. I was worried to mess with removing the fold down seats, was it pretty easy?
Yes, a couple of beefy bolts and it can be replaced like new.
You are left with the 2 threaded studs but they only stick up an inch or so.
I like the xtra room.
Mine is 2005 so it’s prolly the same.
I can send pics…jay
Do you have templates for the shelves?