Do you ever get an idea in your head that you just can’t get out? That is how this project was for me. After several months of daydreaming, I decided to build additional storage into the back of my 2006 Chevrolet Tahoe camper conversion.
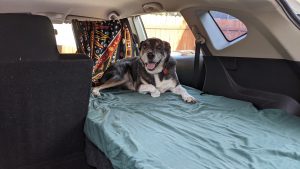
Every time I build something like this, it starts with a need. Amanda and I have been camping on and off in our Chevy Tahoe for almost exactly 2 years now! In that time, the bed I built has really held up well. However, there’s been many times we’ve been camping where we arrive at our campsite late, climb in the back for bed, and realize we have to open up the car and let all the heat out just to be able to reach that one sweatshirt that is buried under the bed somewhere.
The back windows in my Chevy Tahoe are set pretty far back above these plastic pieces of the interior that hide the rear wheel wells. This creates some space on either side of the bed where we throw random things like extra clothes or blankets. It usually looks cluttered and spills onto the bed.
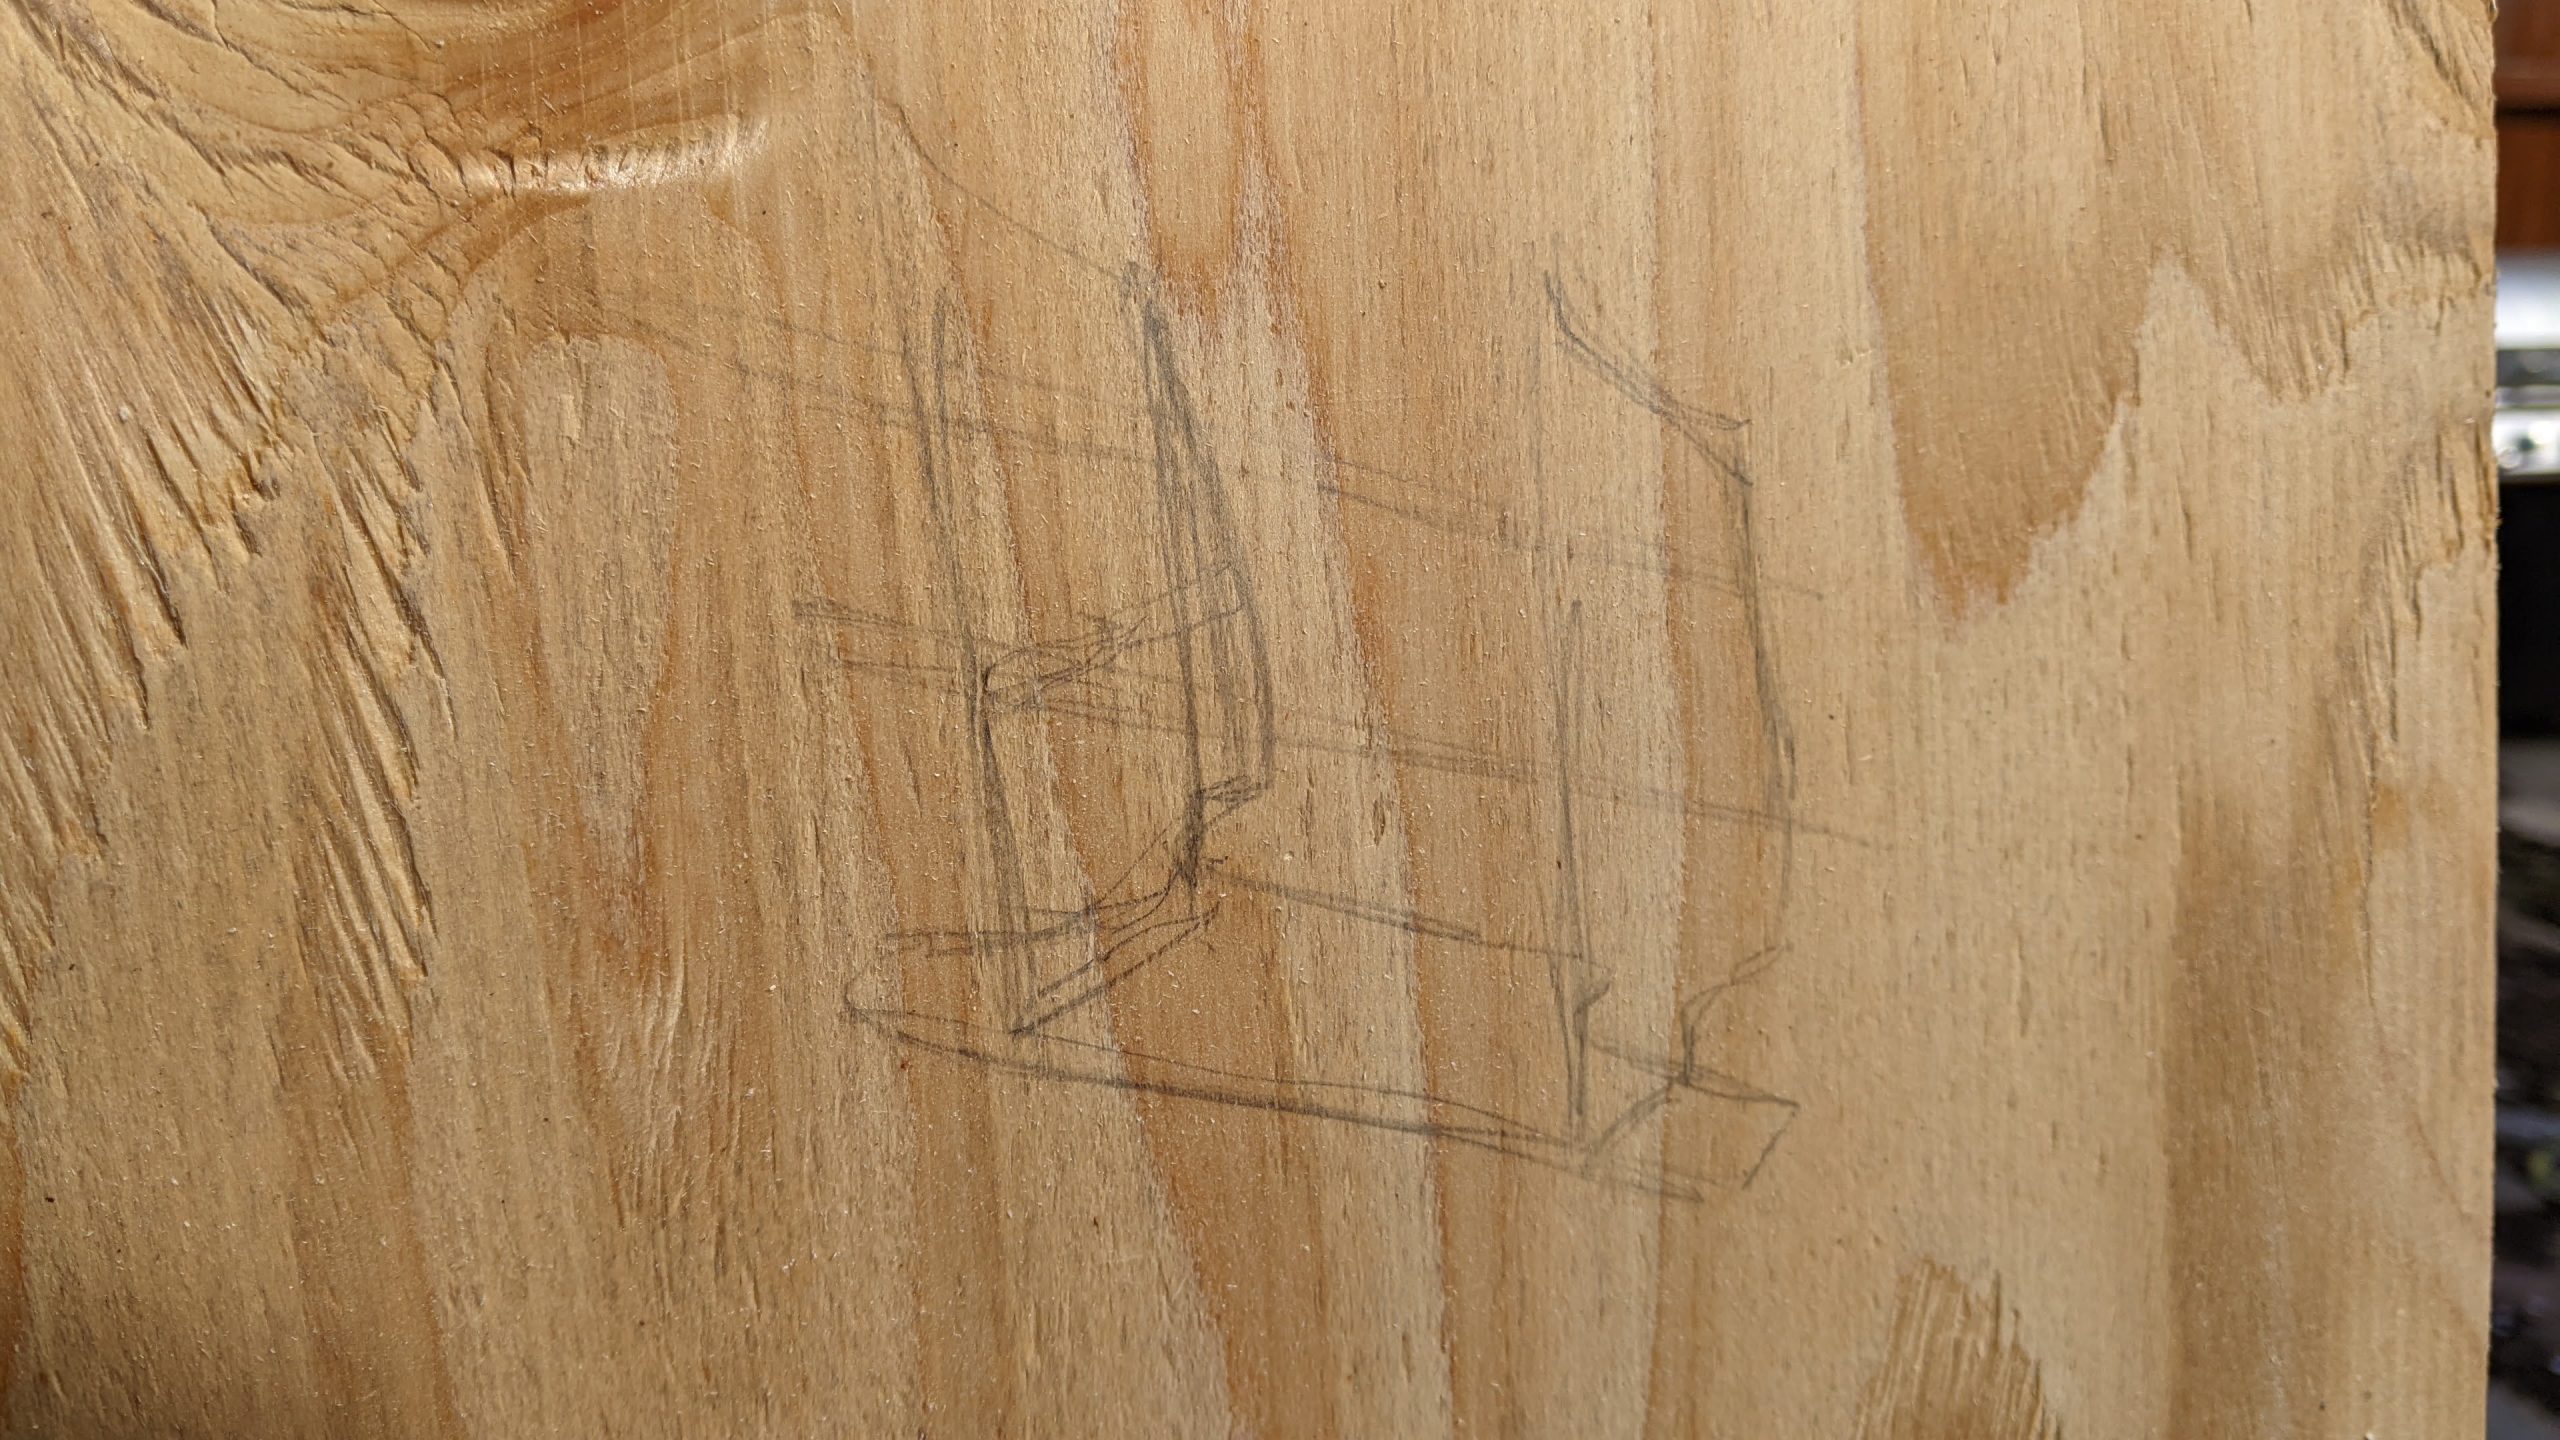
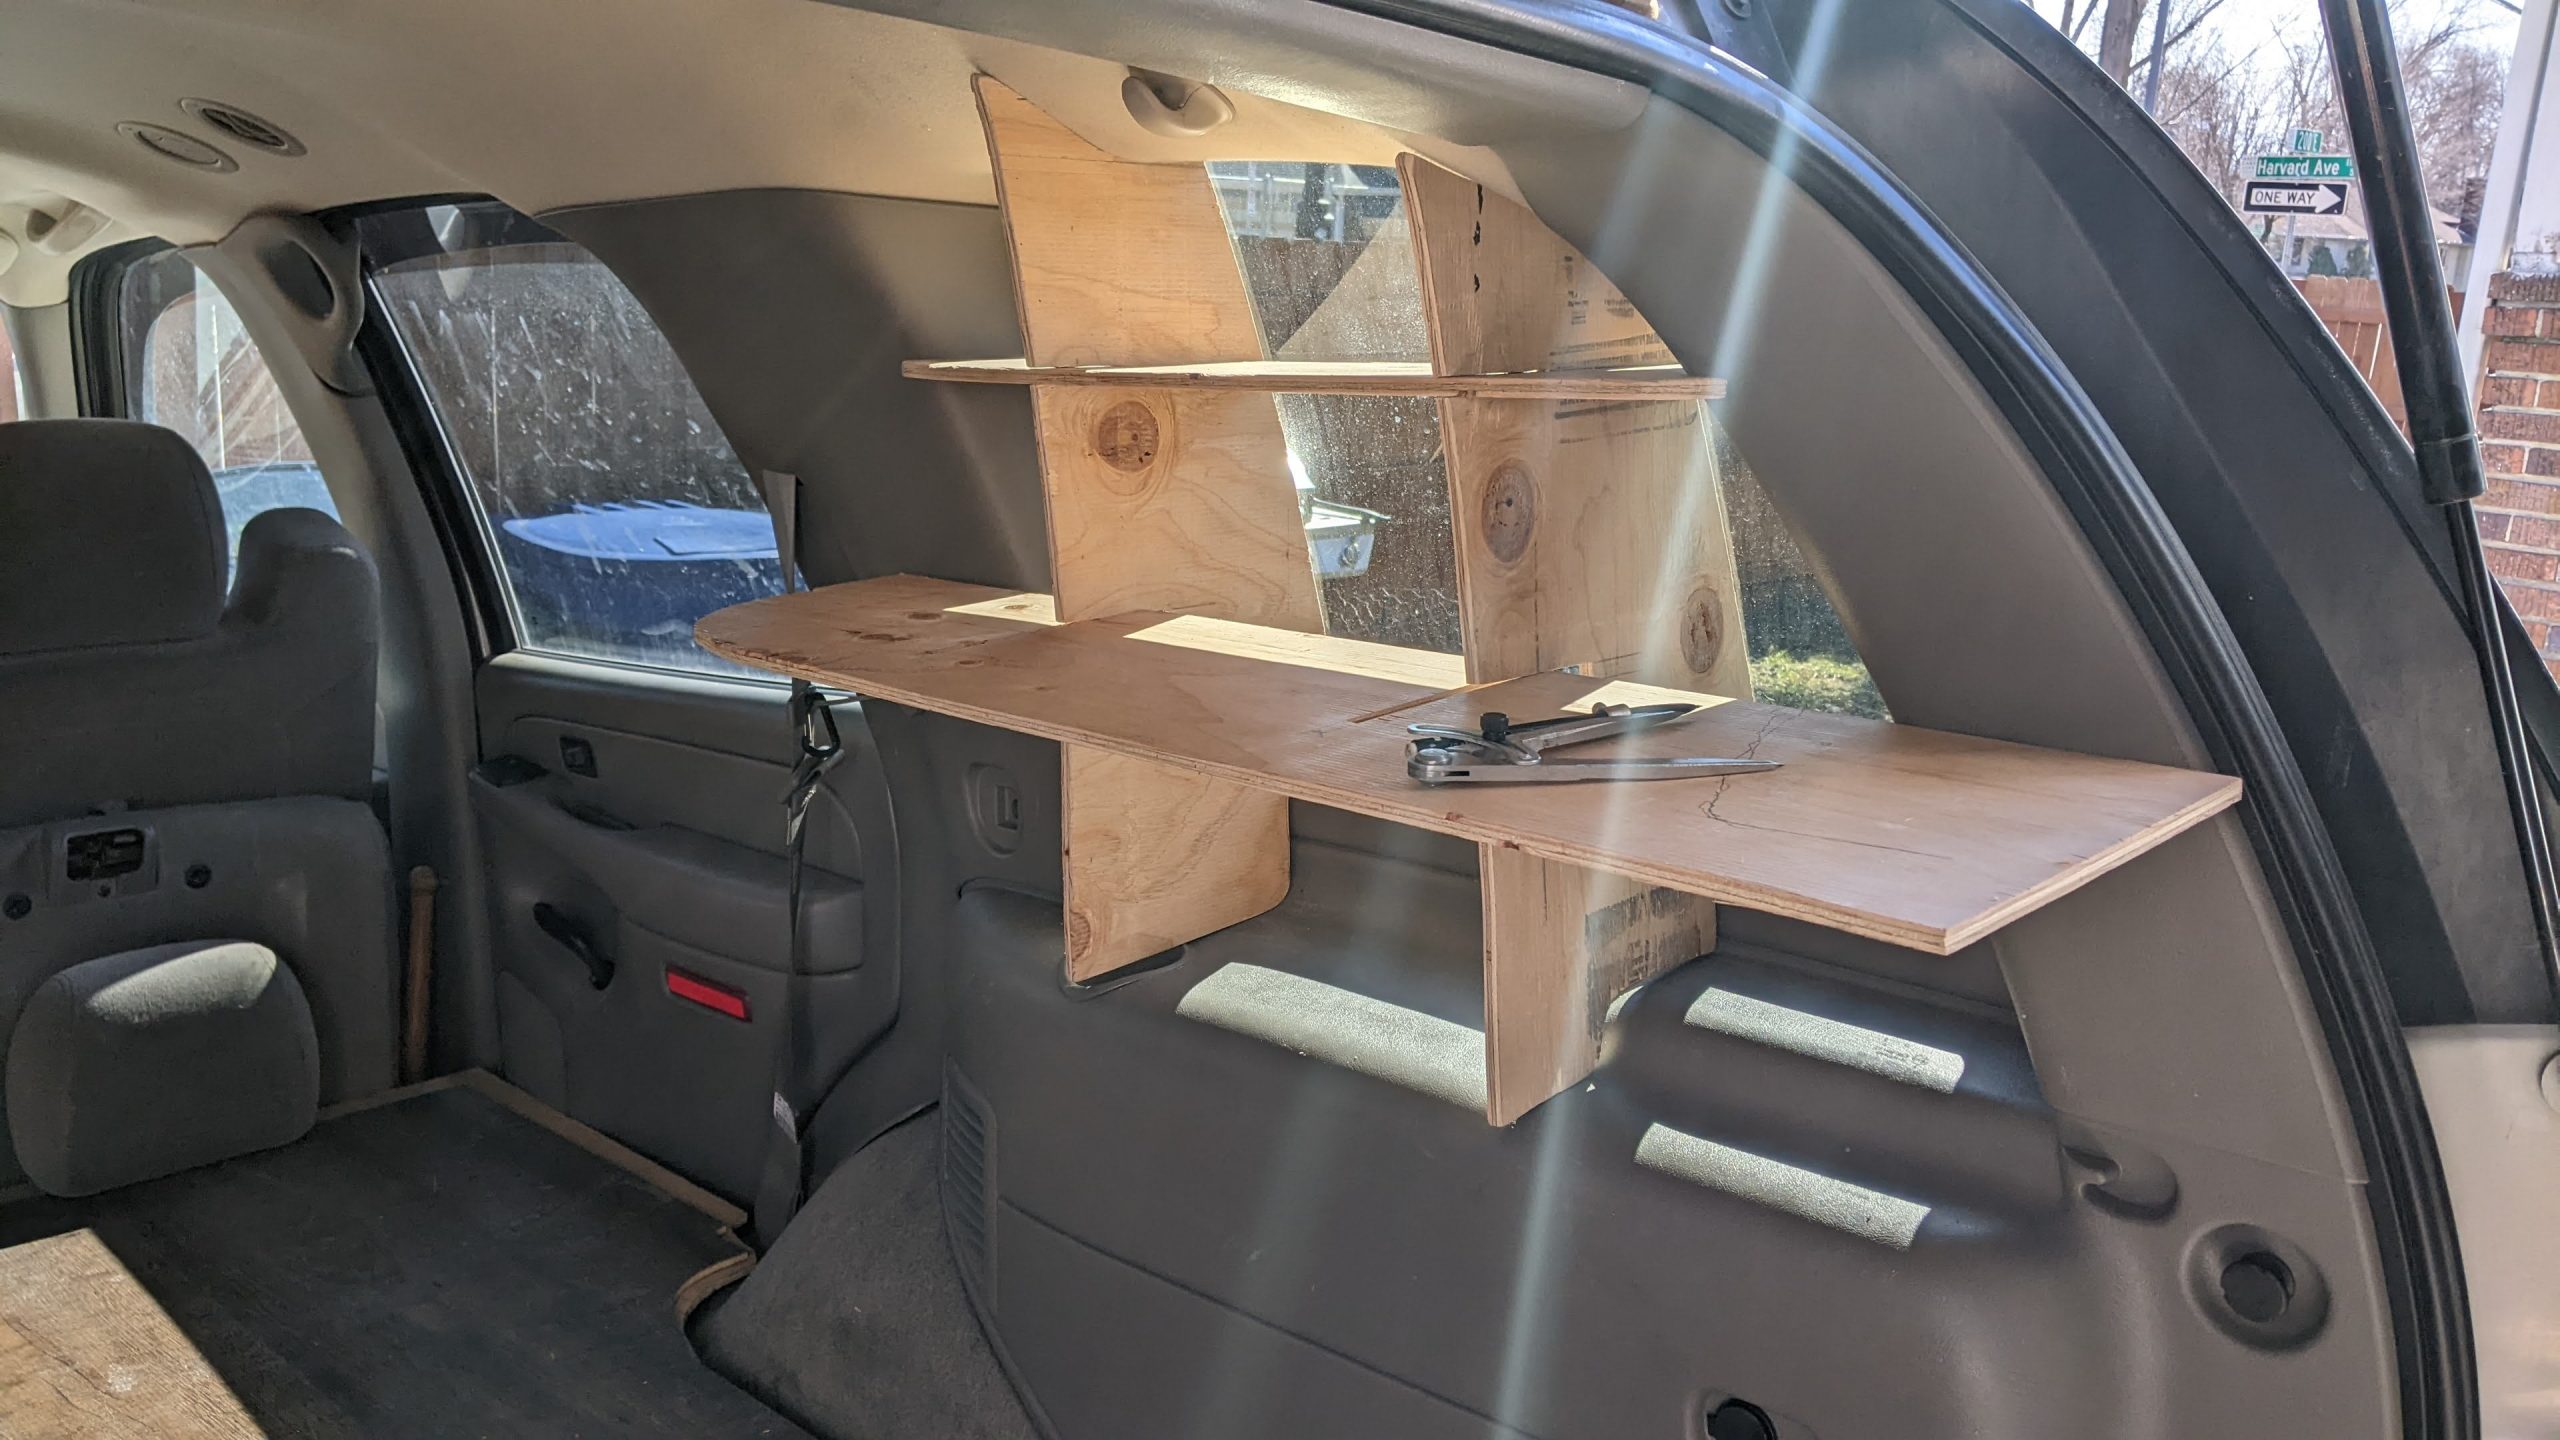
I spent a long time thinking about how to utilize the space better. After thinking about it for weeks, maybe even months, I sketched the image above on some scrap wood in my garage. The idea is a set of shelves that lock together and wedge into the rear windows. Of course, they won’t hold any serious weight, but it could hold loose items, clothing, snacks. Anything we want to access while laying on the bed.
Cut First, Measure Later
With my drawing to work from, I started cutting up a piece of 3/8″ plywood I had leftover from another project. With just a Harbor Freight jigsaw and some trial and error, it wasn’t long before I had my first piece. Here you can see the fit after probably an hour of cutting, testing, cutting, and testing. If you zoom in, you can see the pencil lines for the planned shelves and some of the excess I would cut off.
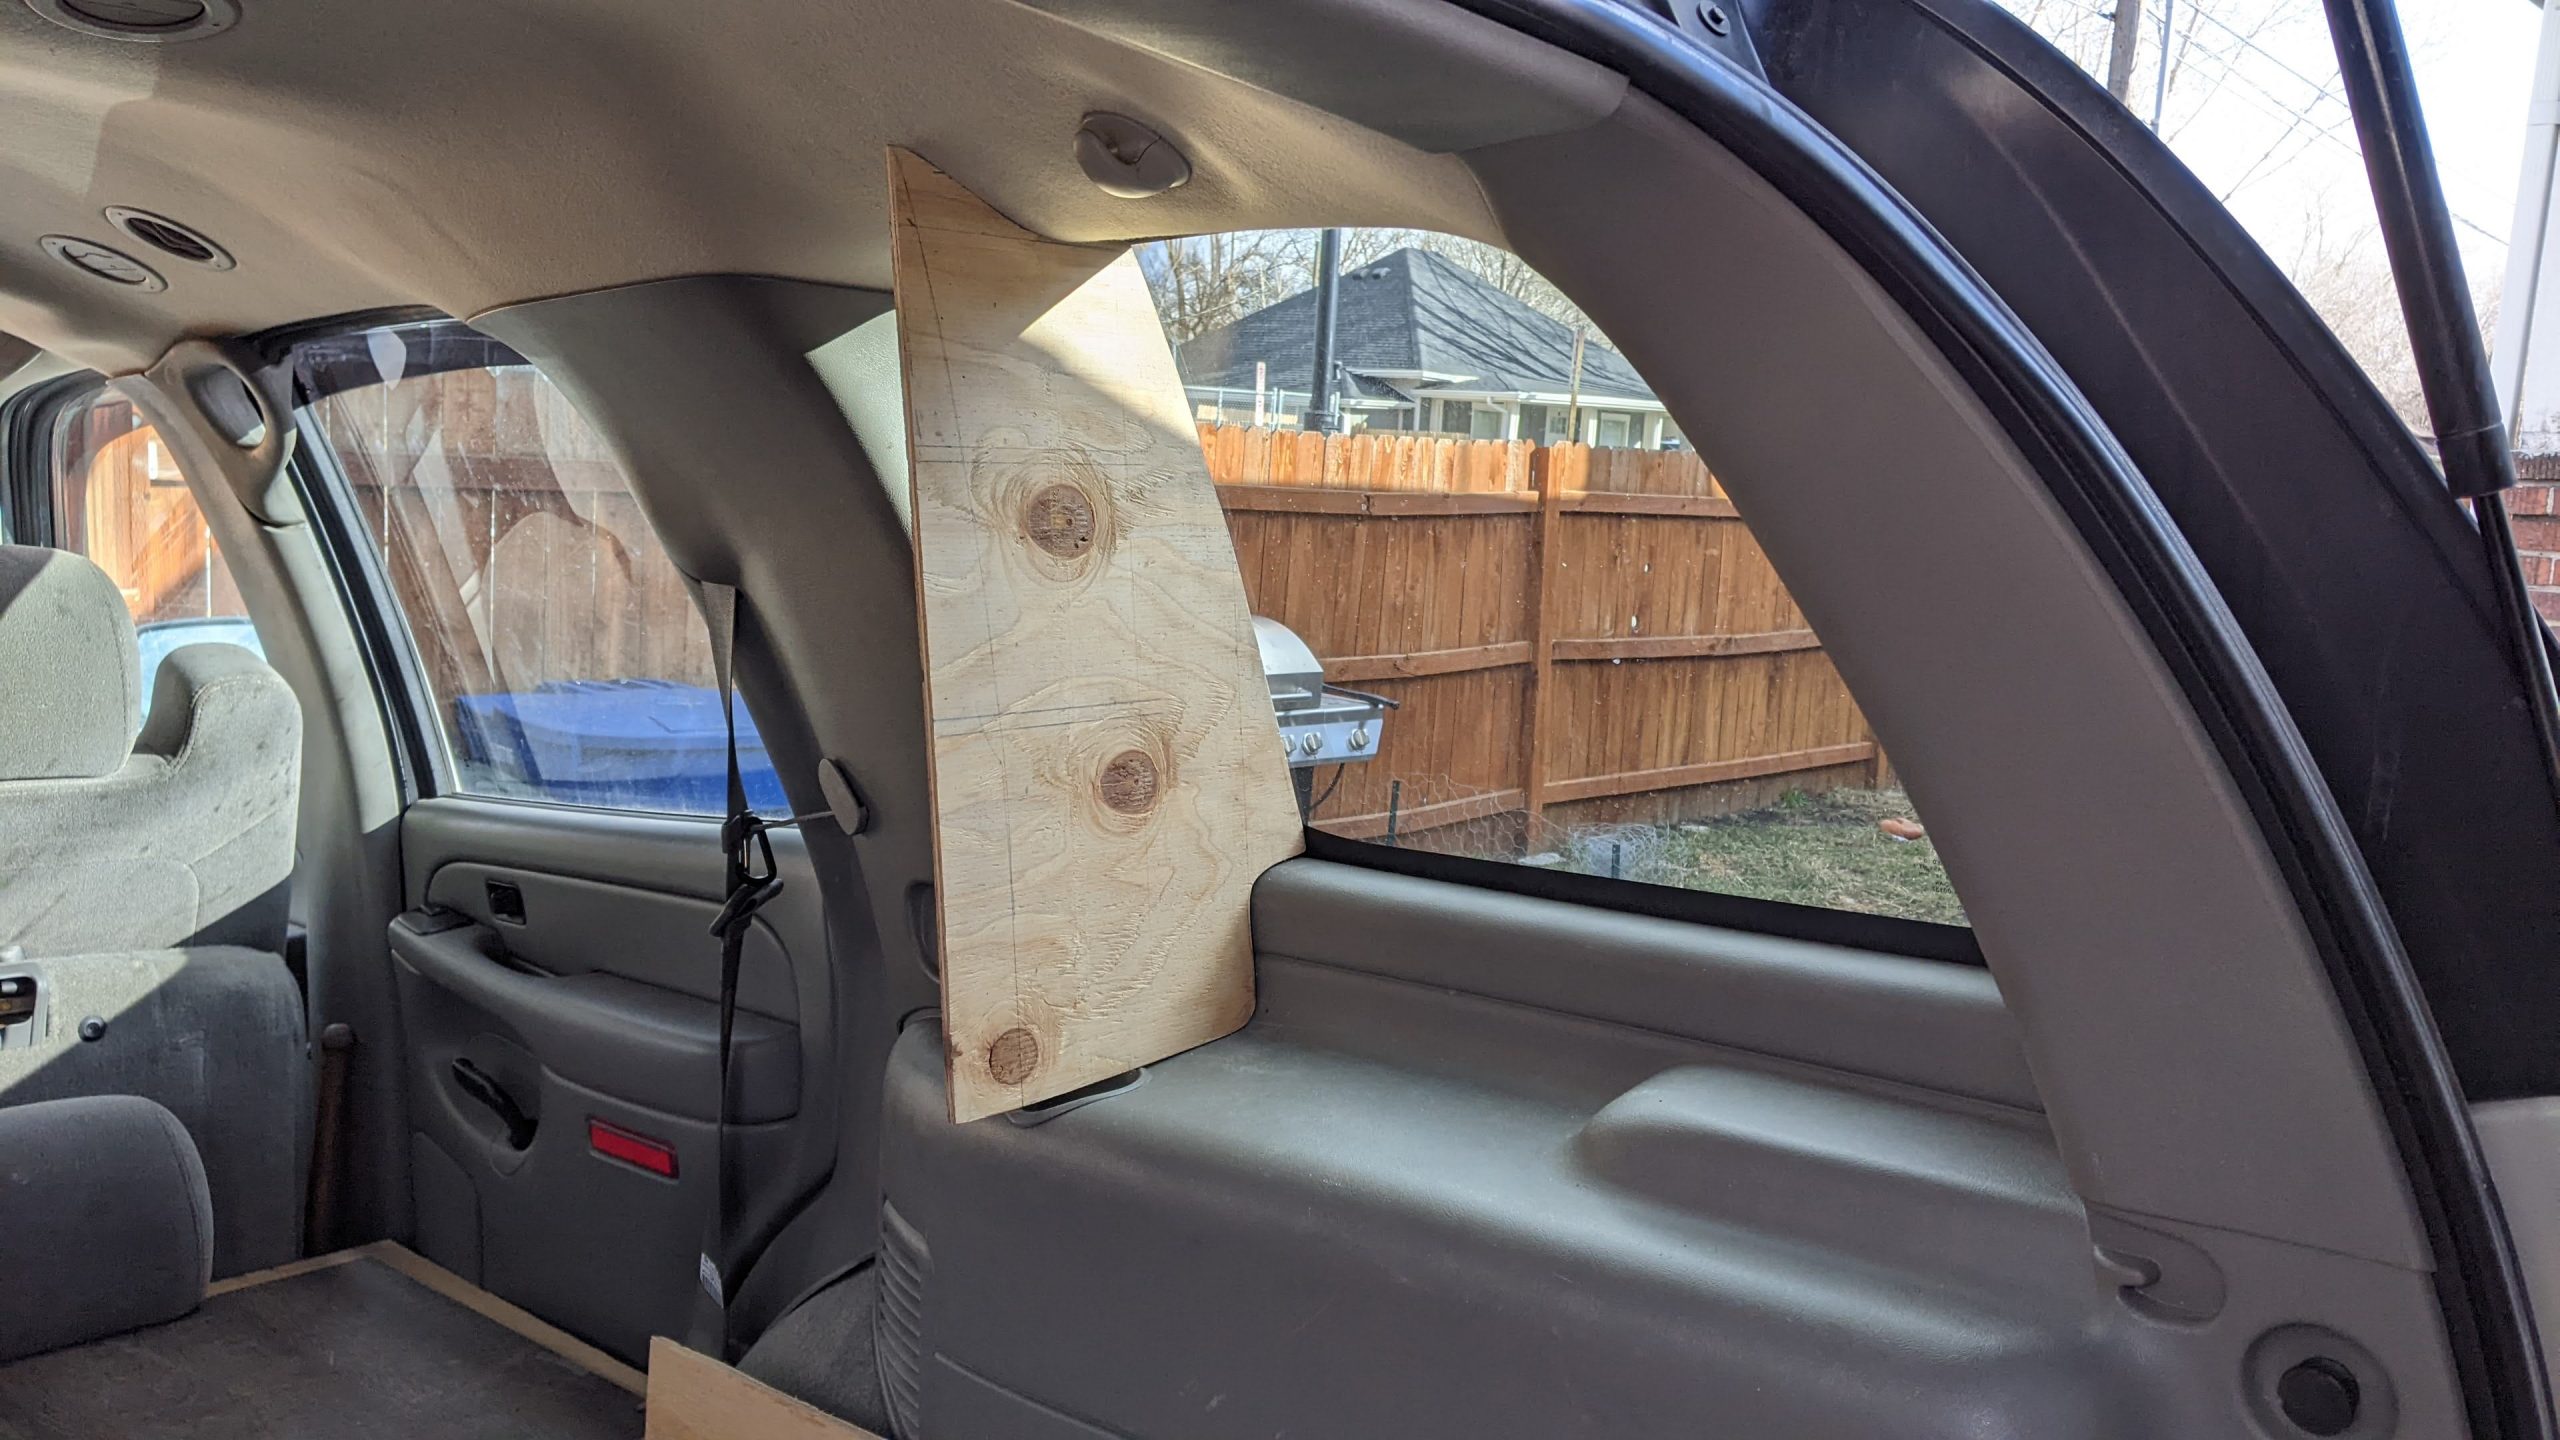
This was the longest part of the project. Getting these first pieces to fit the way I wanted was a trial in patience. It was also a trial of whether or not this was even feasible. Once I got that first piece fitted, I could tell it was wedged enough that it should stay in the window. The second vertical piece had to be a little smaller because of the curve of the roof. There was also that bump on the bottom I had to fit it around.
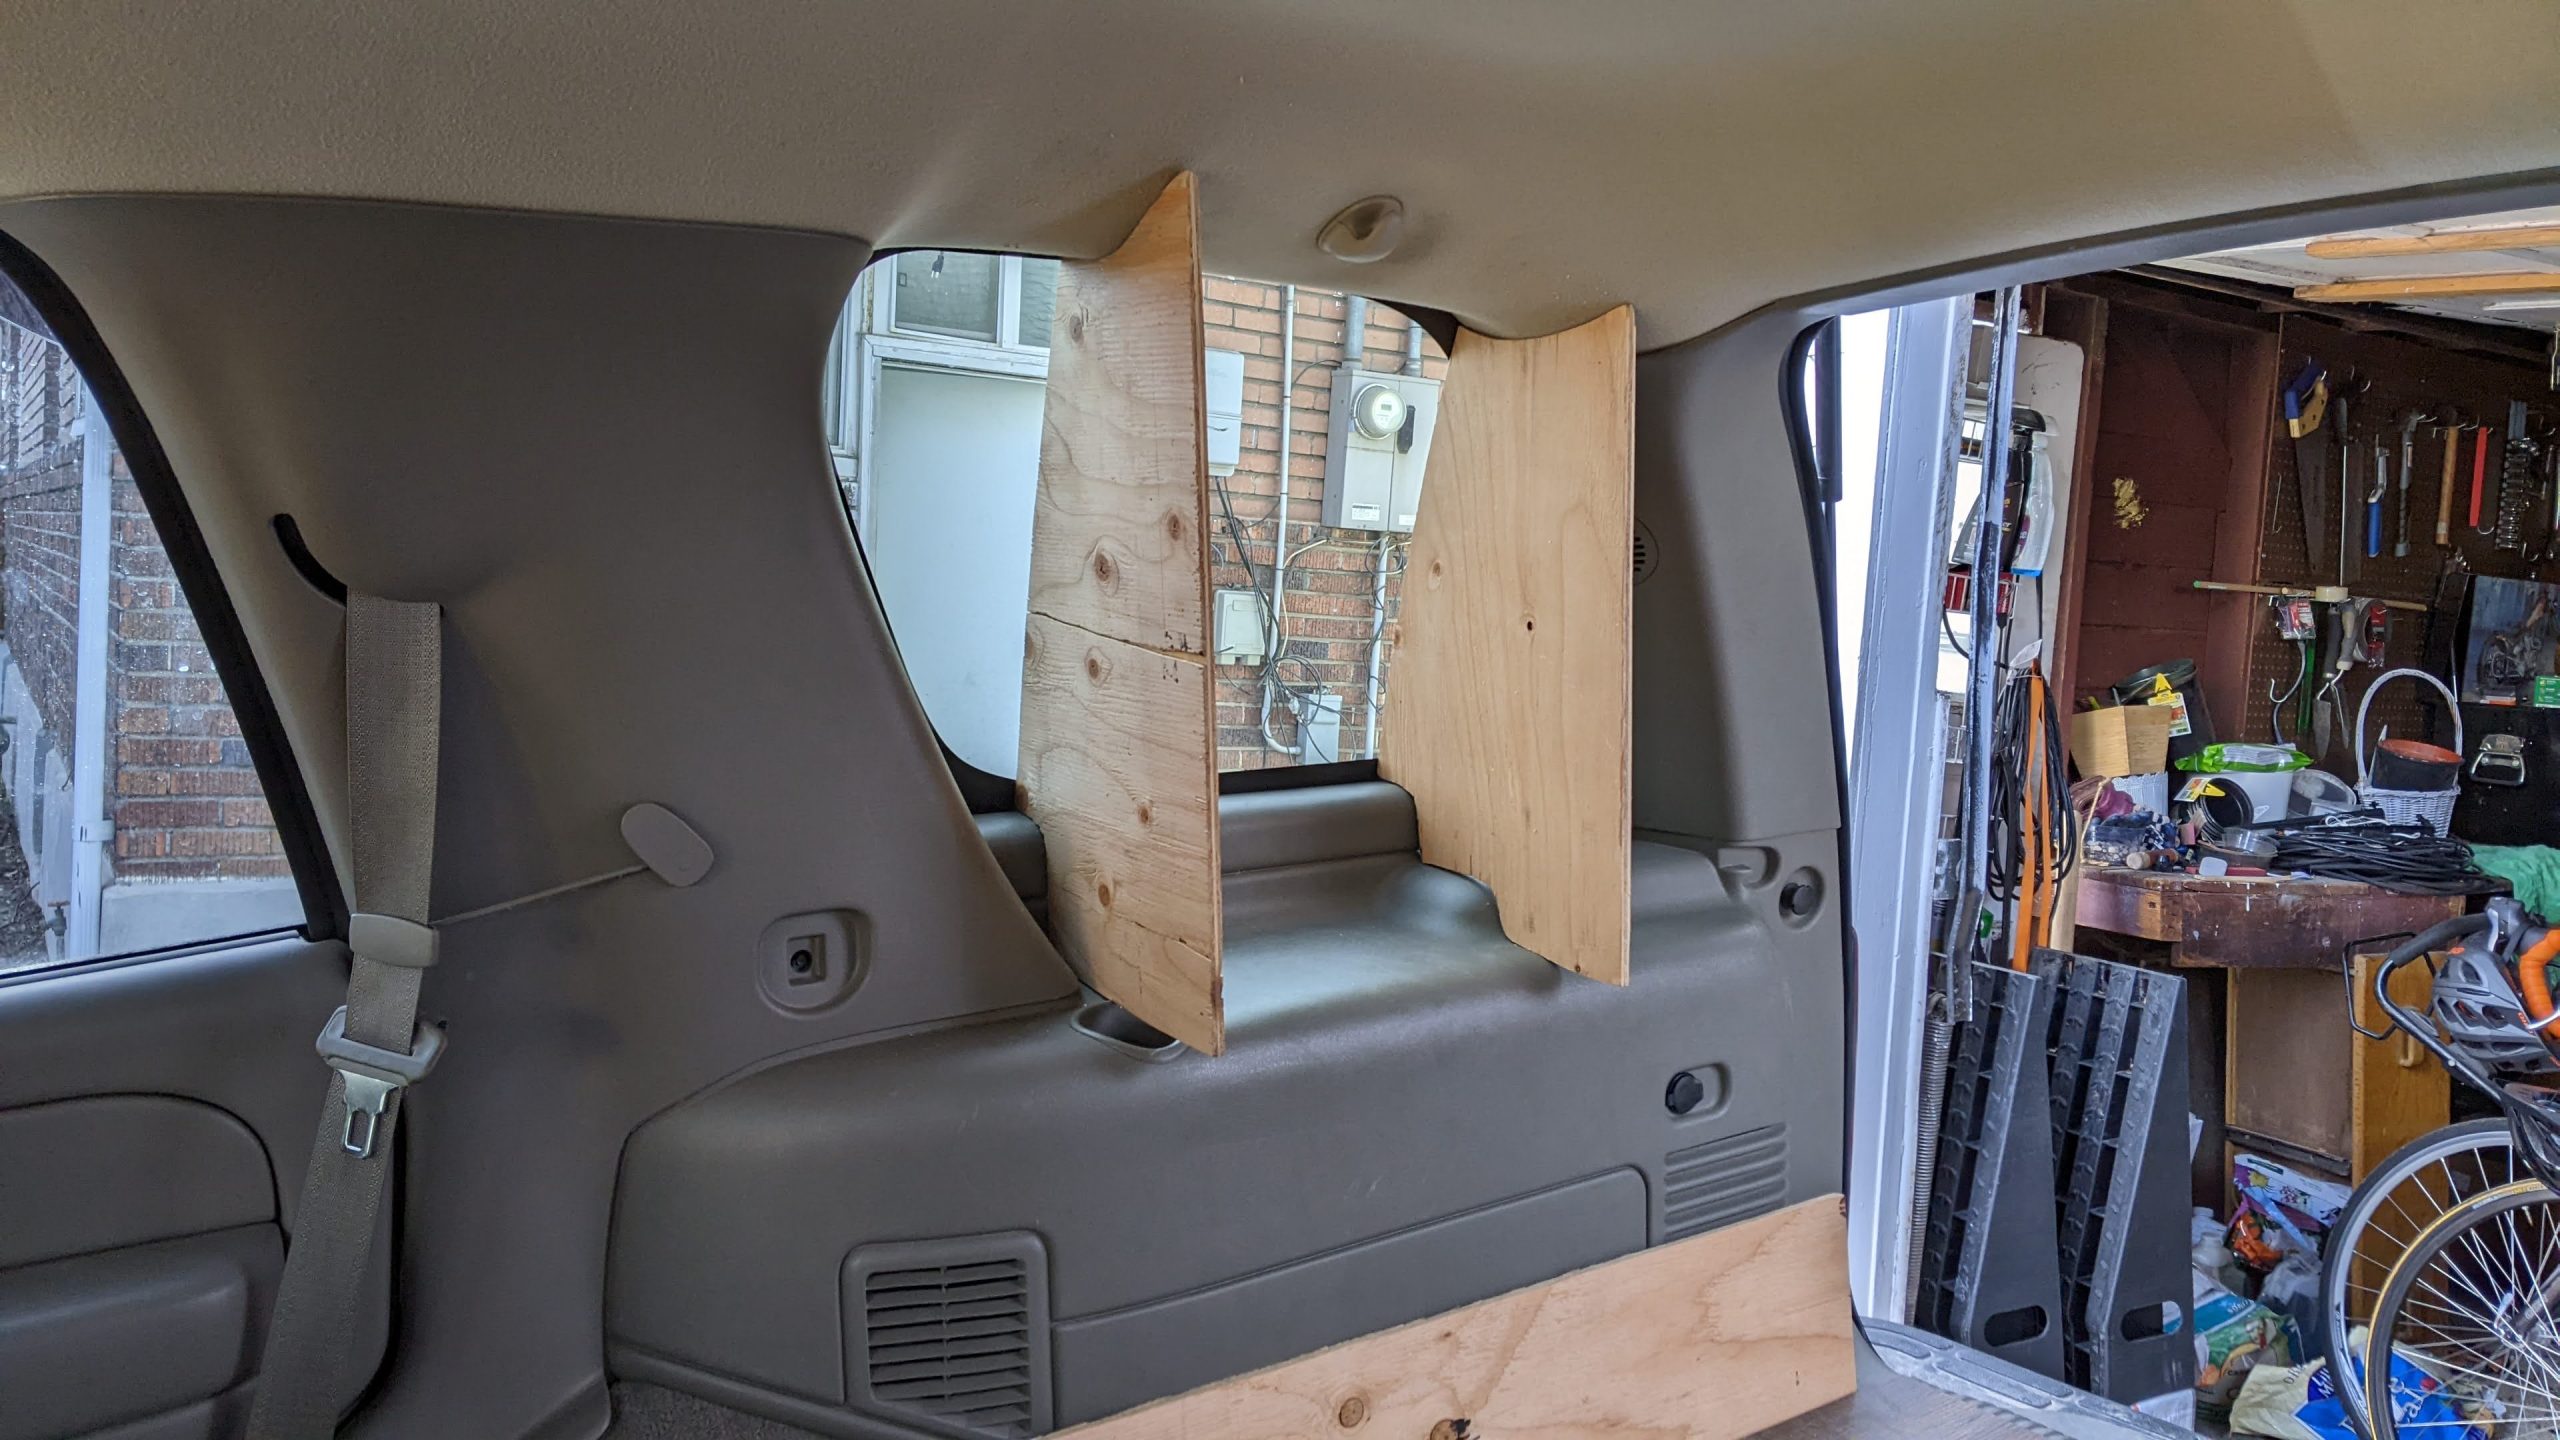
Above you can see the second piece fitted. My biggest concern with this project is that the shelves would fall out when the car is rocking side to side. I do a lot of off-road driving and anything that isn’t secured tends to slide all over. In the picture above, you can see the headliner curves upward where it meets the back window. I cut my shelf pieces to fit this curve which keeps them secure once they’re wedged in. Thanks Chevy!
It’s Shelvin’ Time
At this point I was feeling confident my shelves could really work so I started in on the shelves. Unfortunately, I stopped taking thorough pictures but feel free to leave a comment if you have any questions!

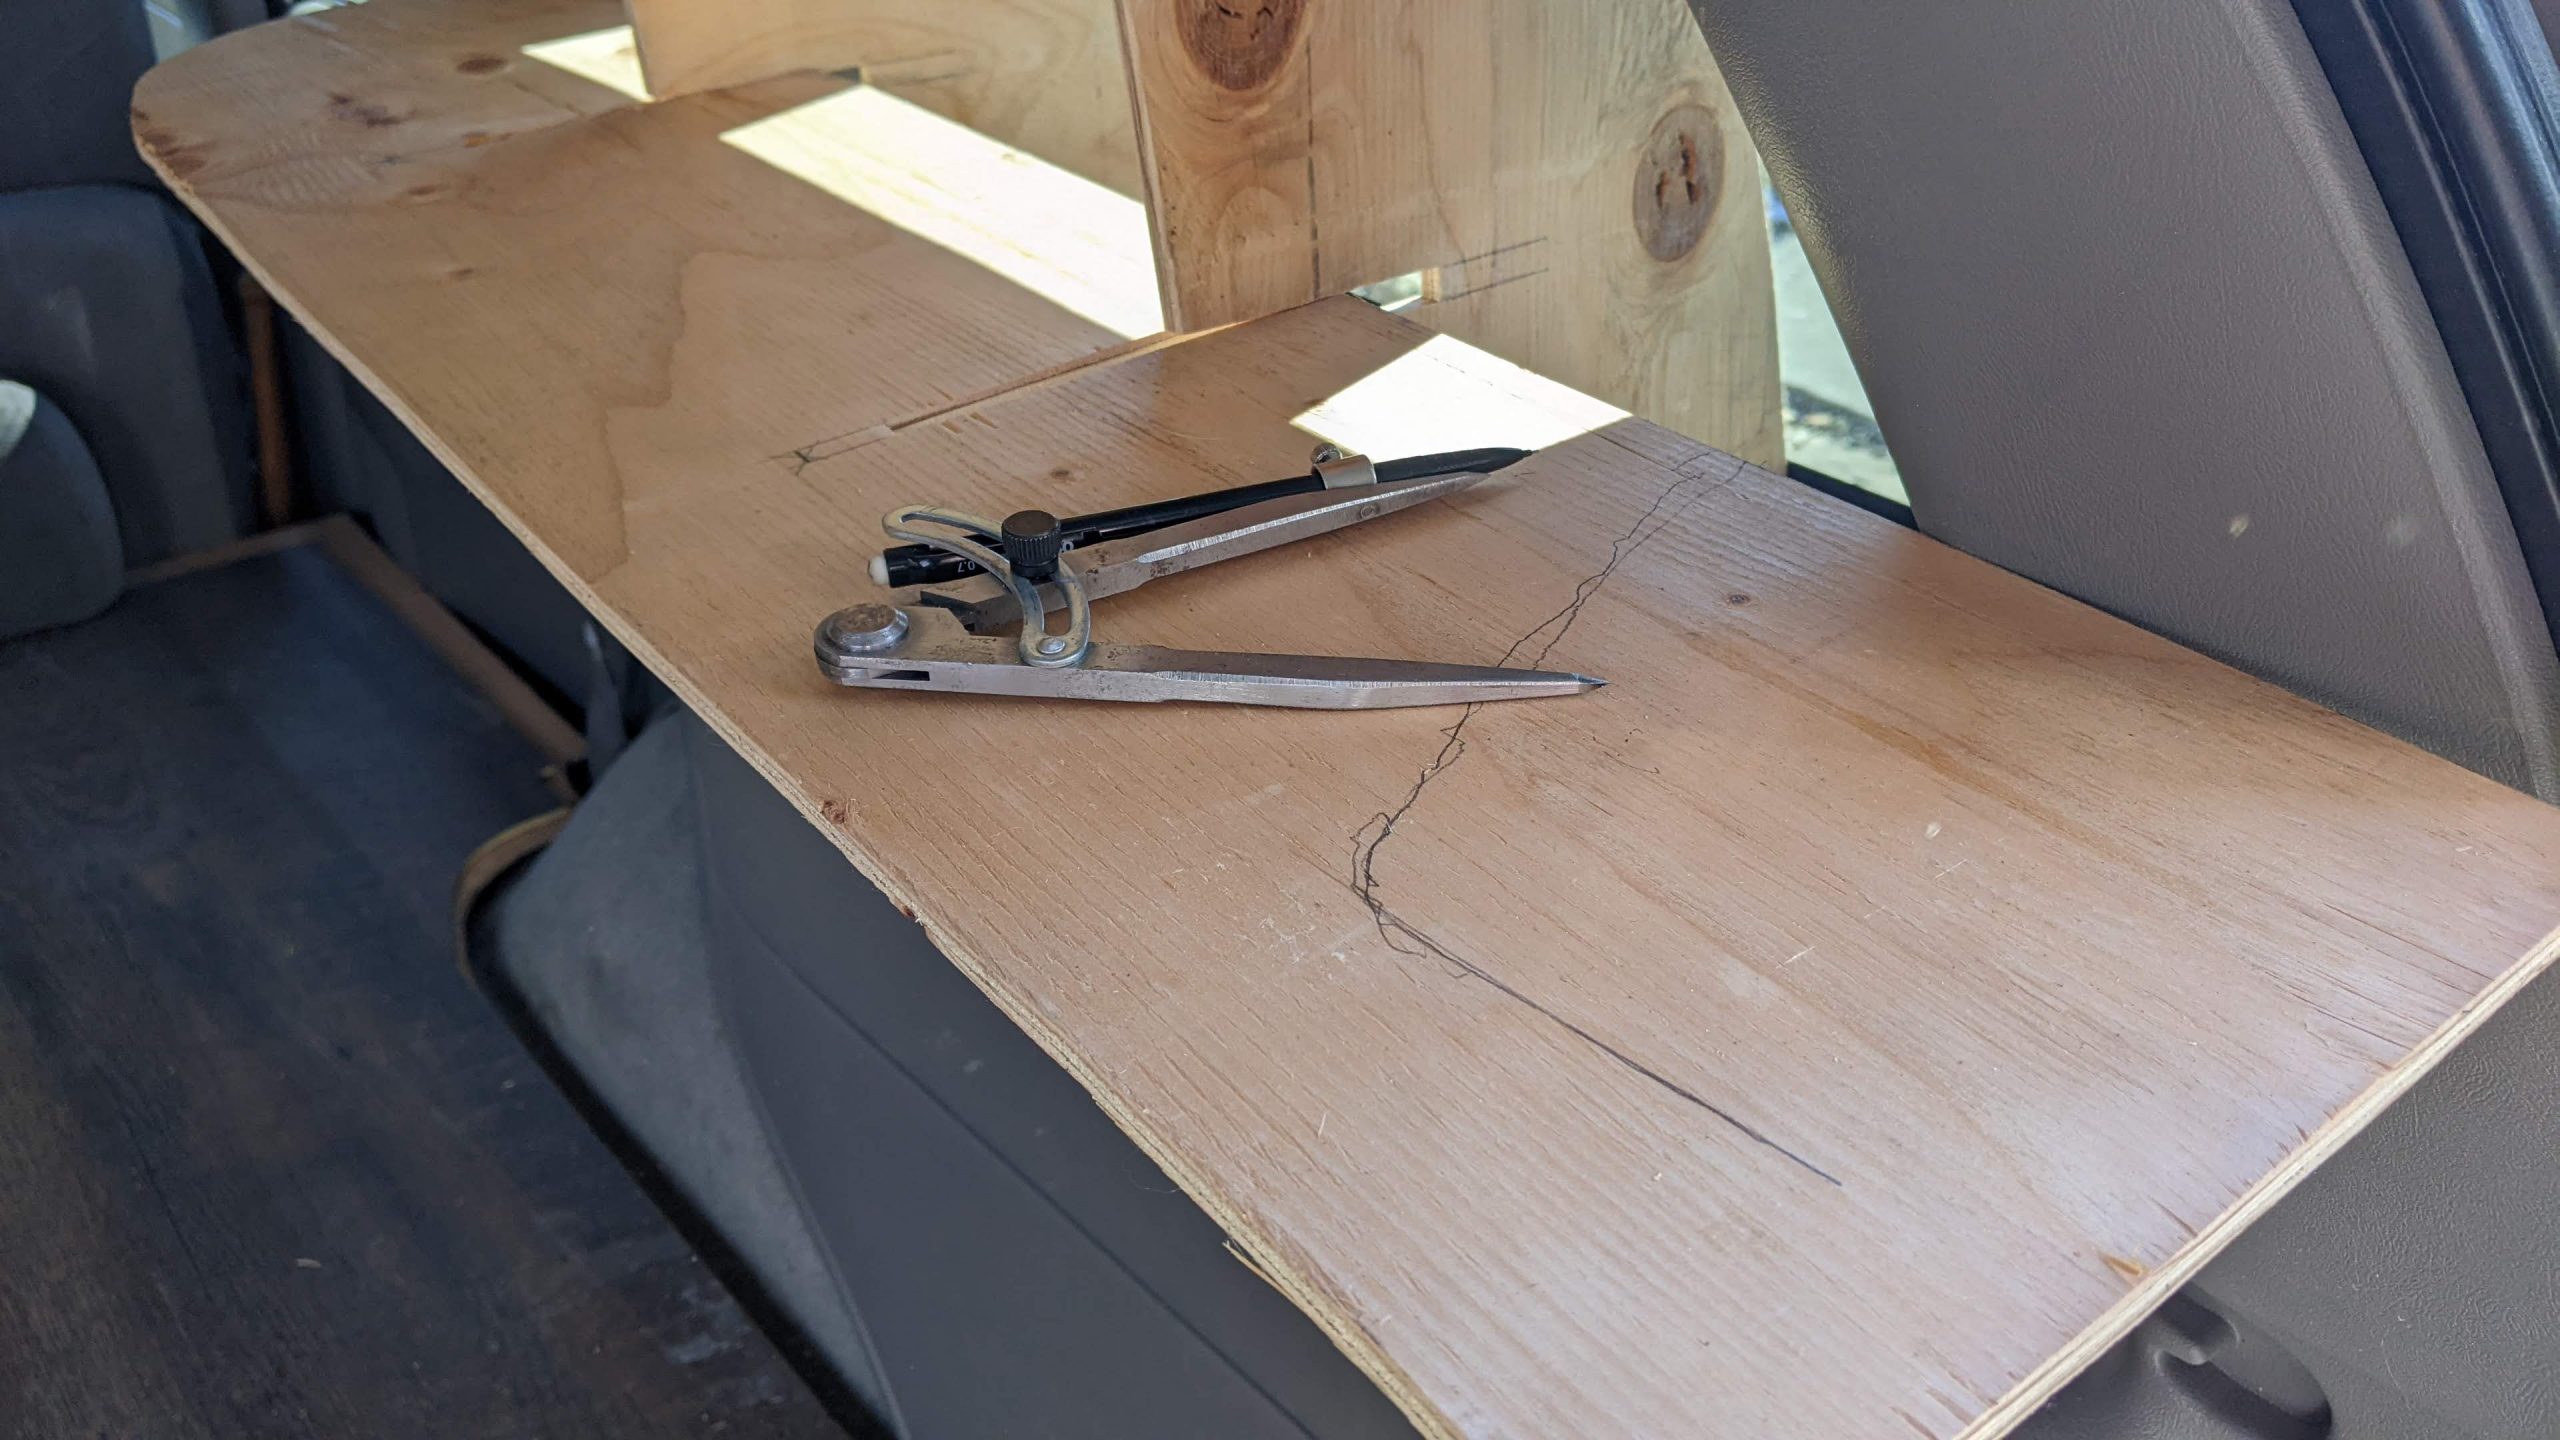
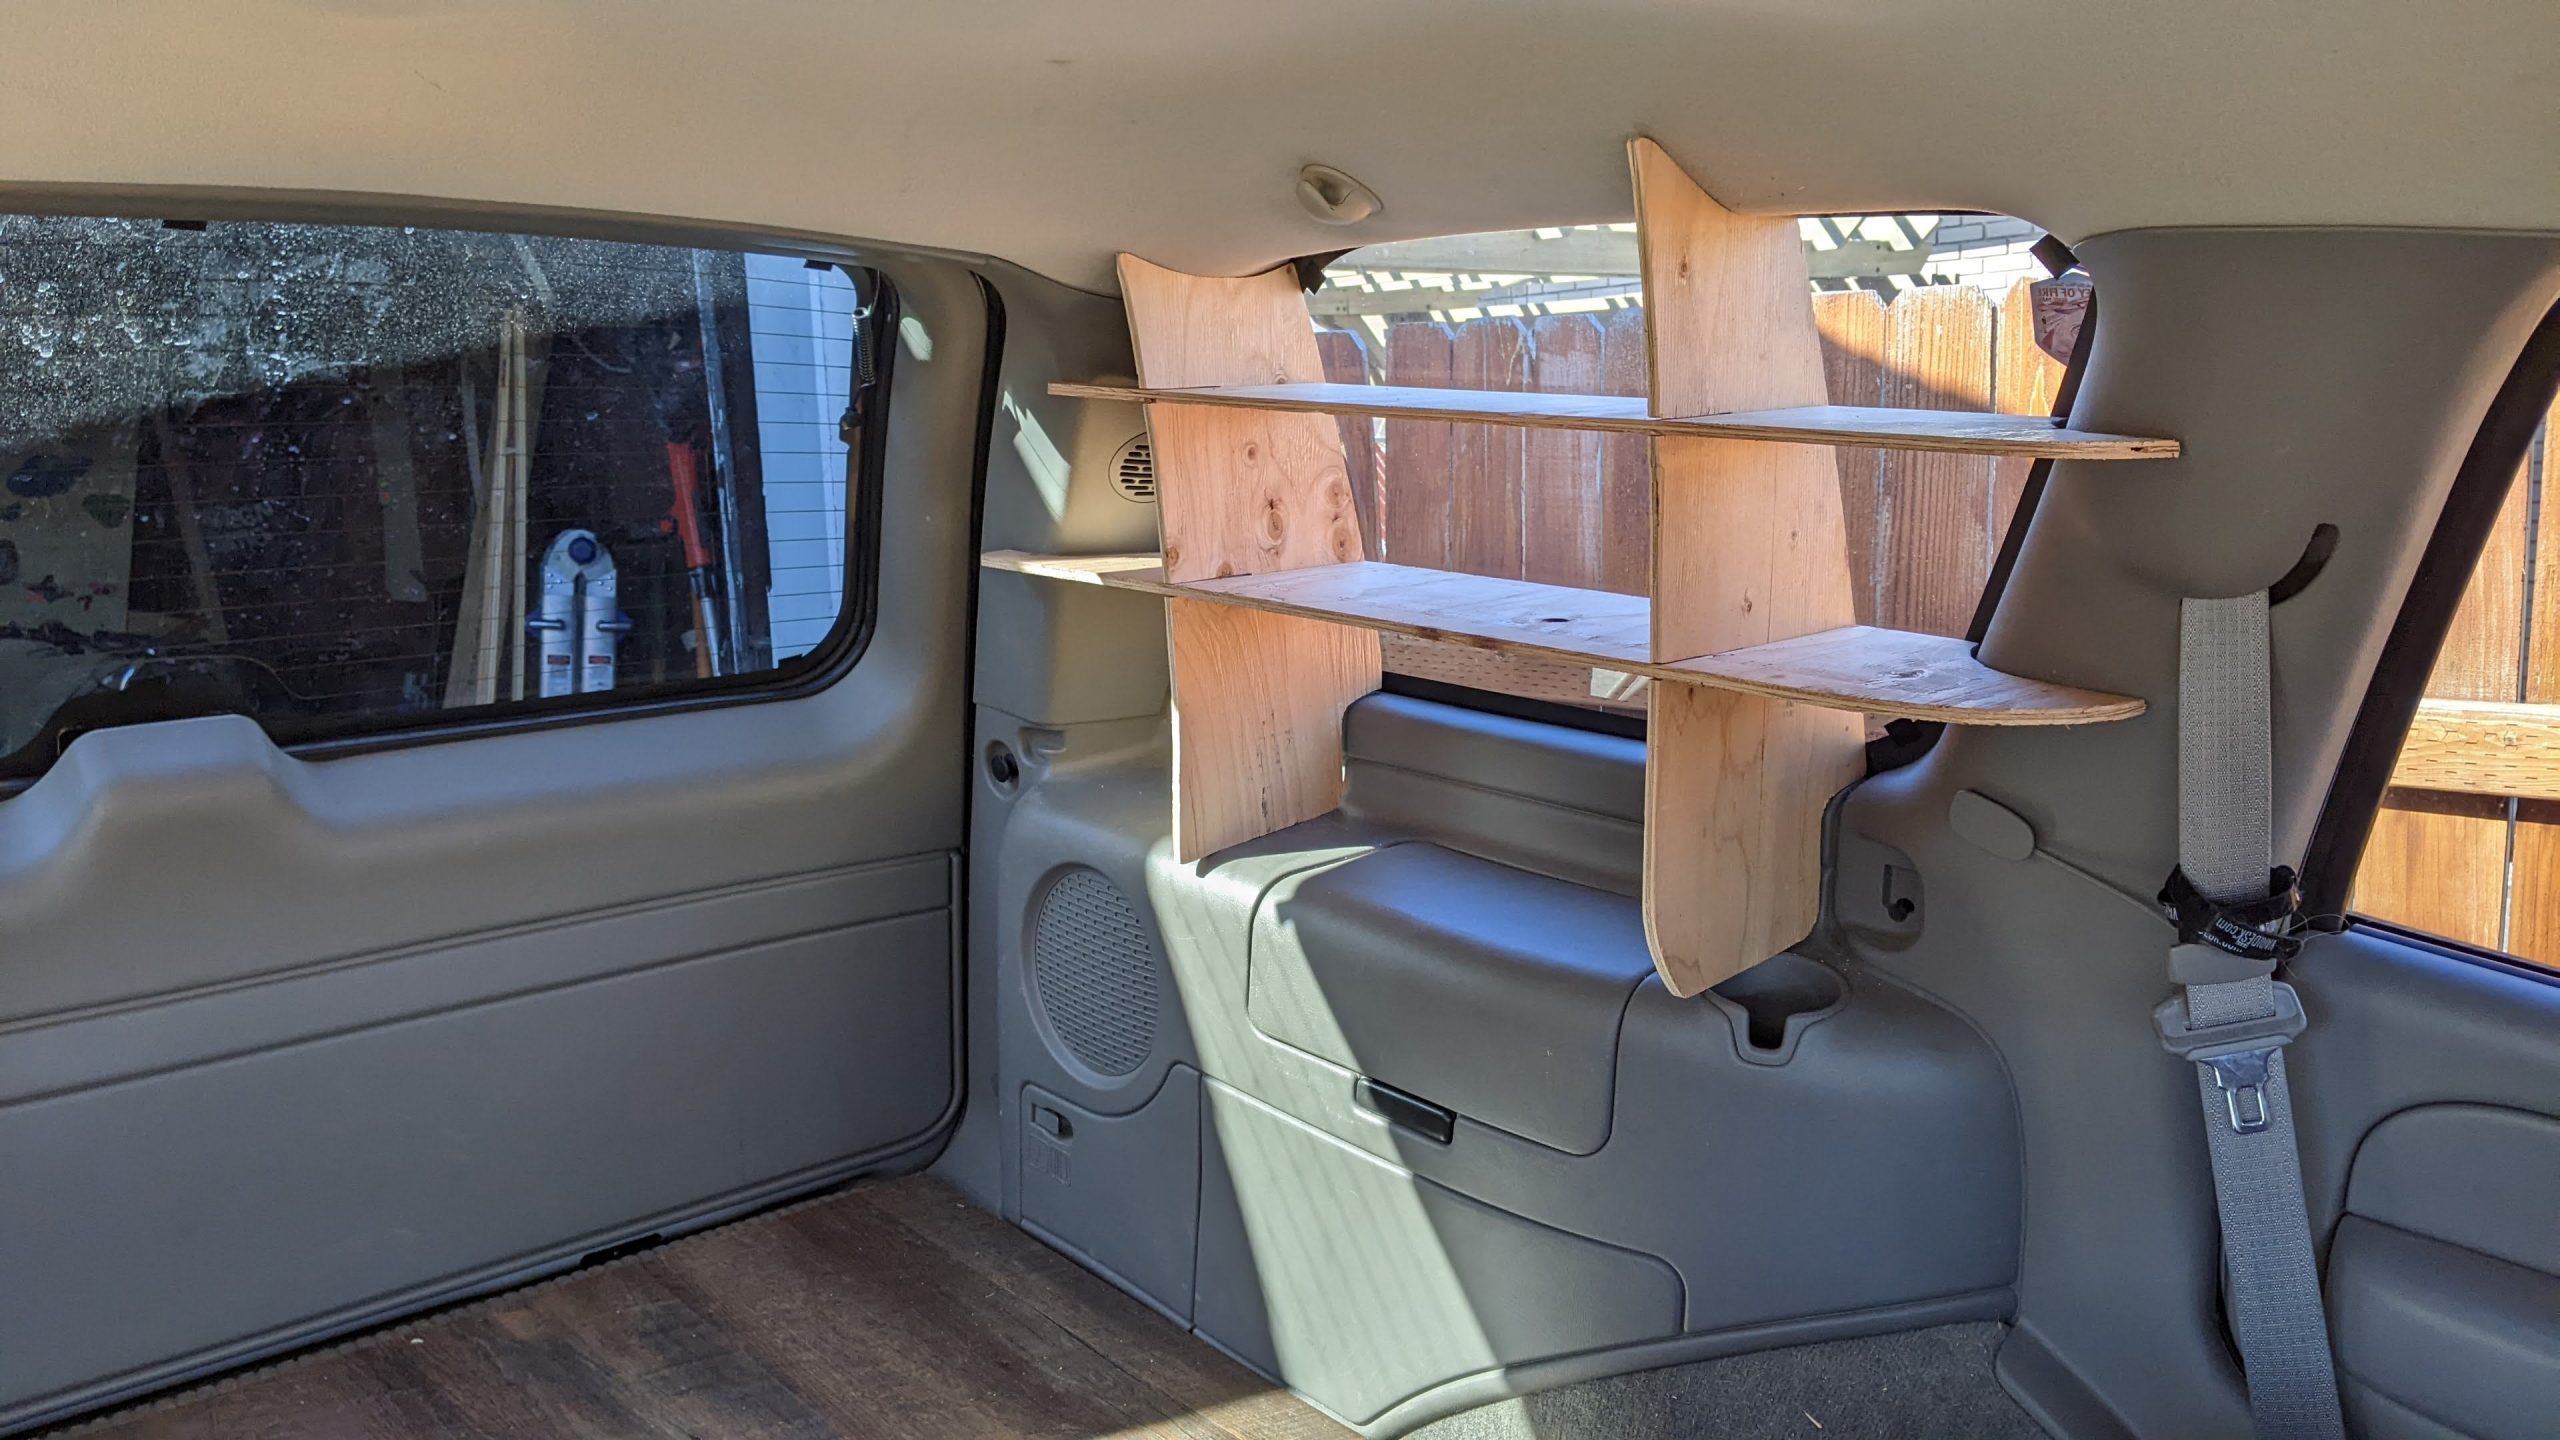
The first shelf was more trial and error again with my trusty jigsaw. I measure out where I wanted the shelves and cut slots into the two vertical pieces. Then I cut slots in the shelf piece so they could all slide together. The trickiest part is scribing the shelf so it fits into the dimensions for the window. Especially since the window is not squared off.
After I got the first shelf how I wanted, I started on the second shelf. You can see in the pictures above some of my scribing process as I slowly got the shaped dialed in. This was a continuous process of cut, test, measure, scribe, cut, and test again. I’m really happy with how the shelf wraps around the sides of the vehicle’s window. I also maximized the size of the shelves without encroaching on the sleeping space too much.
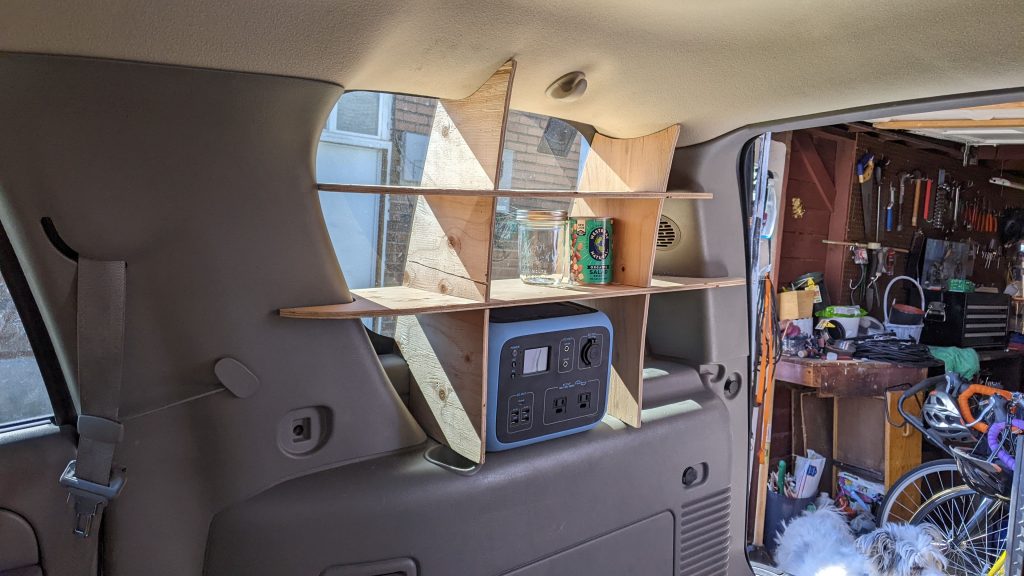
One side is done! Above you can see a test fit of my Bluetti AC50S power supply, a can of beans, and a mason jar I had on hand. All pretty typical things we might bring camping with us. Everything fits great and it barely moves. You can really wiggle the shelves around and they don’t fall out of the window.
Shelf Numero Dos

Now that one side is done, the second side came together way quicker. Once again, I wasn’t taking as many pictures but the driver side shelves were built on the same premise. I started by tracing both vertical pieces and made copies. The driver side has slight differences, particularly there isn’t that little bump on the bottom part of the smaller vertical support.
The other difference is that the window is wider than the passenger side window. Unfortunately, this means I couldn’t trace the shelves. But it wasn’t too difficult to cut some rough shapes and clean them up with my scribe and cut method.
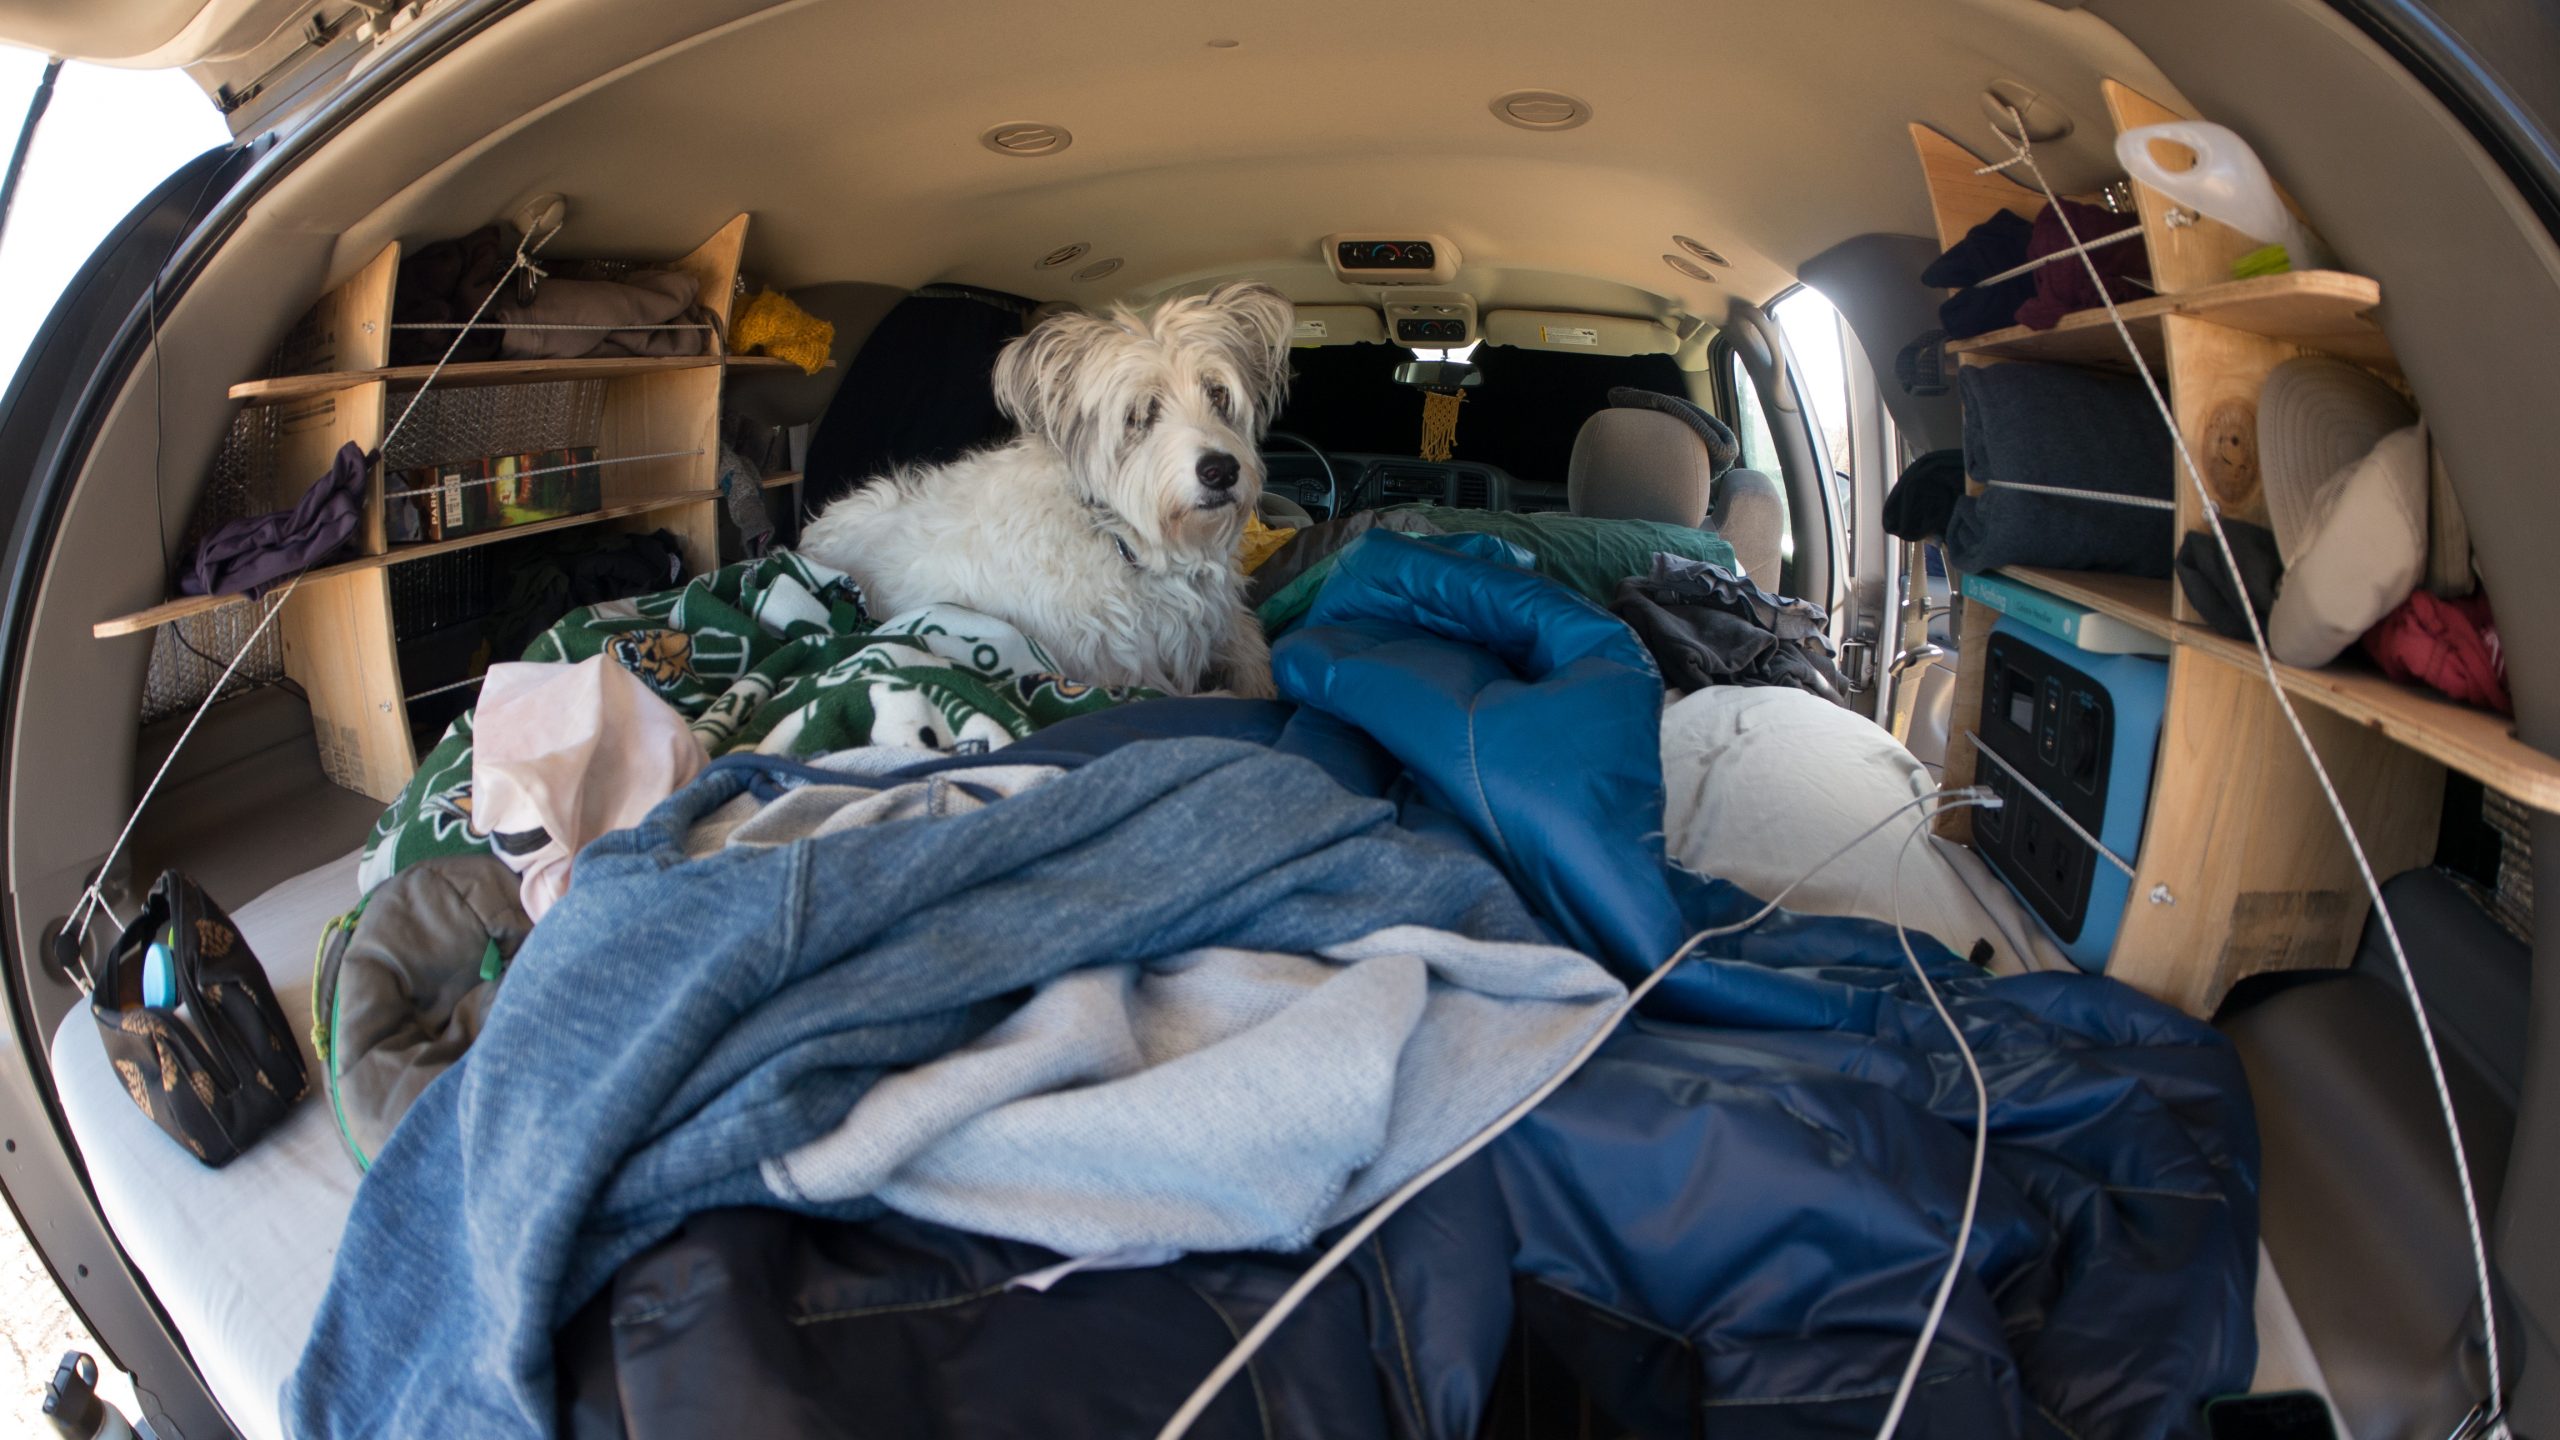
In less than half the time of the first shelf, I was done with the second. Check out all the storage space in the picture above!
Final Thoughts
I built these shelves a few months ago and I’ve been thinking about this write up since then. I know I haven’t posted on here in awhile, I’ve been a bit busier than expected with life this year, but I’ve had adequate time to use these shelves in my rig and give my review of them so far.
First and foremost, I failed to account for the thickness of my Reflectix window covers when I scribed the shelves to fit flush against the windows. Unfortunately, this means the shelves fit a bit too snuggly and put pressure against the headliner in a way I don’t love. After my first outing with these truck camping shelves, I made some adjustments.
You might have noticed in the picture above that I added some marine bungee across the shelves on each side. I also added a couple pieces of marine bungee from the clothes hooks to the grocery hooks to hold the shelves in a bit. After driving off-road a bit I noticed the back part of the shelves would slide out a little.
I definitely want to paint or stain the shelves at some point but I just haven’t had the chance to yet. But I am very happy with how well they turned out for so cheap. Since I used some scrap 3/8″ plywood I had on hand, this project only cost me my time.
So what do you think, are these a useful addition to a camping vehicle like my Chevy Tahoe? Leave a comment and share your thoughts with me. And as always, thanks for reading!
Hey Trevor! I have the exact same year and model truck that you have and Ive also made cut outs for the floor boards except I used a long rug instead. And after completing my basic setup of a mattress, window covers and some light decors, I found there was so much space not utilized and wished I could have some sort of shelving unit for the rear windows. Until I found your post which is exactly what I need to do.
Do you happen to have the blueprints/templates for the cut outs? I would absolutely pay for them!
Do you have templates for the shelves?
Hey Kyle! I apologize, I recently moved and have not had time to keep up on my site here. Unfortunately I don’t have any kind of templates because I kind of built these with trial an error using a scribe.
I still have these shelves and I should have some more time on my hands here soon. I can work on creating some kind of templates!
Also, I would love to see your set up if you have an Instagram or somewhere you’re posting your build.
Superb layout and design, but most of all, concise and helpful information. Great job, site admin. Take a look at my website Webemail24 for some cool facts about Roofing.
Thank you, Ive been looking for some guidelines the help me out and you came spot on. Thank you
Hey Jamall, glad I could help!